Overview of the Edit/Enter Charge Types window
Charge types are set up in the Edit/Enter Charge Types window. You can access it by selecting Edit > Charge Types in either the Invoicing application or the Rate Schedules application.
The Enter/Edit Charge Types window is shown here with sample data. The numbered callouts indicate key characteristics of the window.
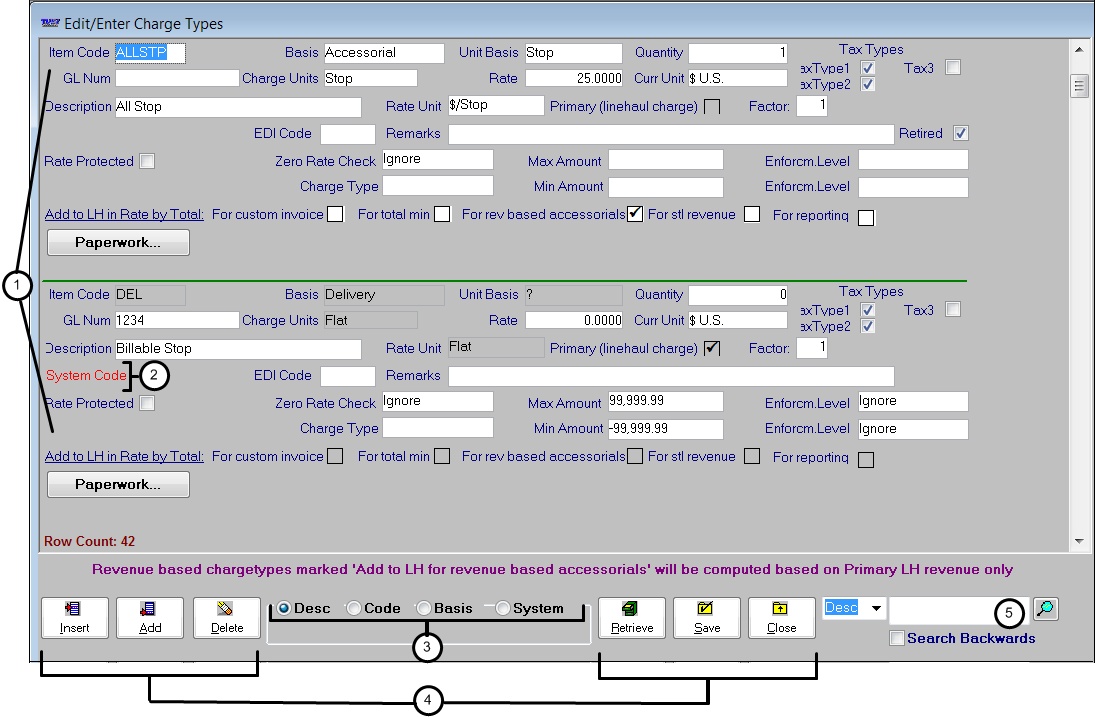
The numbered callouts in the illustration correlate to the numbers listed below.
1. The Enter/Edit Charge Types window displays multiple charge types at a time. A thick, horizontal line separates the individual charge types. You can use the scroll bar on the right of the window to bring additional charge types into view.
2. The red System Code text at the left side of the window indicates the charge type is a system code.
3. The radio buttons between the task buttons allow you to sequence the charge type display.
Button | Description |
|---|---|
Desc | Sort alphanumerically according to entries made in the Description fields. |
Code | Sort alphanumerically according to entries made in the Item Code fields. |
Basis | Sort the list of charge types alphanumerically by Basis. |
System | Sort the list of charge types so that system codes are listed prior to charge types that were entered manually. |
4. The buttons at the bottom of the window allow you to perform various tasks.
Button | Description |
|---|---|
Add | Adds a blank charge type record at the end of the charge type list. |
Insert | Inserts a new charge type record above the one that you have selected. |
Delete | Permanently removes the selected charge type from the list. Note: You cannot delete charge types that are system codes, or that have been used in rates or on orders. |
Retrieve | Refreshes the data. |
Save | Saves any additions, changes, or deletions you have made in the window. |
Close | Allows you to exit the window. |
5. The search fields allow you to locate a specific charge type quickly
Note: The Paperwork button at the bottom-left of the window applies if your company uses the paperwork tracking feature.