Using the rate index to create rate schedules based on your defined regions
You can use the region fields in the rate index to create a rate schedule based on an origin region and destination region. Unlike a rate table, which may include multiple origins and/or destinations, using the rate index allows you to specify one origin region and one destination region. When an order is matched with a rate based on its index, the billing amount is calculated according to the rate and charge type specified in rate header.
To create a region-based rate schedule that uses the rate index:
1. In the rate header:
a. In the Charge field, select the appropriate charge type for the rate.
b. In the Rate field, enter the rate for the specified charge type.
2. On the Index tab, specify the origin and destination regions:
a. In the Trip Definition or Region field, select Region.
b. In the Origin and Dest fields, select the origin region and destination region for the rate.
Note: You must specify both an origin and a destination region.

3. Save the rate.
Note: For more information about setting index restrictions, see Setting up a rate index.
Example of a region rate based on a rate index
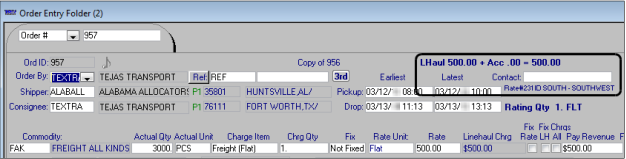
This example illustrates what happens when index-based region rates are applied to an order during rating.
The shipper ALABALL is in Huntsville, Alabama, which is in the South region.
The consignee TEXTRA is in Fort Worth, Texas, which is in both the West and Southwest regions.
Because Texas belongs to more than one region, there are two possible index-based rates:
For rate 230, the origin region is South and the destination region is West. The rate is $825.00.
For rate 231, the origin region is South and the destination region is Southwest. The rate is $500.00.
When the order is rated, the lower rate of $500.00 is applied.