Find custom fuel prices along your route
| This feature requires access to ContentTools and Account Manager web tools. |
If your fleet has negotiated fuel prices with certain vendors, you can share that information with drivers via CoPilot. Drivers can then select the best fuel stops along a route based on price, location, and Hours of Service (HOS) break requirements.
How to set up custom fuel prices in CoPilot
The ContentTools and Account Manager web tools are required to send custom fuel prices to CoPilot. Contact us if you are not licensed for these tools or if you do not have a current login.
Step 1: Initial Setup
Create a .CSV file of your negotiated fuel locations with the following fields: Name, Address, City, ZIP, and State or Country (Europe). For each location, enter in the Name field a combination of the name of the fueling location and its price. (Example: "$5.999 Pilot Travel Center"). If you are using Microsoft Excel, see Excel instructions for how to concatenate two fields.

Step 2: ContentTools setup
In ContentTools, you are going to upload the .CSV file as a Place Set. Place Sets are the way ContentTools organizes similar types of locations. In this case, create a Place Set titled "1 Co Appr Fuel" or something similar a driver would recognize as company approved fuel stops when viewing it in CoPilot.

After creating the Place Set, you will import your .CSV file to save all of your fueling locations as Places within that Place Set. To do that:
-
In the Place Sets panel, click on Import.
-
Select Choose File and select the .CSV file that contains fuel station locations.
-
ContentTools will take you through a series of steps to verify the location information in the .CSV.
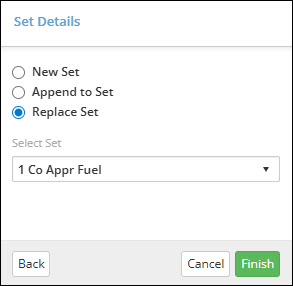
-
Click on the Replace Set option in the Set Details dialog, and then Finish.
Step 3: Account Manager setup
Once your fuel stations are imported into ContentTools, you have to assign that newly created Place Set ("1 Co Appr Fuel") to a specific group or groups of vehicles running CoPilot. This ensures those places, and their fuel prices, appear in CoPilot. The setup is done in Account Manager’s Configure Fleet Settings page:
-
If a Vehicle Group doesn’t already exist, create one for the vehicles that need access to these fueling locations.
-
On the Vehicle Groups page, select a Vehicle Group and click Assign Custom Places.
-
Select the newly created Place Set ("1 Co Appr Fuel") and click Done.
-
The Place Set will appear in CoPilot the next time the app is closed and relaunched on each device, or at the interval set by the Fleet Sync Interval in your Configuration Profile.
Step 4: Drivers add fuel stops
Your Fuel Stations are viewable in CoPilot when a driver searches for a location to add as a stop on a route. To search for Places:
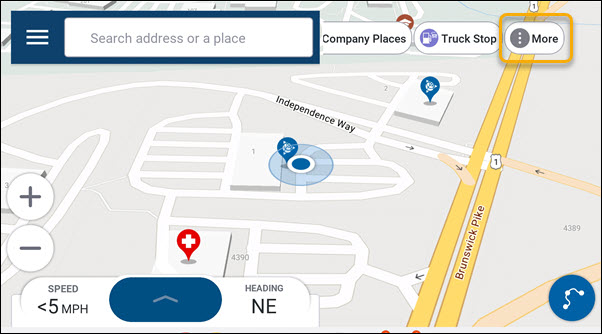
-
Tap on More (three dots icon) and select Company Places. This opens a list of the company’s Place Sets created in ContentTools.
-
Select "1 Co Appr Fuel" to filter out everything but the company approved fuel stops.
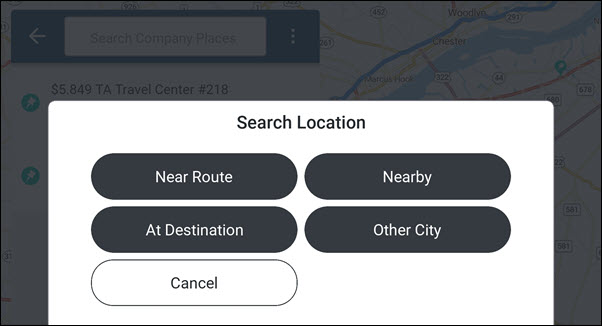
-
At the top of the Search Places screen, tap the three dots icon and select Near Route, Nearby, At Destination or Other City to select where you want to search for fuel stops. (This assumes a route with a least one stop has been entered into CoPilot or the driver is in the middle of a route. If no stops have been entered, this menu will only display Nearby or Other City as options.)
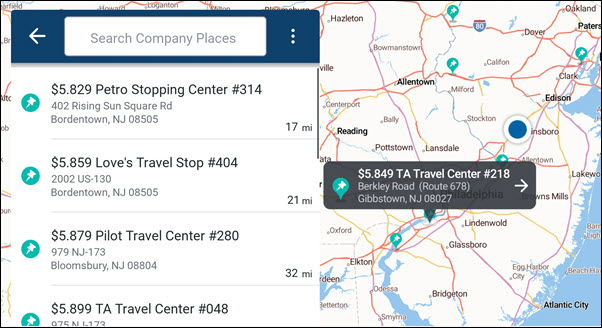
-
You can then Search Company Places by name, and tap on the desired fuel station to add it as a stop on the route. (The price from your .CSV file is displayed with the name of the fuel stop.)

-
Or, you can tap the map icon and select a fuel location directly from the map.
Updating prices
As fuel prices change, you can update the .CSV file and import it again using the steps above.
Creating Fuel Stops via API
This same process can also be done programmatically using the Places API. (Separate licensing required.)