Edit or Add Roads
Each user will log in with a Trimble Identity (TID). Once logged in to MapExact, you will be taken to a map viewer.
Before an edit can be made, you must be zoomed in on the map to a certain level. When the orange border is present, the zoom level is too high. Use the zoom buttons or click the orange border to be taken to the appropriate level of zoom to make an edit.
Edit an Existing Road Segment
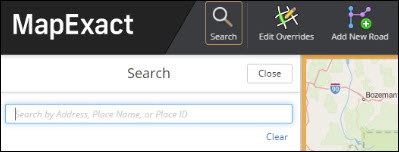
To get started, click Search in the top toolbar to search for a location near where you would like to create an edit. You can enter a ZIP/Postcode, city, street address or coordinates for your search.
| In the MapExact web tool, you may have access to edit maps outside of the geographic region for which you are licensed or the region present on your CoPilot devices. Edits can be performed across the entire area available through the web tool. If an edit is made outside of the licensed map region and this edit is approved, these edits will be shown as a failure when a sync is performed with CoPilot. |
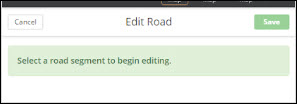
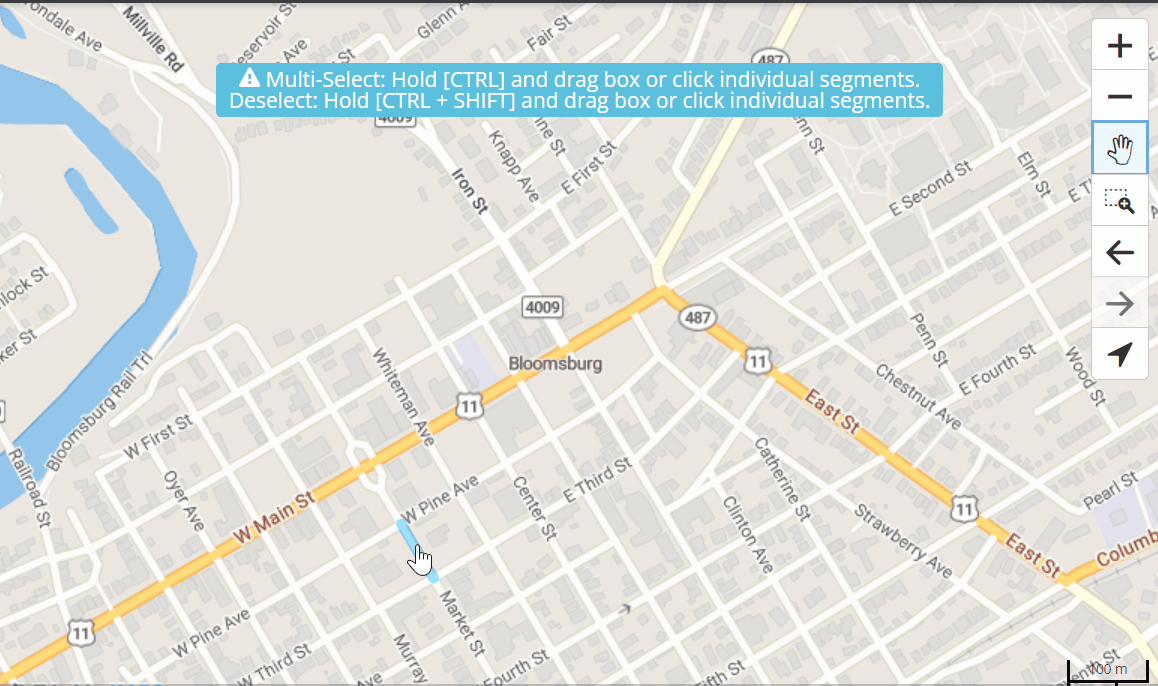
Once the area has been located, you can use the zoom and pan functions on the far right-hand side of the map to find the road segments that need to be edited. Select Edit Overrides on the top toolbar when you would like to make an edit to a road segment. It will open the Edit Road panel.
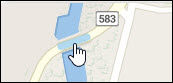
Hover over the road that you wish to edit, and the road segment will be highlighted in blue. Click on it to select it for editing.
If you are unable to select a road segment, it could be that the zoom level is too high. Another reason may be the link already has an edit submitted by another user pending Approval or Decline. In this scenario, you’ll see the message: The road is locked by another user.
Once you have selected a road segment, the Edit Road panel will be displayed. This is where the current map data for the selected road segment is displayed and where changes can be made.
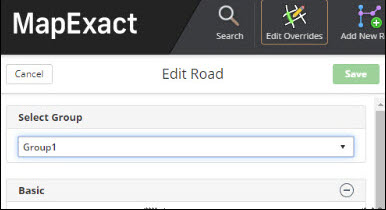
You can make one or multiple changes to the road segment’s attributes. Once the changes have been made, the edits need to be saved to your company’s account. Edits will be saved in the Group you have selected in the Select Group drop-down.
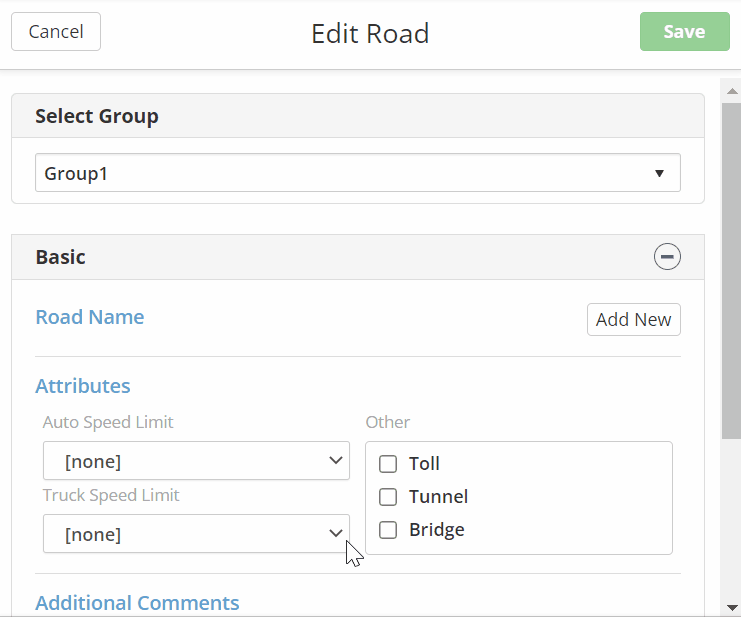
The Edit Road panel is divided into three sections - Basic, Truck and Advanced.
Basic Options

Road Name: To change an existing road name, type in the new name and select a road type from the drop-down. Or, click on Add New to create an additional name for that same road segment. Each road segment can have up to three names. Note: If a name is removed/edited, and approved, CoPilot will no longer be able to find the previous road name in an address search. We recommend adding a new road name to the segment if you believe some users may search for an expired road name.
Road names must be correctly spelled. Misspelling may lead to address search failure. If multiple road names exist on a segment, the primary road name will be the one shown on the map. All names, however, will be searchable via an address search.
Highway Numbers: Use the highway number fields to change an existing highway number. Click Add New to create a new highway number for that same road segment. Each road segment can have up to three highway numbers.
Attributes: Use the checkboxes and drop-downs to change road attributes for this segment. These road attributes are the Direction, Speed Limit and other features, such as Toll, Tunnel or Bridge.
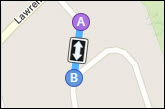
Turn Restrictions: Click one of the Arrow icons on the map to add a restriction.
Additional Comments: Enter any additional suggestions or comments here. These comments will only be shown in MapExact and not within the CoPilot application.
If, at any stage, you identify an edit that is not correct, another edit can be created to rectify the error or the incorrect edit can be deleted.
Truck Options
*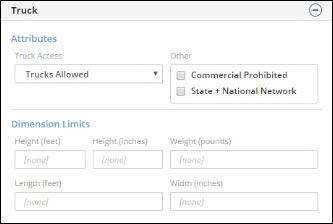
Attributes: Use the checkboxes and drop-downs to change the truck attributes for this segment.
Dimension Limits: Use this to add or change truck dimensions, such as height, weight, width and length.
These road segment details will only affect CoPilot Truck deployments.
Advanced Options
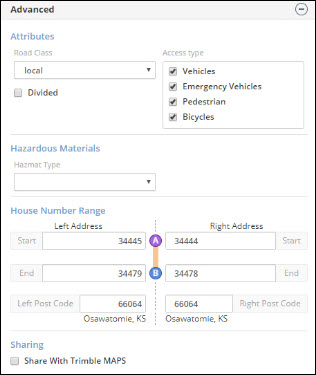
Attributes: Use the checkboxes and drop-downs to change the road class attributes and access type for the road segment selected.
House Number Range: Addresses are the house numbers represented as ranges. Special attention needs to be placed on the A-B/B-A direction of the road link when editing the addresses. Incorrect information will lead to the address appearing in the wrong place for the driver.
The start and end designations of a particular road are somewhat random and don’t necessarily correspond with the values in the address ranges. Therefore, the A and B designations on the map must be matched with the A and B designations in the editing panel when entering the address range.
Since house numbering is based upon a range, both the start and end values need to be provided on a particular side. This can be the same value if only one house number exists on that side of the street (ex: Start 5 and End 5).
House numbers do not need to exist on both sides of the street. If this is the case, both the start and end boxes should be left blank.
Sharing: Check the Share With Trimble MAPS box if you would like to send your edits to our team of mapping experts. They will attempt to verify the edit and, if it’s correct, the edit will be included in a future version of our map data—available to all users.
Save and Submit
Once you have made your changes, click Save at the top of the Edit Road panel. The Submit Changes dialog box will open. To confirm the changes you have made for that road segment, click Submit. The edit will be submitted for review.
Edit Multiple Road Segments at a Time
Editing multiple links at a time is helpful in cases where you want to edit one or two attributes (a speed limit, for example) for a long stretch of road or for a wide area of roads. To edit multiple links:
-
Hold down the CTRL key and click on each individual segment you want to edit, or hold down the CTRL key, click on a segment, and drag a box over all of the segments you want to edit.
-
When you select multiple road links, the Edit Road panel displays all of the editable attributes—Basic, Truck, and Advanced—but without any of the existing values for those attributes. Any of the values that you add will be applied to all of the roads you have selected.
-
Click Save to save your changes.
Add a New Road Segment
-
Click Search in the top toolbar to search for a location near where you would like to add a new road. You can enter a ZIP/Postcode, city, street address or coordinates for your search.
-
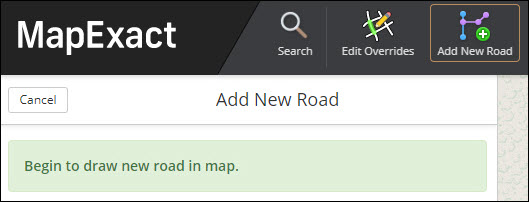
Once the area has been located, you can use the zoom and pan functions on the far right-hand side of the map to find the exact area to add the new road. Click on the Add New Road in the top toolbar.
-
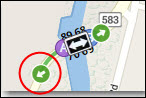
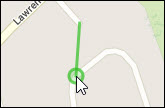
A red x appears under you cursor. Move the cursor to an existing intersection where you want to add the new road. New road links must be connected to an existing road link at an intersection. (The existing link can be either a custom road or part of the standard road network.)
-
A green circle will appear under you cursor at a spot where you can draw the new road segment. Click once to start drawing the segment. Drag your cursor to where you want the new segment to end.
-
Double-click to finish drawing the segment.
-
The Edit Road panel opens on the left side of your screen. In the panel, enter and save all of the attributes for the new road—Basic, Truck and Advanced—as you would when editing an existing road segment.