Working with parts in a shop’s inventory
On the Shop Inventory page, you can:
-
Enter vendor information for a part
-
View and replace part serial numbers
-
Renumber a shop’s inventory record
Opening a shop’s inventory
To look up a shop’s inventory record:
-
Go to Menu > Masters > Shop Inventory.
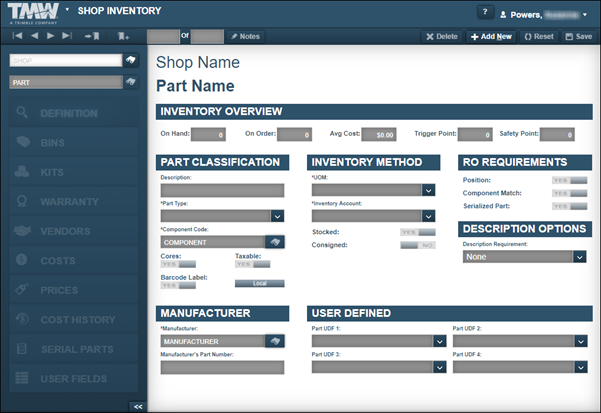
The Shop Inventory page opens. -
In the Shop field, enter the shop’s ID and press ENTER.
The system displays information about the first part record in the shop’s inventory.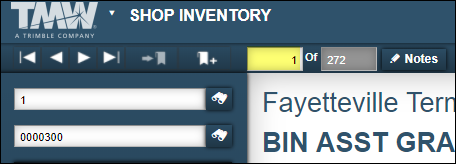
Note: The shops you can enter may depend on your shop restrictions, if any. For details, see Shop Restrictions.
-
Enter a part’s ID in the Part field and press ENTER.
The system displays information related to that part.
Managing vendor information for parts in a shop’s inventory
Some parts used at your facility may be available from multiple vendors. In a part record, you can specify which vendor to use when ordering the part.
Use the Vendors tab to add, edit, or remove vendor information from a part in a shop’s inventory.
Adding vendor information
When you add vendor information to a part, you add that information to the part record for that specific shop. If multiple shops stock the same part, you must add it to each shop.

To enter vendor information for a part in a shop’s inventory:
-
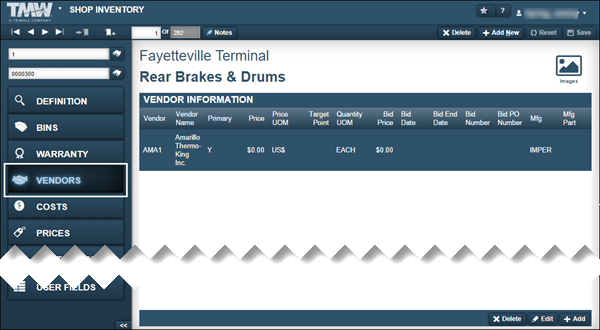
Click the Vendors tab.
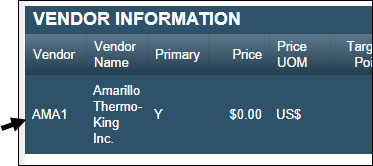
The Vendor Information section is displayed.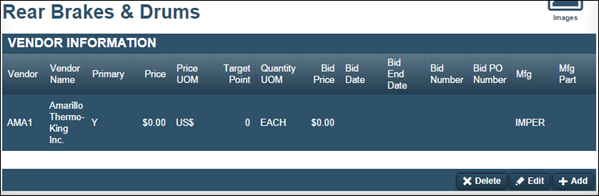
-
Click Add.
The Add Vendor window opens.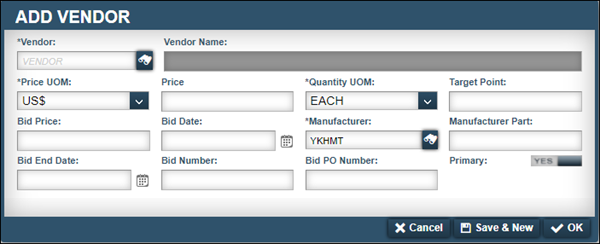
-
Make entries as needed.
For information on individual field definitions, see Vendors tab.
You can use these guidelines to make entries in other fields as needed.
-
Price
This price is the everyday price for the part from this vendor. -
Target Point
If the part is a stocked part and this vendor is your primary vendor, enter a value in the Target Point field. The value in this field is related to your stocking level for the part. Normally, you enter a value in this field if the part will be stocked and this vendor is your primary vendor. -
Bid Price
The bid price is the contractual price you may have agreed upon with this vendor. If there is no bid price, leave this and all other bid fields blank. -
Bid Date
If you entered a bid price, you must enter a date in the Bid Date field. This date is the agreed upon start date for pricing. -
Manufacturer Part
If needed, update the Manufacturer Part field. If the vendor supplies a brand that is different from the one on the part record, change this field to the manufacturer’s code. This field is used as the part number on the purchase order. -
Primary
If this vendor is your preferred vendor when purchasing this part number, toggle the Primary option to YES.
-
-
When you are finished making entries, do one of the following:
-
To save the vendor’s information, click OK.
The system saves the vendor information. The window closes. -
To save and add additional vendor information, click Save & New.
The system saves the vendor’s information. The window remains open to allow you to add another vendor. -
To close the window without saving your changes, click Cancel.
-
Editing vendor information
To edit vendor information:
-
Click the Vendors tab.
The Vendor Information section is displayed. -
Select the row you want to edit.

-
Click Edit.
The Edit Vendor window opens.
-
Make changes as needed.
For information on individual field definitions, see Vendors tab. -
Click OK.
The window closes and your changes are displayed.
Deleting vendor information
To delete vendor information:
-
Click the Vendors tab.
The Vendor Information section is displayed. -
Select the row you want to remove.
-
Click Delete.
The Delete Part Vendor system message window opens. It asks, "Are you sure you want to delete Vendor Name?" -
Click Delete.
The vendor information is removed.
Understanding part serial numbers
A serialized part is a part that requires a serial number for ordering and tracking purposes. You add a serial number to a part for a specific shop. This feature is controlled by toggling the [Inventory] Track Serial Numbers For Serialized Parts option to YES.
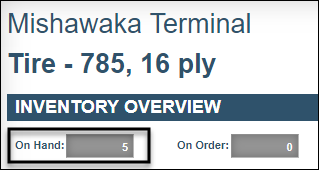
The On Hand amount in the serialized part’s record determines the amount of serial numbers you can add to the record. The quantity of parts and serial numbers must match. For example, these illustrations show a shop that has five parts on hand and five serial numbers listed in the Serial Number Information section.

Typically, you add serial numbers to parts when setting up a shop’s inventory. Once you add the maximum amount of serial numbers permitted, you must use a purchase order or make a physical inventory adjustment to change the serial numbers.
Viewing serial numbers in a shop’s inventory
To view a shop’s serial number information:
-
Open a shop’s inventory and load a part.
Note: You must load a serialized part. -
Click the Serial Parts tab.
The system displays the part’s serial numbers in the Serial Number Information section.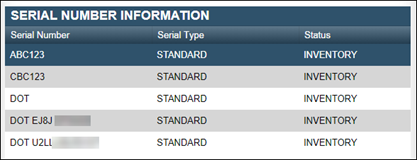
Replacing serial numbers in a shop’s inventory
Use the Serial Parts tab on the Shop Inventory page to replace a part’s existing serial number. For example, you may want to replace a serial number that was entered incorrectly at the time it was received. When you replace a serial number, the system removes the old number and adds the new number to the shop’s inventory.
To replace a part’s serial number:
-
Open a shop’s inventory and load a part.
Note: You must load a serialized part. -
Click the Serial Parts tab.
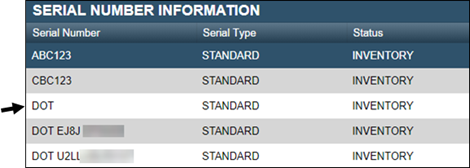
The Serial Number Information section is displayed.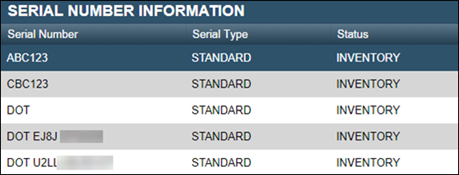
-
Select the serial number that you want to replace.
-
Click Replace Serial Number.
The Replace Serial Number window opens.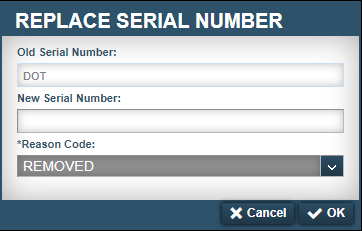
-
In the New Serial Number field, enter the serial number that replaces the existing number.
-
Click OK.
The system saves your change and closes the window.
Renumbering a shop’s inventory record
Use the Renumber Shop Part window to renumber a local part in a shop’s inventory. When you renumber a part, you have the option to have the system update open orders with the new number. Closed orders remain unchanged.
To renumber a local part in a shop’s inventory:
-
Open a shop’s inventory and load a part.
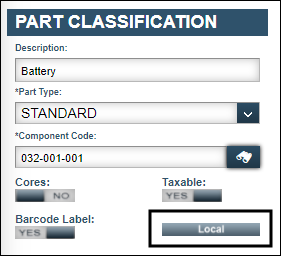
Note: You must select a Local part.The system uses the Catalog/Local indicator to identify whether a part was added from the Parts Catalog or Shop Inventory. The part master record displays the indicator in the Definition tab’s Part Classification section. Local identifies the part as a local part.
-
Right-click in the Part field and select Renumber from the menu.
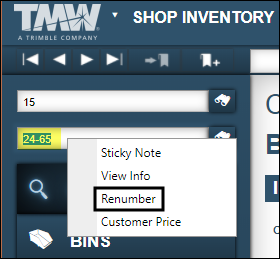
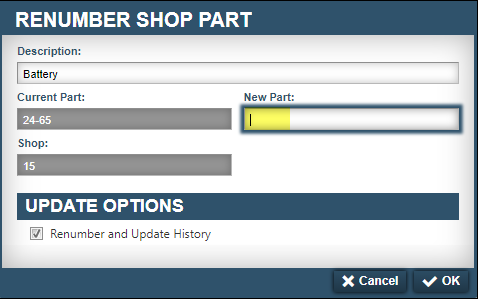
The Renumber Shop Part window opens and shows the Renumber Shop Part and Update Options sections.
By default, the system displays the part’s description, current part number, and shop number.
-
In the Renumber Shop Part section, enter the new number in the New Part field.
-
In the Update Options section, determine whether you want the system to update open and closed orders with the new number. Do one of the following:
-
Select the Renumber and Update History checkbox to allow updates.
The system selects this checkbox by default.Trimble recommends this option.
-
Clear the Renumber and Update History checkbox to prevent updates.
-
-
When you are finished entering information, click OK.
The Renumber Shop Part message opens and asks, "Are you sure you want to renumber current part number to new part number? -
Do one of the following:
-
To renumber the part, click Renumber Shop Part.
The system updates the part record with the new number. The window closes. -
To close the window without saving your changes, click Cancel.
-