Adding rows to a rate table
To add a row to a rate's table, follow these steps:
1. Click in a Rate field of the rate table to which you want to add a row.
2. Click Add Row in the window header.
Note: You can only add new rows to the bottom of a table, you cannot insert new rows between existing rows.
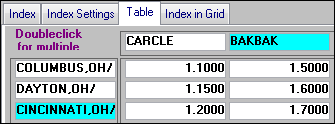
An editable row will be added for each column in the table. The initial value in the rows repeats the value of the row you were in when you clicked Add Row. The system automatically fills in the column names for the new row.
Notice the message shown in the header section of the window. You cannot add columns to the table until you have completed your row addition(s).
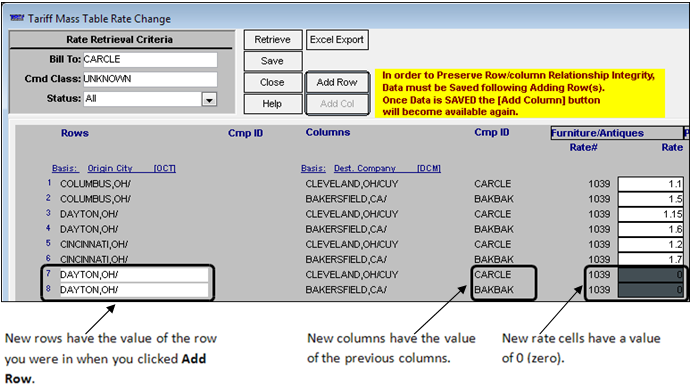
3. Click in the first editable row and enter the appropriate row value. In the example above, our rate table rows are based on Origin City, so we entered the name of the city we are adding to the rate table.
4. In the editable Rate fields, enter the dollar amounts for the new rows.
5. To add more rows to the same table, repeat Steps 2 - 4.
6. Click Save when you are done. The Changes saved message is displayed.
7. Click OK
8. Click Close to exit the window.
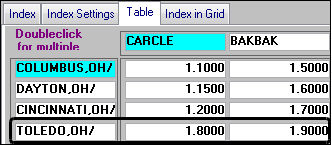
If you want, you can open the rates you changed to verify your changes. In the example above, we added a row to rate #1039, listing Toledo, OH as an Origin City.