Create parts in the Shop Inventory
Parts created in the Shop Inventory are local parts. These parts are unique to a specific shop, such as a bumper used on a tractor by a single client.
These parts are not synchronized with the Parts Catalog. They do not appear automatically in other shops' inventories. To have them in the inventories for multiple shops, you must enter them in each shop individually or create the part in the Parts Catalog.
There are two ways to enter parts:
-
To enter parts globally, you make entries in the Parts Catalog.
When you use the Parts Catalog, the part information is identical in the Shop Inventory master record for all shops. -
To enter parts unique to your shop, that is local parts, you make entries in the Shop Inventory.
Create local parts
Your company may not allow local parts. If [Inventory] Allow Local Parts is set to NO, you will not be able to create parts in the Shop Inventory. Instead, you must create them in the Parts Catalog and then add them to the shop’s inventory.
| For details about individual fields, see Shop Inventory master records. |
-
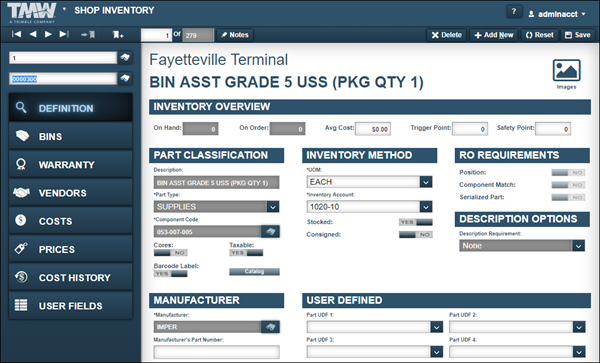
Go to Menu > Masters > Shop Inventory.
The Shop Inventory page opens. -
Click Add New.
The Add New Part window opens.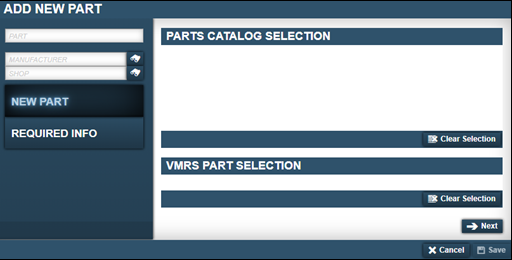
-
Enter the new part number (part ID) in the Part field and press ENTER.
The system does one of the following:-
Displays the part number in the Parts Catalog Selection section
This means that the part exists in the Parts Catalog. When this happens, you are adding the part to your shop inventory, not creating a local part.
Click Cancel to close this window and follow the steps listed in Add parts to a shop’s inventory from the Parts Catalog.
-
Displays the part number in both sections
The part is already in the Parts Catalog. Click Cancel to close this window. -
Displays the part number in the VMRS Part Selection section
This means that the part record exists within the Vehicle Maintenance Reporting Standards (VMRS) system.Select the correct part and go to Step 4.

Note: If you select a part from this section, the system fills the Manufacturer field automatically.
-
No part number displays in either section
Enter the part’s manufacturer in the Manufacturer field and press ENTER.Go to Step 4.
-
-
In the Shop field, enter the shop’s ID and press ENTER.
-
Click Next.
The Part Classification (Local), Inventory Method, and Manufacturer sections are displayed.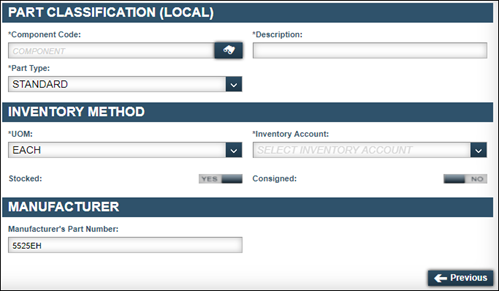
Note: If you selected a part from the VMRS Part Selection section, the system shows the component code and description automatically.
-
Make entries in the required fields.
For details about individual fields, see Definition tab.
-
If the part is stocked in your shop’s inventory, toggle the Stocked option to YES.
-
If the part is a consigned part, toggle the Consigned option to YES.
Note: If you set both options to NO, you identify the part as a Non-Stock part.
-
-
Click Save.
Create a local part kit
A part kit contains all the required parts needed to make a repair. When you charge parts out for a repair order, a part kit allows you to charge out a single part number instead of each individual part. The part numbers and quantities assigned to the kit appear as line items on the repair order.
| You cannot add a kit to a purchase order because kits are made from existing parts in your inventory. You can only add kits to repair orders. |
When you create a kit number, Trimble recommends that you include the word Kit as a suffix in your kit part number (for example, 1825FrontBrakeKit). Do not include spaces in kit part numbers.
To create a local part kit:
-
Follow Steps 1-6 in Create local parts.
-
Make entries in the required fields.
For details on individual fields, see Definition tab.When assigning a component code to a kit, use a component code that represents the kit’s purpose.
Component code examples:
-
047-001-001_ (Kit, Filter - Diesel Engine)
-
047-001-002_ (Kit, Filter - Gasoline Engine)
-
047-001-003_ (Kit, Filter - LPG Engine)
-
013-002_ (Rear Brakes and Drums)
-
000-002_ (PM Level B)
For information on using component codes, see the Component codes overview.
-
-
In the Part Type field, select KIT.

-
Click Save.
The new kit record is displayed.To close the window without saving your changes, click Cancel.
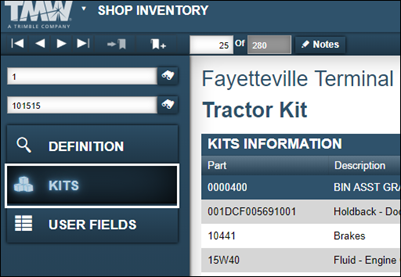
The Kits tab appears in the Navigation Pane.
Add parts to a local part kit
-
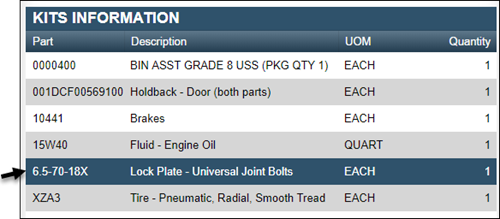
With the part kit record open, click the Kits tab.
The Kits Information section is displayed.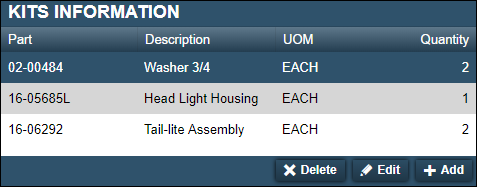
-
Click Add.
The Add Part To Kit window opens.
-
Make entries in the required fields.
For details on individual fields, see Kits tab. -
Click OK.
The window closes and the Kits Information section displays the part record.
Edit kit quantities
-
With the part kit record open, click the Kits tab.
The Kits Information section is displayed. -
Select the row that you want to edit and click Edit.
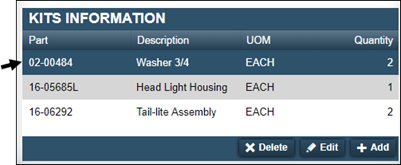
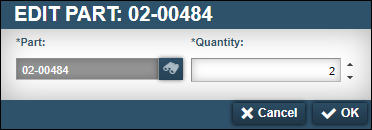
The Edit Part: <Part Number> window opens.
-
In the Quantity field, make changes as needed.
-
Click OK.
The window closes and updates the Quantity field.
Remove parts from a kit
-
With the part kit record open, click the Kits tab.
The Kits Information section is displayed.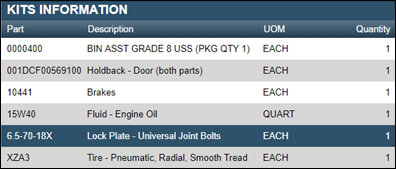
-
Select the row that you want to remove and click Delete.
The Delete Kit system message window opens. It asks, "Are you sure you want to delete <Part Number> from this kit?"
-
Click OK.
The system removes that part from the kit.
Add parts to a shop’s inventory from the Parts Catalog
Parts set up in the Parts Catalog are global parts. These parts are common to all shops. For example, 10W30 engine oil. The system allows you to add these parts to multiple shop inventories. When you do, all instances of that part have the same descriptive information. When you make changes to these parts in the Parts Catalog, the system updates the part record in the shop’s inventory automatically.

-
Click Add New.
The Add New Part window opens. -
Enter the part number (part ID) in the Part field and press ENTER.
The part displays in the Parts Catalog Selection section.Note: If the part does not display in the Parts Catalog Selection, verify that you entered the correct part number. If you entered the correct part number, and it still does not display in this section, the part does not exist in the Parts Catalog.
-
Select the part and click Next.

The Copy Definition From Parts Catalog window opens. It states, "Part Number Number is currently not in the local inventory of Shop Shop ID. It has been located in the Parts Catalog. Do you want to copy the definition from the Parts Catalog?"
-
Click Use Catalog Part.
The system fills the Component Code, Description, and Part Type fields with the values from the Parts Catalog.Note: If you click Create Local Part, the system allows you to create a local part instead of using the part record from the Parts Catalog.
To close the window without saving your changes, click Cancel.
-
Make entries in the remaining fields as needed.
For details on individual fields, see Definition tab. -
Click Save.