Manage bin locations
Bin locations help you manage inventory in your shops. They are physical locations (such as shelving units or wood pallets) in your shop where employees can find replacement parts, cleaning supplies, or other stocked components.
You use the Bins tab on the Shop Inventory page to:
-
Create and assign bin locations to parts
-
Assign existing bin locations to parts
-
Delete bin locations
-
Modify bin locations
-
Transfer parts between bin locations

Assign bin locations to parts
When you add parts to your shop’s inventory, you must specify at least one bin location per part. The default bin location is N/S.
|
You create bin locations when you assign them to parts. You cannot create bin locations without loading a part record. |
-
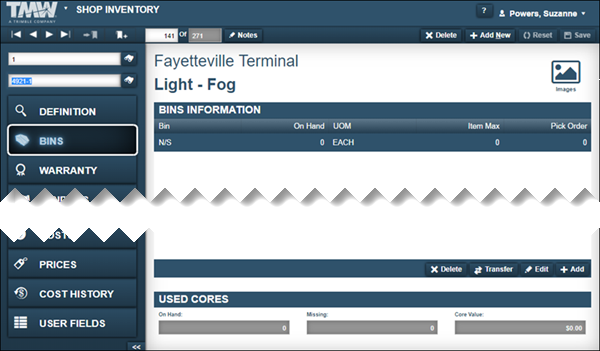
Click the Bins tab.
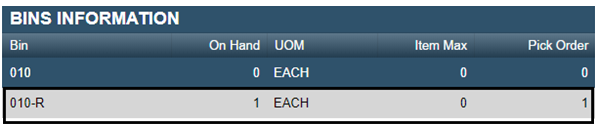
The Bins Information section displays bin locations for this part.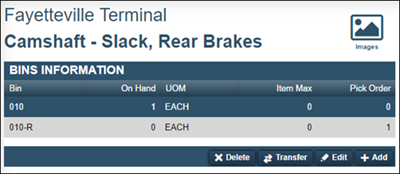
-
In the Bins Information section, click Add.
The Add Bin window opens.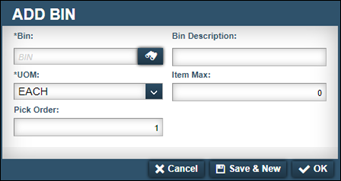
-
In the Bin field, enter the bin location and press ENTER.
-
If that bin location already exists, the system updates the Bin Description field with the name of the bin. Go to Step 6.
-
If that bin location does not exist, you must enter a bin description. Go to Step 5.
-
-
In the Bin Description field, enter a description for this bin location.
-
In the UOM field, specify how the parts are stored in this location.
Note: This unit of measure should match the unit of measure on the part record. For example, if the part is set to EACH, you should set the bin location to EACH. -
If needed, make entries in the following fields:
-
Item Max
-
Pick Order
Note: For details about individual fields, see Bins tab.
-
-
Do one of the following:
-
To save the bin location, click OK.
The system assigns that bin location to the part. The window closes. -
To save and add another contact, click Save & New.
The system saves the bin location. The window remains open to allow you to add another bin. -
To close the window without saving your changes, click Cancel.
-
Delete an existing bin
-
Click the Bins tab.
-
In the Bins Information section, select the bin record that you want to delete.
-
Click Delete.
The Delete Bin message window opens. It asks "Where would you like to delete the bin from?" -
Do one of the following:
-
To delete the bin from the part, click Delete From Part.
The system removes the parts from the bin location. The window closes. -
To delete the bin from the shop, click Delete From Shop.
The system removes the parts from the bin location and deletes the bin from the shop inventory. You must reassign all parts that were in this bin to different bin locations. The window closes.Note: You cannot delete a bin if it contains parts.
-
To close the window without saving your changes, click Cancel.
-
Edit bin location details
Use the Edit Bin window to update a bin’s description, UOM, Item Max number, and Pick Order number.
-
Click the Bins tab.
-
In the Bins Information section, select the bin record that you want to update.
-
Click Edit.
The Edit Bin window opens.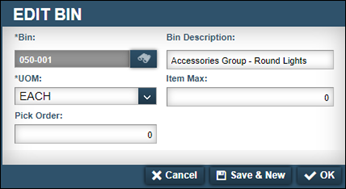
-
Make changes in the editable fields as needed.
Notes:
-
For details about individual fields, see Bins tab.
-
If this bin location has parts associated with it, you cannot change the Bin field.
-
Do one of the following:
-
To save your changes, click OK.
The system updates the bin record with your changes. The window closes. -
To save your changes and add a new bin location, click Save & New.
The system updates the bin record with your changes. The window remains open to allow you to edit another bin location. -
To close the window without saving your changes, click Cancel.
-
Transfer parts between bin locations
Sometimes you need to move parts from one bin location to another. When you transfer parts, you indicate that you have physically moved the part to a different location in the shop’s inventory.
-
Click the Bins tab.
-
In the Bins Information section, select the bin that contains the parts you want to transfer.
-
Click Transfer in the lower-right corner of the section.
The Bin-To-Bin Transfer window opens.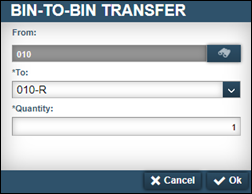
Note: The From field is read-only and displays the selected bin location.
-
In the To field, select a new bin location.
-
In the Quantity field, enter the number of parts that you want to transfer.
-
Click OK.
The Bins Information section updates.