Setting up a rate table with flat and non-flat rates
To set up a mixed rate schedule, follow these steps:
1. Set up the rate schedule according to the requirements of your contract:
Identify the type of rate (primary, secondary, line item, or linked line item rate).
Select the charge type that identifies the rate's calculation method (e.g., mileage, weight, volume, count, percent of revenue).
Make entries in the appropriate fields in the rate header and index.
Create a rate table by making selections in the Rows and/or Col's fields in the rate header.
Add rows and/or columns and the necessary entries all rates, including the flat rate(s).
2. At the right side of the rate header, select the Chg radio button.

3. To apply a flat rate for a specific cell in the rate table, right-click on the cell and select Rate As Flat from the shortcut menu.
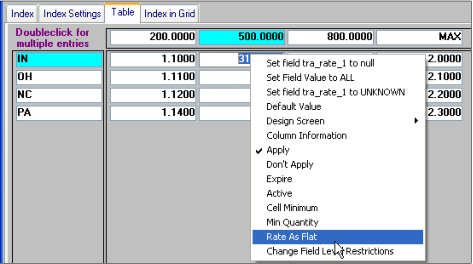
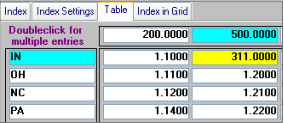
The cell's background changes from white to yellow.
4. At the bottom of the window, select the Minimums radio button.
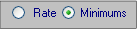
The Minimums pane toggles into view.
5. In each flat rate cell, enter a zero (the system displays 0.0000).
Note: The flat rate feature is not tied to the feature for minimum rates. However, if you have anything but 0 entered on the Minimums pane, the system will multiply the billing quantity by the number entered on the Minimums pane, resulting in an inflated billing charge.
6. Save the rate schedule.