ConnectedDock Admin
ConnectedDock is a mobile application installed on supported Android handheld devices. It is used to manage the processing of freight at your terminal.
The ConnectedDock Admin application is used to configure settings such as how to handle auto-docking, handling of loaded items, commodity lists, imaging, barcode, seals and weigh scale settings, and so on.
To access ConnectedDock Admin:
| From this location | Go to |
|---|---|
TruckMate Menu and TruckMate Task List |
|
Windows Start Menu |
TruckMate 20xx > ConnectedDock Admin |
Windows Explorer |
C:\Program Files (x86) > TruckMate 20xx > ConnDockAdmin.exe |
For information about how to configure and use the ConnectedDock Admin application, refer to these documents available on the Trimble Transportation Learning Center.
-
(Go to the Use the ConnectedDock Admin program for Configuration section.)
Terminal screen design for ConnectedDock
You can choose which information appears on the Terminal screen in ConnectedDock. You can set up to four different fields.
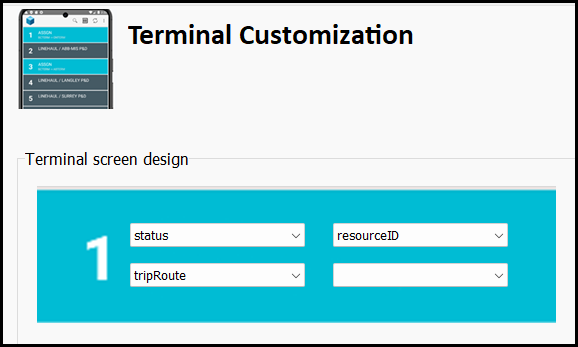
| The upper two options have a larger font size than the lower two options. For visual clarity, Trimble Transportation recommends fields that have more information go on the lower options (for example, Door). |
Set up terminal screen options
-
Start from ConnectedDock Admin.
-
Go to Screen Fields > Terminal. The Terminal Customization page opens.
-
Select one of the four fields. A list of options opens.
-
Select an option. The options list closes.
-
Repeat Steps 3-4 for each field.
Field options
Here is a breakdown of each field you can show on the device.
| Field name | Related TruckMate field | Details |
|---|---|---|
status |
TRIP.STATUS |
Shows the status of the trip that is parked at the door. This field updates as the trip’s status changes. |
resourceID |
Trailer, power unit (straight truck only), or container |
Shows the primary loadable resource on the trip. If multiple resource are assigned to the same trip, it takes the first assigned resource according to the trip’s linkage. |
tripRoute |
TRIP.ORIGIN_ZONE > TRIP.DESTINATION_ZONE |
Shows the trip’s start zone and end zone. It does not show any intermediate stops. These values determine which bills can be matched to the trip. |
totalItemCount |
Calculated field of items assigned to the trip |
Shows the total number of items assigned to the trip. This allows dockworkers to determine how many more items could be loaded on to the trip. It does not show the number of items to load or unload at a particular location. |
itemCountProcessed |
Calculated field of items loaded or unloaded |
Shows the total number of items that have been loaded onto or unloaded from the trip. |
percCountProcessed |
Calculated field of items loaded or unloaded |
Shows the percentage of items that have been loaded onto or unloaded from the trip. This calculates the total items to load or unload versus the items that have already been loaded or unloaded. For example, if there are 10 total items to load, and 6 items have been loaded, then this field would show 60%. |
departureDate |
LEGSUM.LS_PLANNED_DEPARTURE |
Shows the planned departure date for the trip from its current terminal. The departure date is based on the trip’s current leg when the trip is at a door. |
user1-10 |
TRIP.LS_USER_1-10 |
You can have up to 10 user fields. These are pulled from the TRIP table. Each user field shows whatever data is in the user field for the trip that is currently parked at the door being viewed. |
Trip Calc1-10 |
CUSTOM_DOCK_TRIP_CALC_FIELDS.CALC1-10 |
CUSTOM_DOCK_TRIP_CALC_FIELDS is a custom procedure. You can enter any information you want into this procedure to have the results of that query appear in ConnectedDock. |
DataWedge on Zebra devices
DataWedge is an application that Zebra Technologies uses to configure which barcode readers can be used with specific applications. ConnectedDock hardcodes which barcode types that are permitted, but you can use DataWedge to access more options.
If you want to take advantage of DataWedge on Zebra device, you can use ConnectedDock_datawedgeRelease.apk as an alternative to the symbolRelease APK. The symbolRelease APK is still recommended for Zebra devices if you are not using DataWedge.
| DataWedge is not a Trimble Transportation product. We will review any issues that occur, but if the issue is with DataWedge itself then we will not be able to resolve it. In that scenario you will need to reach out to the Zebra Technologies Support Team. |
Set up DataWedge
The setup process is done from the Zebra device that is being used with ConnectedDock.
-
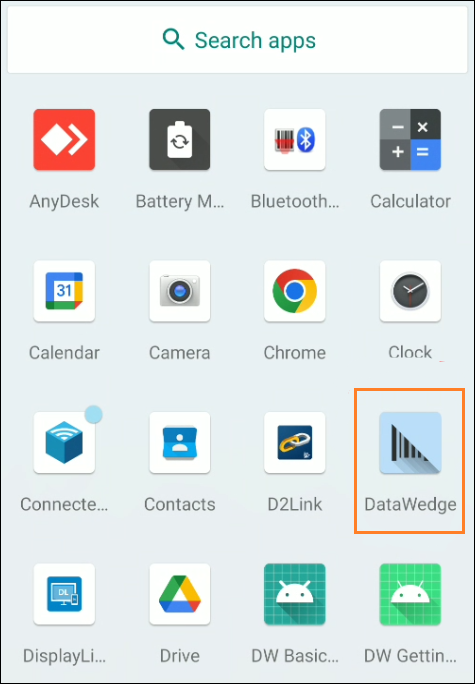
Confirm that DataWedge is installed on the device.
If it is installed, it appears in the device’s app list.
-
Select the DataWedge icon. DataWedge opens.
-
Select New Profile.

The profile creation window opens.
-
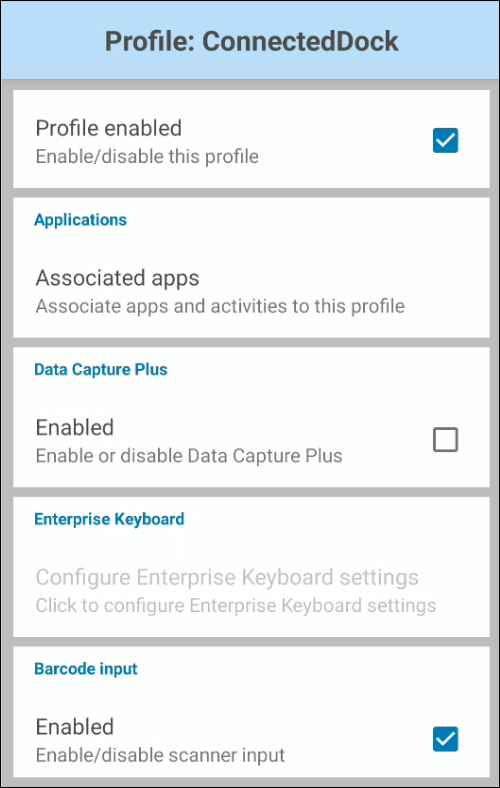
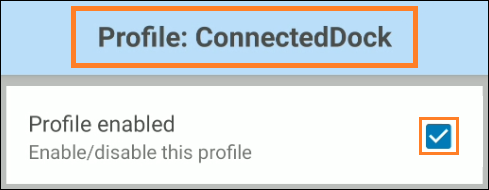
Name the profile "ConnectedDock".
-
Select the Profile enabled checkbox.
-
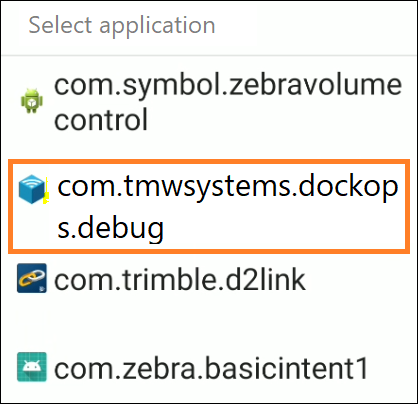
Select Applications. The Select application window opens.
-
Select com.tmwsystems.dockops.debug. The Select application window closes.
-
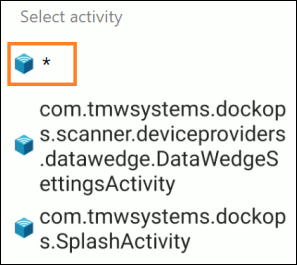
Select Activity. The Select activity window opens.
-
Select the asterisk (*). The Select activity window closes.
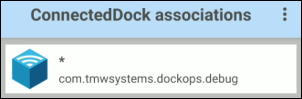
The option you selected appears in the ConnectedDock associations list.
-
In the Barcode Input section, confirm that the Enabled option is checked.

-
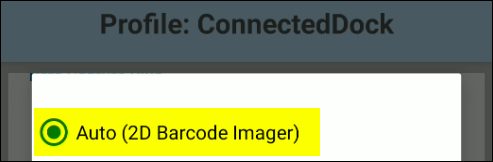
Select Scanner selection. The scanner selection window opens.
-
Select Auto (2D Barcode Imager) and then select OK. The scanner selection window closes.
-
Select Configure scanner settings. The Select scanner to set parameters window opens.
-
Select All Scanners. A confirmation window opens.
The All Scanners option makes sure that DataWedge will be used no matter how the barcode is scanned.
-
Select OK. The confirmation window closes.
-
Select Decoders. The Decoders window opens.
-
Select which barcode types can be used.
Note: Not all barcode types are functional with DataWedge. Trimble Transportation has tested the core types used by the majority of customers. However, changes may be needed if you try to use a barcode type that ConnectedDock does not currently support.
The default types we recommend enabling are:
-
Code 39
-
Code 128
-
Interleaved 2of5
-
-
In the Intent Output section, set these options:
-
Select the Enabled checkbox.
-
Set Intent action to com.symbol.datawedge.ACTION.
-
Set Intent delivery to Broadcast intent.

-
-
Unless required for a different product on the device, disable all other profiles.
This makes sure they cannot interfere with the ConnectedDock workflow.