Linking an accessorial rate to a primary rate
In order for secondary rates and linked line item rates to be applied, they must be linked, i.e., attached, to a primary rate first. In CRMRight, you can only attach an accessorial rate to a primary rate when both were created in CRMRight.
Notes:
1. To determine where a rate was created, use the T column in the quotes grid.
• A value of T (for Tariff) means it was created on the Edit Billing Rate Schedule Folder.
• A value of R (for rate quote) or S (for spot quote) means it was created in CRMRight.
2. You must use the Rate Schedules application to link or unlink any rates created on the Edit Billing Rate Schedule Folder.
To link rates created in CRMRight, do the following:
1. Look up the company's profile and select the Quotes tab.
2. If needed, use the restriction fields to the right of the quote grid to narrow down the list to the rates you want to see. Click
 Load Quote
 to trigger the system to search for rates that match your restrictions.
3. Select the primary rate.
Note: It must be a rate quote or spot rate that was created in CRMRight.
4. Click
 Attach Accessorials
 in the lower right of the screen.
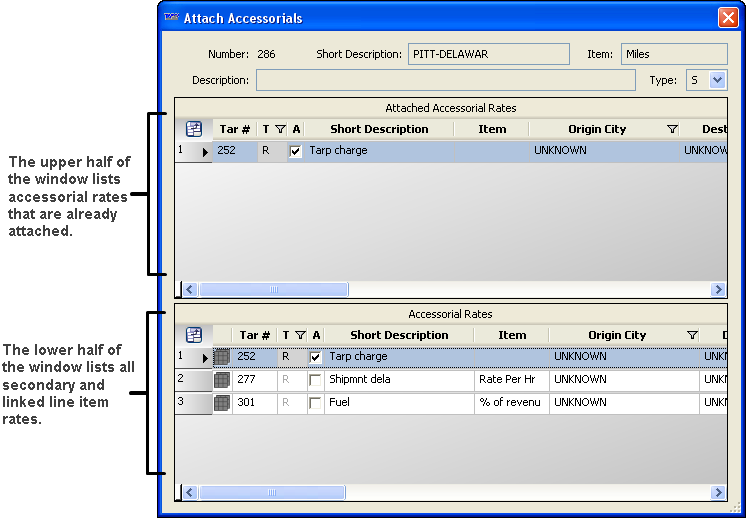
The system displays the Attach Accessorial window.
Show me
If any rates have already been linked to the primary rate, they are listed in the top half of the window. In the lower half of the window, the system lists all accessorial rates that were created in CRMRight.
5. To link a rate to the primary rate, click on the accessorial rate and drag it to the top half of the window.
Note: The system shows inactive rates as well as active ones. If a rate is active, the check box in the A column is selected. Be aware that inactive rates can be attached to primary rates.
6. Repeat Step 5 for any other rates that you want linked.
7. To exit the window, click the red x in the top right corner of the window.
8. To save the attachment, click
 Save Quote Changes
 in the lower right of the screen.