Recording contact information for TMWSuite entities
Contact information, such as e-mail addresses and phone and fax numbers can be recorded for most entities in TMWSuite.
-
The Email field is available in driver, tractor, trailer, carrier, and third party profiles.
-
Company e-mail addresses are recorded in the Company Contacts window.

In the Company File Maintenance window, you can access it by:
-
Clicking the Contact button in the Phones section
-
Clicking
 in the sheet toolbar
 -
Selecting Tools > Edit Company Contacts
-
-
In addition to the Email field in the Carrier File Maintenance window, e-mail addresses for carriers can also be entered in the Carrier Contacts window.

You access this window from the Carrier File Maintenance window by:
-
Clicking
in the sheet toolbar -
Selecting Tools > Edit Carrier Contacts
-
These quick-access features are also available:
-
You can set up the system to launch your e-mail application whenever you double-click on an e-mail address field for a company or carrier.
-
You can set up the system so that:
-
When you double-click on a company or carrier ID, it will access the Company Contacts or the Carrier Contacts window for the specific company/carrier.
or
-
When you double-click on a driver, tractor, trailer, carrier, or company ID in another application, it will open the File Maintenance application and access the profile of the specific entity.
-
Setting up additional functionality associated with the contact information enhancements
The quick-access features associated with contact information are enabled by INI settings. Additionally, you can set up the system to require an e-mail address be entered for each company or carrier contact.
Specifying a default double-click function
If you want, you can set up the system so that:
-
Double-clicking on a company or carrier ID in another application will access the Company Contacts or Carrier Contacts window for the specific company/carrier.
Note: When this option is used, double-clicking on a company or carrier ID in the lookup tab of their respective profile windows in File Maintenance will also open the contact window for that entity.
or
-
Double-clicking on a driver, tractor, trailer, carrier, or company ID in another application will open the File Maintenance application and access the profile of the specific entity.
Two INI settings control this functionality:
Having the system launch your e-mail application automatically
You can set up the system so that the action of double-clicking in an e-mail address field will launch your e-mail application and create a new message addressed to the appropriate entity. Use the [FileMaint]DoubleClickOutlook INI setting.
| This functionality is always available for company and carrier e-mail address fields. It is not available for driver, tractor, trailer, or Third Party e-mail fields unless your system is set up for enhanced settlement printing. Then, you must click in the e-mail field in the entity’s Distribution Information window. For more information on enhanced settlement printing, see "Setting up enhanced print options in resource profiles" in Using Enhanced Printing with Settlements in the TMWSuite Settlements online help. |
Requiring an e-mail address when saving a contact record
You can set up the system so that it will not save a contact recorded in the Company Contacts or Carrier Contacts windows if no e-mail address has been entered.The requirement is activated by the [FileMaint]RequireCmpContactEmail INI setting.
Entering e-mail addresses in asset profiles
In addition to using the enhanced settlement printing feature to record e-mail addresses for drivers, tractors, trailers, and third parties, you can record an e-mail address for these entities in their respective profiles.
In the Driver File Maintenance window, the Email field is available in the Contact section.

In the Tractor File Maintenance window, the Email field is available in the top section.

In the Trailer File Maintenance window, the Email field is available in the Purchase Information section.

In the Third Party File Maintenance window, the Email field is available in the Phone section.

|


Using the Company Contacts window
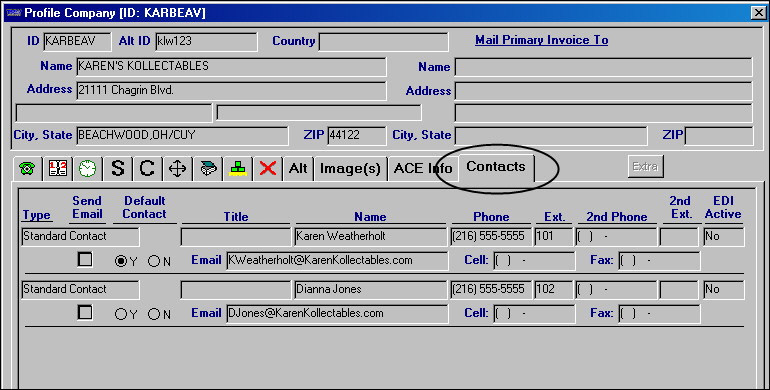
The Company Contacts window allows you to record multiple contacts for a company.The window is shown here with sample data.

In the Company Contacts window, you can:
-
Retrieve a company’s existing contact information.
-
Add new contact information for a company.
-
Delete contact information.
-
Launch your e-mail application and address a message to the selected contact.
The window can be accessed from the Company File Maintenance window or from any core TMWSuite application.
Accessing the Company Contacts window from a company profile
To access the window from the Company File Maintenance window, do one of the following:
-
Click Contact in the Phones section of the window.

-
Click
Contact Info in the sheet toolbar. -
Double-click on the company’s ID in the lookup tab.
Accessing the Company Contacts window from the Tools menu
In TMWSuite, the Tools menu provides access to features that are common to all of the core applications. The Company Contacts window is one such feature.
-
To access the window from another File Maintenance profile window, or from another TMWSuite application, select the Edit Company Contacts command in the Tools menu.

-
To retrieve a company’s contact information, or to record new contact information for a company, enter its system ID in the Company field and press ENTER or click Retrieve.
| The Company Contacts window cannot be accessed from the Carrier File Maintenance window. From that window, the Tools menu provides access to the Carrier Contacts window. |
Retrieving existing contact information for a company
The system creates contact records for a company based on:
-
An e-mail address or fax number recorded for a company in the old Company Edit Email window.
Note: A record for a previously entered e-mail address or fax number will have the EDI Active field set to Yes and an entry of EDI/Imaging Email or EDI/Imaging Fax in the Type field.
-
Phone numbers and the name entered in the Contact field recorded in the Phones section of the Company File Maintenance window.
Creating new contact records in the Company Contacts window
When you create a profile for a new company, or add contact records for an existing company, you can enter the default contact information right in the Company File Maintenance window or you can record it in the Company Contacts window. If needed, you can record multiple contacts for a company in the Company Contacts window.
|
To record contact information, follow these steps:
-
Access the Company Contacts window using one of the methods described earlier.
-
With the ID of the company for which you are recording information displayed in the first Company field, click Add at the bottom of the window.
-
The system adds the fields needed to enter a contact record:

Make entries in the following fields:
Type
Identifies the type of contact record you are creating. Clicking in the field displays a drop-down list of options. Select the appropriate type:
-
Standard Contact
Identifies the contact record as a general contact, i.e., not for use by TMWSuite’s EDI or Imaging add-on modules -
EDI/Imaging Email
Identifies the contact record as available for use by TMWSuite’s EDI or Imaging add-on modules. When this option is selected, you can record an e-mail address for the contact. Phone number fields are not accessible. -
EDI/Imaging Fax
Identifies the contact record as available for use by TMWSuite’s EDI or Imaging add-on modules. When this option is selected, you can provide a fax number for the contact. Other phone number fields are not accessible.
Note: These options are system code entries in the CmpContactType label.
Title
Free-form text field used to record the contact’s title. An entry of up to 30 alphanumeric characters is supported.
Name
Free-form text field used to record the contact’s name. An entry of up to 30 alphanumeric characters is supported.
Phone
Primary telephone number by which the contact can be reached.
Note: When entering a phone number, do not enter dashes or spaces. The system will format the field correctly.
Ext.
The extension number for the contact’s primary phone number.
2nd Phone
Alternate telephone number by which the contact can be reached.
Note: When entering a phone number, do not enter dashes or spaces. The system will format the field correctly.
2nd Ext.
The extension number for the contact’s secondary phone number.
EDI Active
Entry in this field is controlled by the option selected in the Type field.
-
When the type is Standard Contact, the system sets the value to No and makes the field read-only.
-
When the type is EDI/Imaging Email or EDI/Imaging Fax, you can click in the field and select the appropriate option.
-
Yes
The contact information is to be used by the EDI add-on module. -
No
The contact information is to be used by the Imaging add-on module.
-
Send Email
When recording contact information, you can leave this check box cleared. When you send an e-mail message to this company from within TMWSuite, you must select the check box to identify the contact as a recipient.
Default Contact
Identifies the contact that appears in the Phones section of the Company File Maintenance window. If you want this contact record to be the one shown in the profile window, select the Y radio button.
Note: If an existing contact record is marked as the default, you must select the N radio button for that record before you can select the Y radio button for the record you are entering.
Email
The contact’s e-mail address.
Note: If you want, you can set up the system to require that an e-mail address must be recorded for a contact.
For more information, see Requiring an e-mail address when saving a contact record.
Cell
The contact’s cell phone number.
Fax
The contact’s fax number.
Contact Type
Select the option that best defines the role this contact plays in your interaction with the company.
Contact types are defined by your company using the CompanyContactType label.
Note: When defining types of contacts, be sure to use the CompanyContactType label. The Company Contacts window’s Type field uses options recorded in the CmpContactType label.
-
-
Click Save.
Notes:
-
If your entry in the Name field matches that entered in an existing contact record, the system displays the following message.
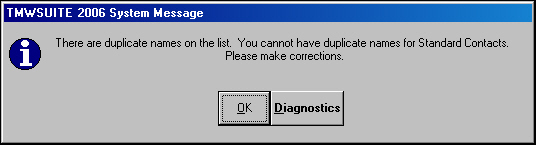
Click OK to close the message, and then make the needed corrections before clicking Save again.
-
If the system is set up to require an e-mail address and you did not enter one, this message is displayed.

Click OK to close the message, and then enter the e-mail address before clicking Save again.
-
Deleting a contact
Contact record can become obsolete. For example, the contact has left the company. To delete a contact record, follow these steps:
-
Access the Company Contacts window using one of the methods described earlier.
-
Verify the correct company ID is displayed in the first Company field.
-
Click Retrieve at the bottom of the window.
-
Click in one of the fields for the contact record you want to delete.
-
Click Delete. The system displays a confirmation message.
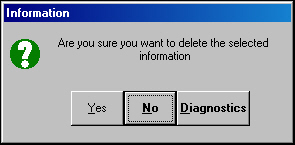
Click Yes to complete the deletion.
-
Click Save.
Note: If there are multiple contact records and the contact you are deleting was marked as the default contact, the system displays this message.
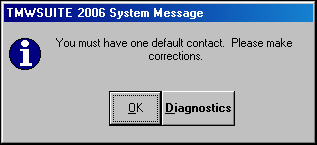
Click OK to close the message, and then mark one of the other contacts as the default contact before clicking Save again.

Note: If no other contact records exist for the company, the contact information you just deleted from the Company Contacts window is displayed in the Phones section of the company profile. It is provided here as a historical record.
Sending an e-mail from the Company Contacts window
You can send e-mail messages to the contacts listed in the Company Contacts window. To do so, follow these steps:
-
Access the Company Contacts window using one of the methods described earlier.
-
Select the Send Email check box for the contact you want to receive the e-mail.

-
Click E-Mail at the bottom of the window.
-
A new e-mail message, addressed to the specified contact, will open.

Complete the message and send it.
Note: If your e-mail application is not running at the time you click E-Mail, the system will start it. It will close your e-mail application when you have sent the message.
| The Carrier Contacts window does not automatically display the carrier’s previously recorded e-mail address or information recorded in the Phones section of the Carrier File Maintenance window as a contact record. |
Using the Carrier Contacts window
The Carrier Contacts window contains the same fields and has the same functionality as the Company Contacts window. The instructions provided on using the Company Contacts window can be applied in the Carrier Contacts window. The differences between the two windows are:
-
Where they can be accessed.
-
The Company Contacts window can be accessed in the Company File Maintenance window, or from any core TMWSuite application. It cannot be accessed from the Carrier File Maintenance window.
-
The Carrier Contacts window can be accessed only in the Carrier File Maintenance window.
-
-
How they can be accessed.
-
The Company Contacts window can be accessed in multiple ways:
-
From the Company File Maintenance window, you can click
 Contact Info in the sheet toolbar or the Contact button in the Phones section of the window. You can also double-click the company’s ID in the lookup tab.
 -
In other applications, you can use the Edit Company Contacts command from the Tools menu.
-
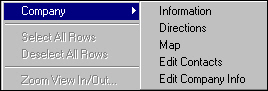
When you right-click in a company ID field, you can use the Company > Edit Contacts command sequence from the displayed shortcut menu.
-
If your system is set up to allow this functionality, you can double-click in a company ID field.
-
-
The Carrier Contacts window can be accessed only from the Carrier File Maintenance window. To open it, click
Contact Info in the sheet toolbar or go to Tools > Edit Carrier Contacts.
-
-
The Carrier Contacts window does not automatically display the carrier’s previously recorded e-mail address or information recorded in the Phones section of the Carrier File Maintenance window as a contact record.
Viewing e-mail addresses using scroll windows
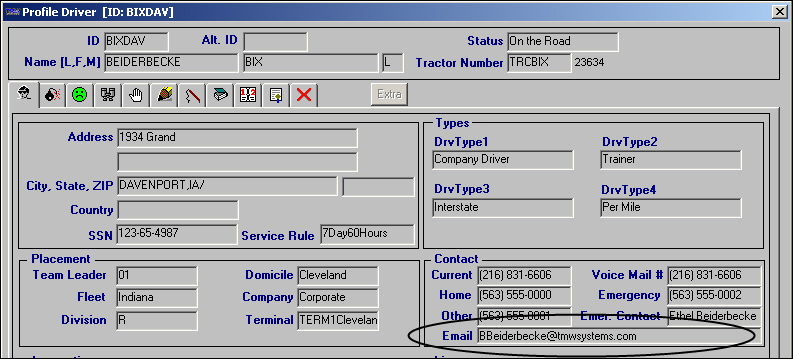
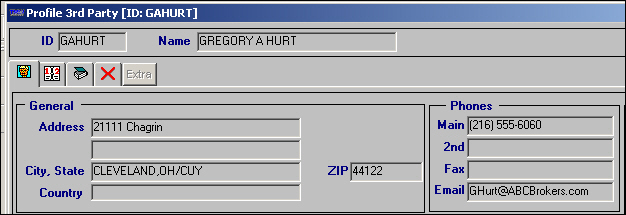
E-mail addresses for drivers, tractors, trailers, and third parties are shown in the entity’s Profile window, accessed from the scroll windows. To access the profile window, you select an entity in the Find* window’s retrieval list and then click Profile. Illustrations of the profile windows for drivers, tractors, trailers, and third parties are provided below:
The Profile Driver window displays the e-mail address in the Contact section.
The Profile Tractor window displays the e-mail address in the tab section.

The Profile Trailer window displays the e-mail address in the tab section.

The Profile 3rd Party window displays the e-mail address in the Phones section.
The Contact tab has been added to the Profile Company and Profile Carrier windows. The tab shows the contact records recorded for the company/carrier, including the e-mail address.

Additionally, the Email column is included in the retrieval list in the company, carrier, driver, tractor, trailer, and third party scroll windows.

Using the double-click options related to contact information
The system provides additional functions based on the action of double-clicking in certain fields.
Accessing an entity’s profile in File Maintenance from other applications
You can get to a resource or company profile from any core TMWSuite application by double-clicking in an entity’s ID field. This functionality requires that you have [FileMaint]DoubleClickFileMaintType=EditFileMain in your TTS50, and that the [FileMaint]FileMaintexepath setting specifies the path to your File Maintenance executable file.
For example, suppose you double-click on a company ID in the Dispatch Trip Folder’s Stop Detail grid.
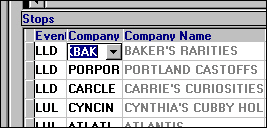
The system will access that company’s profile in File Maintenance.

|
Accessing a company’s or carrier’s contact information from other applications
You can get to the contact information for a company or carrier from any core TMWSuite application by double-clicking on its ID in a field. This functionality requires that you have the [FileMaint]DoubleClickFileMaintType=EditContacts setting in your TTS50.
For example, suppose you double-click on a company ID in the Dispatch Trip Folder’s Stop Detail grid.
The system will open the Company Contacts window and display the contact information for that company.

All the functionality associated with the Company Contacts window is available when it is accessed in this manner.
Creating a new e-mail message by double-clicking on an e-mail address
You can have the system start a new e-mail message, addressed to the specified entity, when you double-click in an e-mail address field. This functionality is enabled when you have [FileMaint]DoubleClickOutlook=Y setting in your TTS50.
For example, suppose you double-click in the e-mail address field on the Profile Carrier window’s Contacts tab.
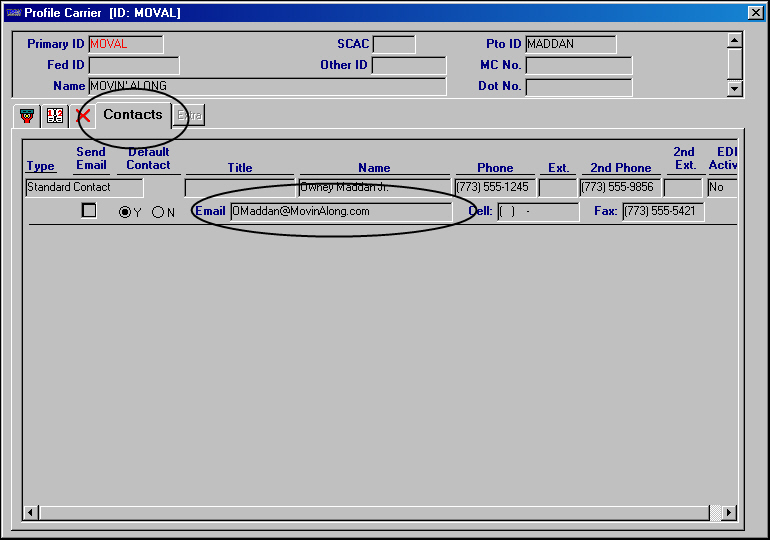
The system will create a new, properly addressed, e-mail message.

This functionality is not available everywhere that an Email field is shown. The table below lists where the functionality can be accessed.
| Window | Functionality Available |
|---|---|
Company Contacts Note: You can also use the Company > Edit Contacts command sequence from the shortcut menu that displays when you right-click in a company ID field to access a company’s contact information.
|
Yes |
Carrier Contacts |
Yes |
Distribution Information (Email 1 and Email 2 fields) Note: The Distribution Information window can be accessed from driver, tractor, trailer, third party, and carrier profiles when your system is set up to use enhanced settlement printing. |
Yes |
Invoice Output Selection (Email 1 and Email 2 fields) Note: The Invoice Output Selection window can be accessed from company profiles when your system is set up to use enhanced invoice printing. |
No |
Carrier File Maintenance |
No |
Driver File Maintenance |
No |
Tractor File Maintenance |
No |
Trailer File Maintenance |
No |
Third Party File Maintenance |
No |
Profile Carrier |
No |
Profile Driver |
No |
Profile Tractor |
No |
Profile Trailer |
No |
Profile Third Party |
No |
