Create and manage routes
|
There are two ways to select stop locations to create a route:
|
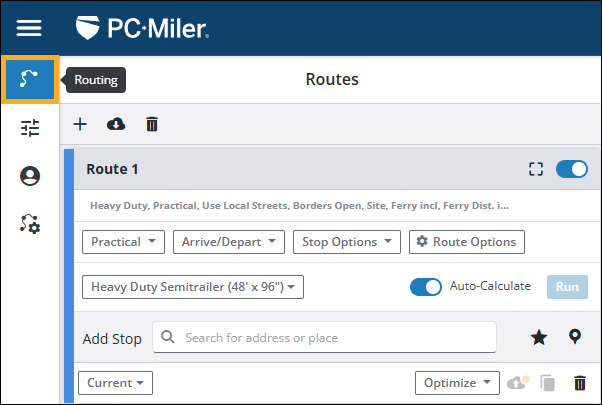
The Routes panel
To open the Routes panel, select Routing in the left-side menu.
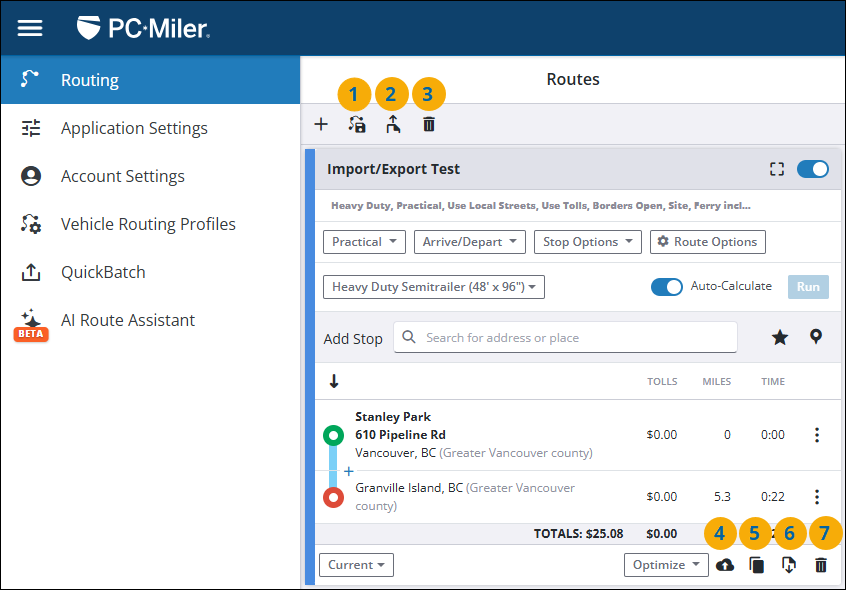
Route entry card features
In the Routes panel, you enter information about your route in a route entry card. You can have multiple route cards open at the same time.

-
The route number or name if the route has previously been named and saved.
-
Frame the route on the map or toggle on or off the display of the route line on the map.
-
Select a Routing Type for this specific route.
-
Set an arrival or departure time for the route.
-
Select whether to import stops from a .csv file or add stop time for a stop to improve ETA calculations.
-
Select Route Options for this specific route.
-
Select a Vehicle Routing Profile. (An abbreviated list of settings related to the selected profile is displayed above it. Hover your cursor over the abbreviated list to view the full list.)
-
Choose whether PC*Miler recalculates the route each time you add a stop. When Auto-Calculate is switched off, the card displays a Run button. Click it to calculate the route and display it on the map.
-
Add stops to create the route by entering a location in the search field, selecting a location from your list of
 favorites, or selecting a location from your
  Custom Places.
 -
Select a PC*Miler version for mileage calculations. This feature is only recommended for generating mileage for freight rating and billing based on contracts that require older versions of PC*Miler. Otherwise, routing should always the default Current setting, which generates routes based on the most up-to-date map data.
-
Select whether you would like the route to be fully optimized, or optimized while keeping the final destination the same. Your route stops are reordered based on your selection.
-
Select the trashcan to delete the route from your list.
Add stops in the Route card
-
Select a Vehicle Routing Profile from the drop-down (No. 7 in the graphic above) or select Route Options. This helps ensure PC*Miler generates a route that safe and legal for your vehicles.
-
Add stops by doing one the following:
-
Select the Add Stop text box to enter a location. As you type the name of a stop, you will see a pick list of possible matching locations. Click on the best match to add that stop to your route.
-
Select
Favorites to search for and select a location from your saved favorites. -
Select
Custom Places to search for and select a location from your Custom Places.
-

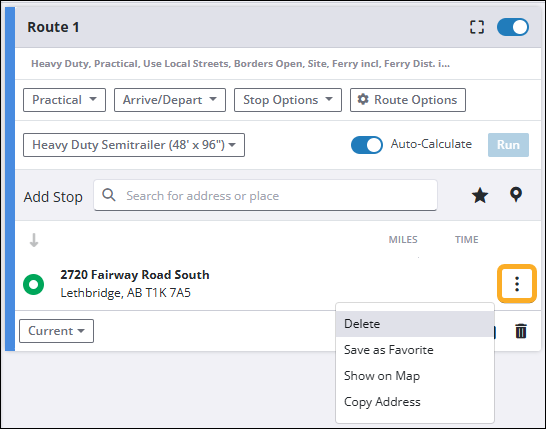
Delete stops in the Route card
To delete a stop from the route, select the More Actions menu (vertical ellipsis), and select Delete. The stop is deleted and the remaining stops on the route move up in the trip order.
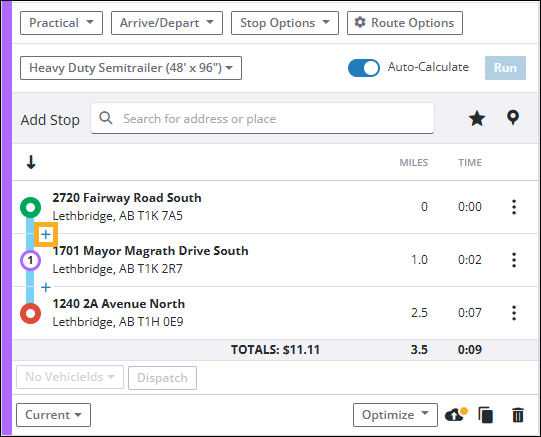
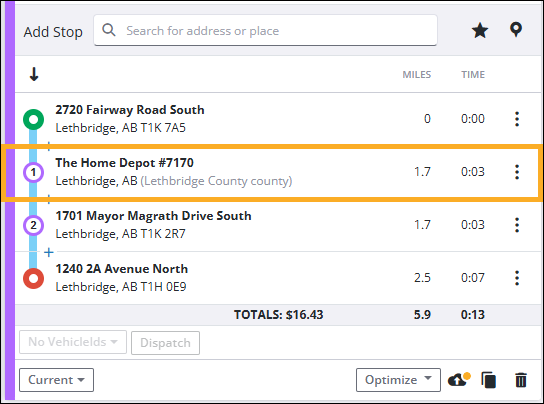
Add intermediate stops
Once you add at least two stops to the route card, a + button appears between each of the stops. To add an intermediate stop:
-
Select the + button between the two stops where you want to add a new intermediate stop.
-
Enter the new stop in the Add Stop field and select the correct stop location from the search results dropdown.
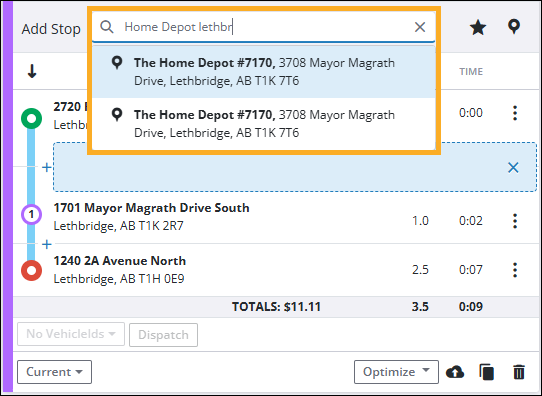
-
The intermediate stop is added to your route.
The map window
-
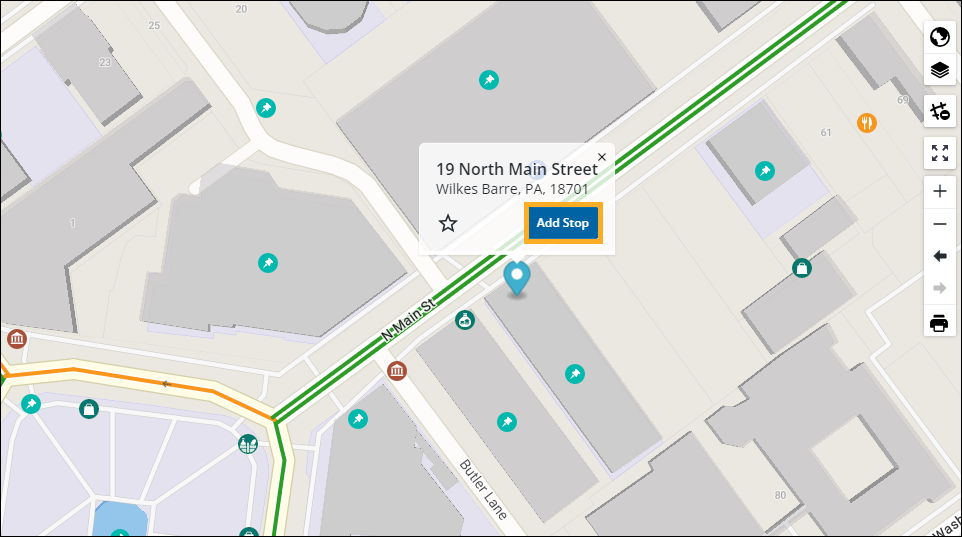
You can also add a stop directly from the map window.
-
Click on a location. An info box about that location will pop up.
-
Select Add Stop. This adds the stop to the route card.
-
Saving a favorite
-
With a location selected in the map window, select the
Favorites icon to save the location for future route planning.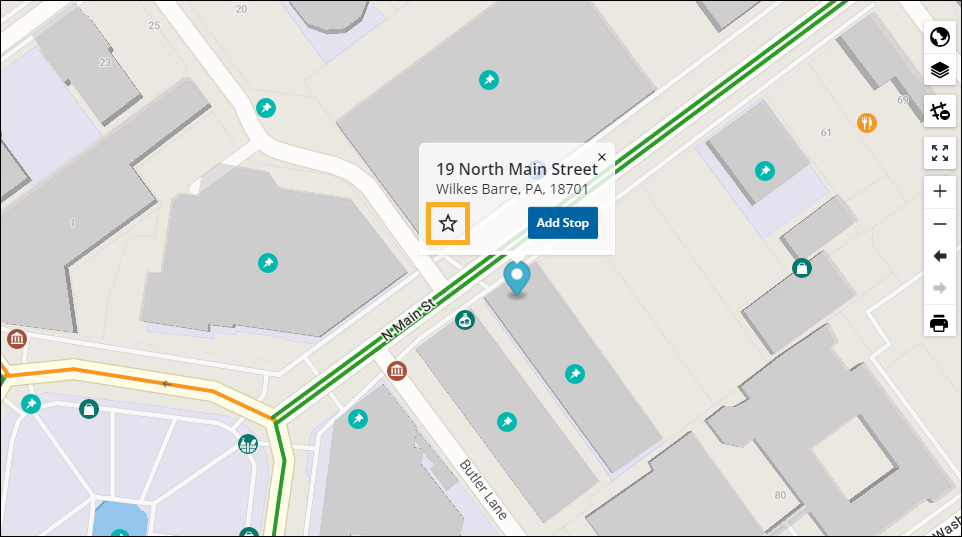
-
A popup window appears. Enter a name for your favorite in the text field. If you want the favorite to be shared across all users in your PC*Miler Web account, select the checkbox under the text field.
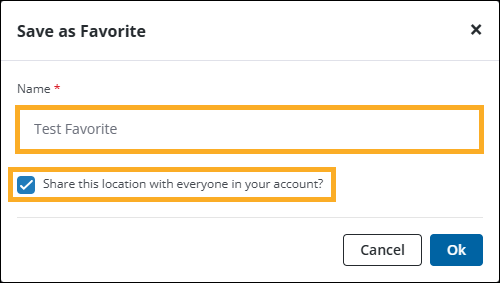
Select Ok to save the location to your Favorites.
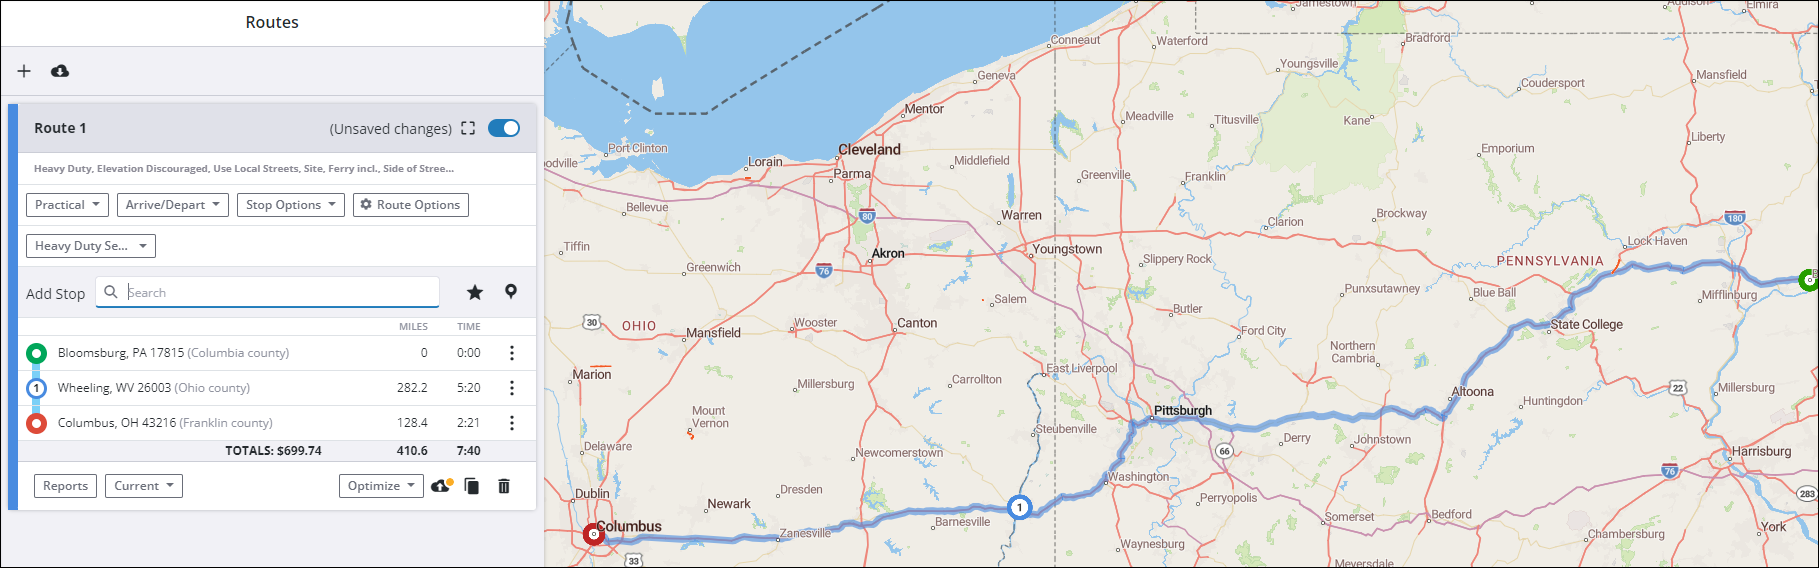
Calculate a route (Auto-Calculate)
Once you add at least two stops (an origin and a destination) in the route card, PC*Miler Web by default automatically generates a route and draws it on the map. The color of the map route line matches the color in the route card.
The route is updated each time you insert an additional stop or change the order of stops. You can click and drag stops to re-arrange the order.
Calculate a route (Manual)
If you do not want PC*Miler to automatically calculate the route, turn off the Auto-Calculate switch. PC*Miler displays a Run button you click when you’ve added all of your stops and want to calculate your route.

Manage your generated route
After the route is calculated, you can still perform edits to the route and have it recalculated with your changes. Once you are satisfied with the route you have created, you can duplicate the route, delete it, or save the route for sharing or future use.
-
Open a saved route.
-
Import a shared route.
-
Delete all currently open routes.
-
Save the selected route. (A maximum total of 3,000 routes can be saved in your account.)
-
Duplicate the selected route.
-
Export the selected route.
-
Delete the selected route.
Save a route
-
To save a new route, select the Save Route icon. The Save Route popup window appears.
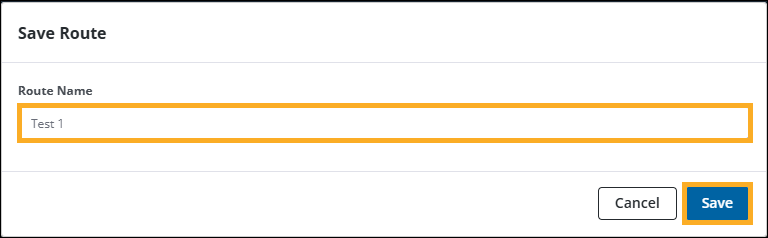
Enter a unique name or ID in the Route Name field and select Save. -
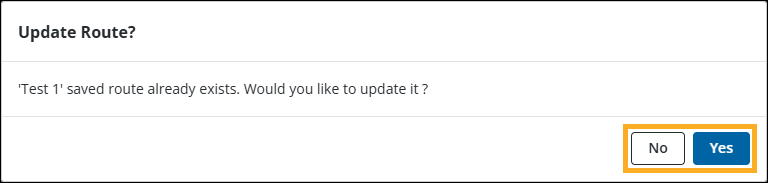
To save changes to an existing saved route, select the Save Route icon. The Update Route? popup window appears.
-
Select Yes to update the current saved route with your changes.
-
Select No to create a new saved route with your changes.
-
Open a saved route
To load a saved route, select the Open Saved Route icon. The Open Route popup window appears.
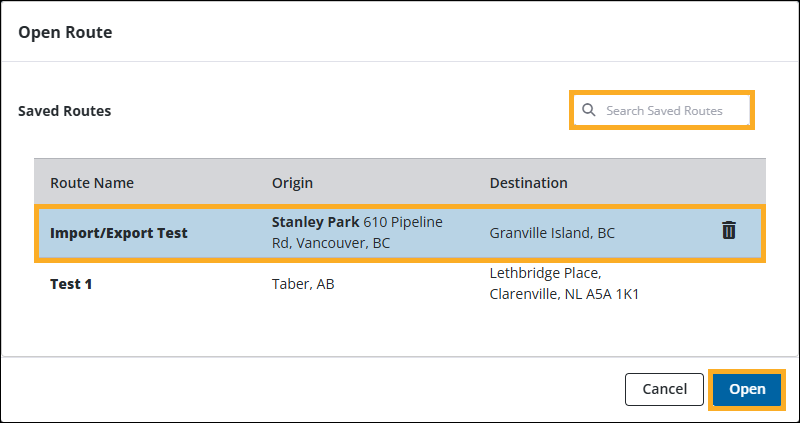
Use the search field to find a specific route and select it, or select a saved route directly from the list. Then, select Open to load the saved route. The route appears in your Routes pane.
Import/Export routes
You can now share routes between PC*Miler Web users within your company via the new import and export route functions. An exported route file contains all the same route information that you would expect from a saved route.
Export a route
-
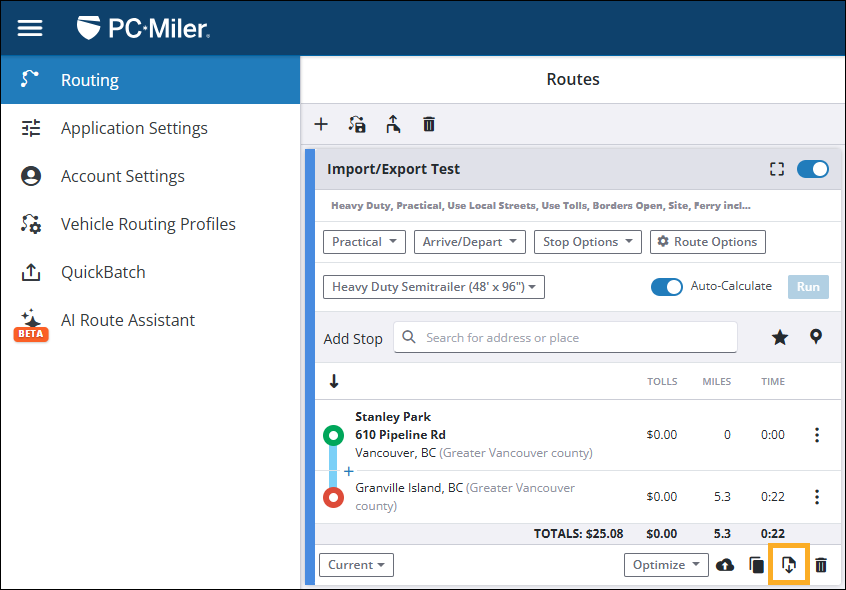
To begin, create a new route, or open an existing saved route, and confirm all your vehicle profile settings and route options are set correctly.
-
With your route selected in the Routing window, select the Export Route icon.
-
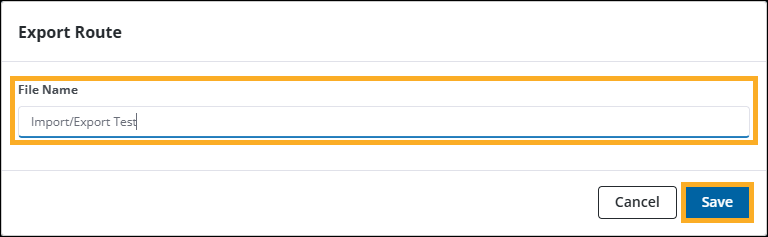
The Export Route popup window opens and displays the name of your route in the File Name field. You can keep this file name or enter a new one. However, ensure that your export file has a unique name or ID as this will help avoid confusion in the event you are exporting multiple routes at a time.
-
Once you have chosen a file name, select Save. Your route is exported in .JSON format to your web browser’s download file location (typically your computer’s "Downloads" folder). Your export file can be shared using any standard practice (email, direct message, shared folder, etc.).
Import a route
-
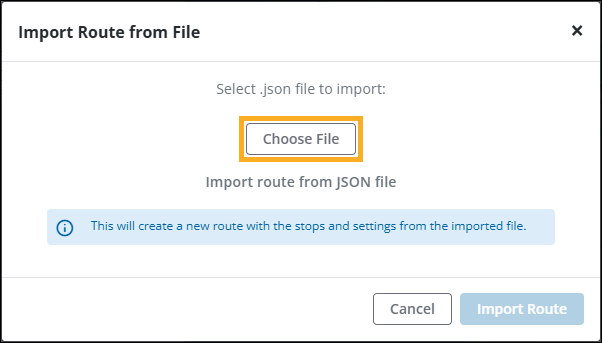
To import a route, navigate to the Routing window and select the Import Route icon.
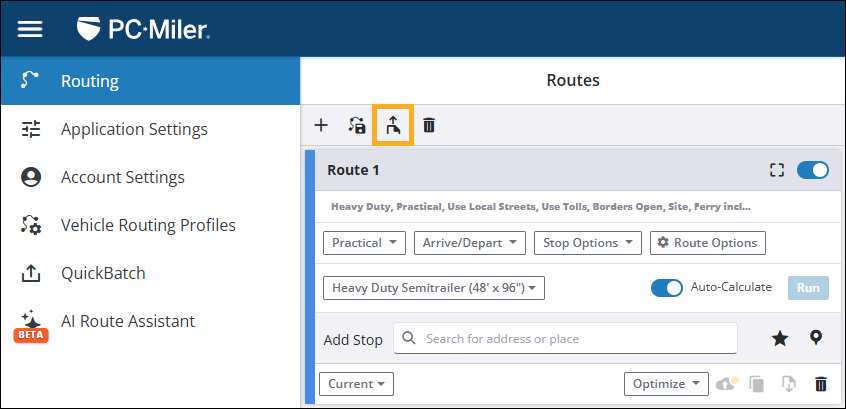
The Import Route from File popup window appears. -
Select Choose File and select the .JSON route file you want to import.
-
With a valid file chosen, select Import Route.
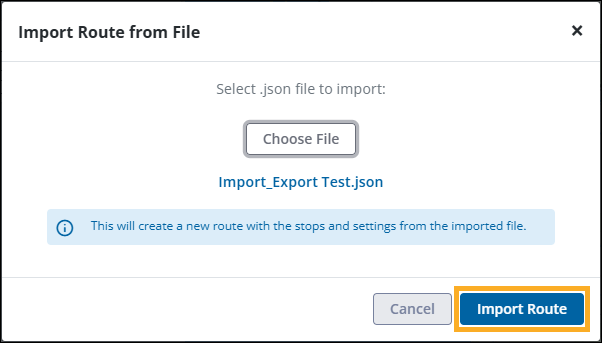
Your route file is processed and the imported route appears in the Routing window.
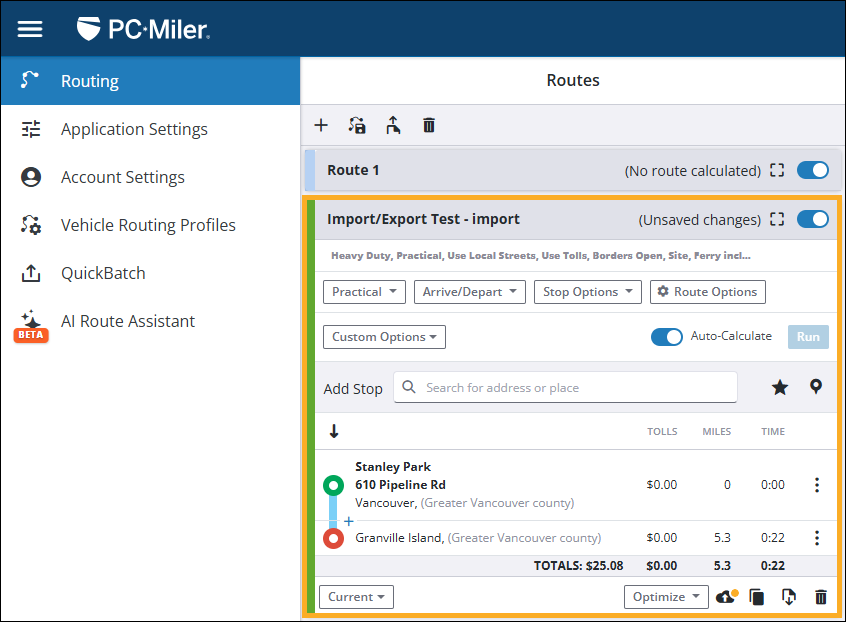
The imported route can be treated just like any other route. This means you can make edits, save the route, and view route reports as you normally would.