Handling pay details from electronic or shift schedule logs
A driver can use an electronic log (ELOG) or shift schedules log to log hours of service.
Setting up the system to process time log activity
Enabling the interface
To access the functionality described in this topic, you must have
[Tariff]ShowDotNetTab=Y in your TTS50.
Specifying the driver’s time log source
-
Go to Tools > Profiles > Driver Profiles.
The Driver Profile window opens. -
Enter the driver’s ID in the Driver ID field and press ENTER.
The driver’s information displays in the window. -
Select the User Definables tab.
-
In the TimeLog pane, select one of these options in the Time Log Source field.
-
UNKNOWN (default)
The system uses the source specified in the String1 field for theTimeLogSourceGeneral Info Table setting. -
ELOG
The driver logs hours of service electronically from a device or manually in the Driver Hours of Service window in TMW Operations. -
SHIFT
The driver logs hours of service by reporting Login/Logout hours for a shift.
Note: The HOSLOG option is used when handling pay details from Hours of Service (HOS) data.
-
-
Click Save and then close the window.
Create a pay type for time log activity
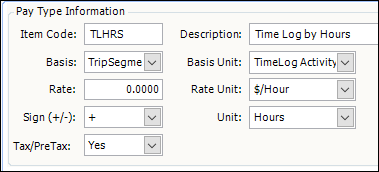
To calculate time-based pay automatically, you must create an hourly pay type.This illustration shows a sample pay type.
-
Go to Tools > Setup > Pay Type Maintenance.
-
Click Add.
The system adds a new pay type item in the Main tab. -
Make entries in all fields.
Field Definition Item Code
Assign a unique ID to the pay type.
Description
Enter a description for the pay type.
Basis
SelectTrip Segment.
Basis Unit
Select TimeLog Activity.
Rate Unit
Select $/Hour.
Unit
Select Hours.
-
Click Save.
The system adds the pay type to the Pay Type Maintenance window.
Create a pay rate for time log activity
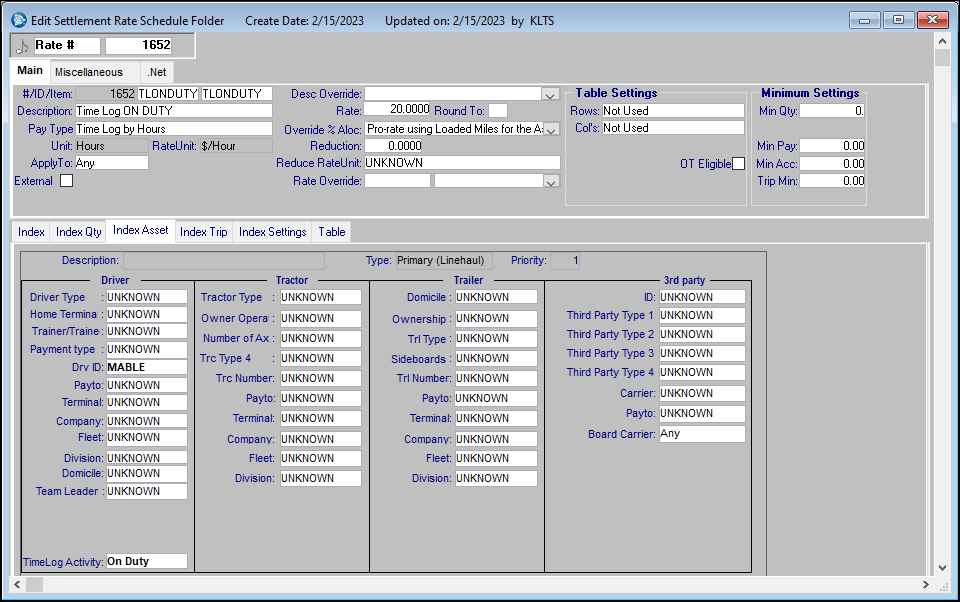
To calculate time-based pay automatically, you must create a pay rate in TMWSuite Rate Schedules that uses the hourly pay type you created.
In the Edit Settlement Rate Schedule window, make sure to do the following:
-
In the Pay Type field, specify the pay type you created.
-
In the Index Asset tab:
-
Specify a driver ID in the Drv ID field
-
Specify an activity type in the TimeLog Activity field. Valid values include:
-
Drive
-
Meal
-
On Call
-
On Duty
-
You can add, edit, and remove values for this field in the TimeLogActivity label. For details, see Using the label file to customize fields in the TMWSuite System Administration online help.
-
This illustration shows a sample pay rate schedule for driver MABLE. It measures On Duty hours.
Working with a driver’s time log details
-
In TMW Operations, go to Operations > Approve Time Log Details.
The Approve Time Log Details window opens.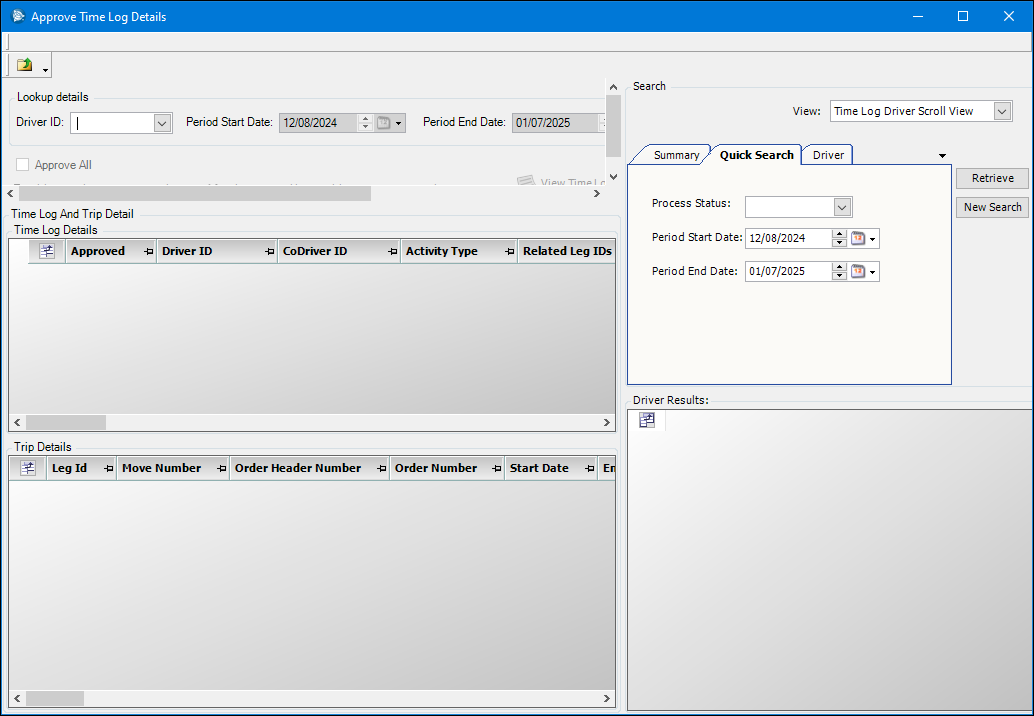
On this window, you can:
-
Add, edit, and/or delete a driver’s time log details manually
-
View messages from the time log provider
-
Approve time log details
-
-
Select a driver and pay period by doing either of the following:
-
Enter information in the Driver ID, Period Start Date, and Period End Date fields.
-
In the Quick Search pane, use the fields provided to filter and select a driver by pay period and/or process status.
-
In the Driver pane, use the fields provided to search all drivers in your database.
Note: Although you can select any driver in your database, time log details appear only for those for which you have chosen a time log data source that is not UNKNOWN.
-
Time and trip details for the specified range appear in the Time Log Details and Trip Details grids respectively.
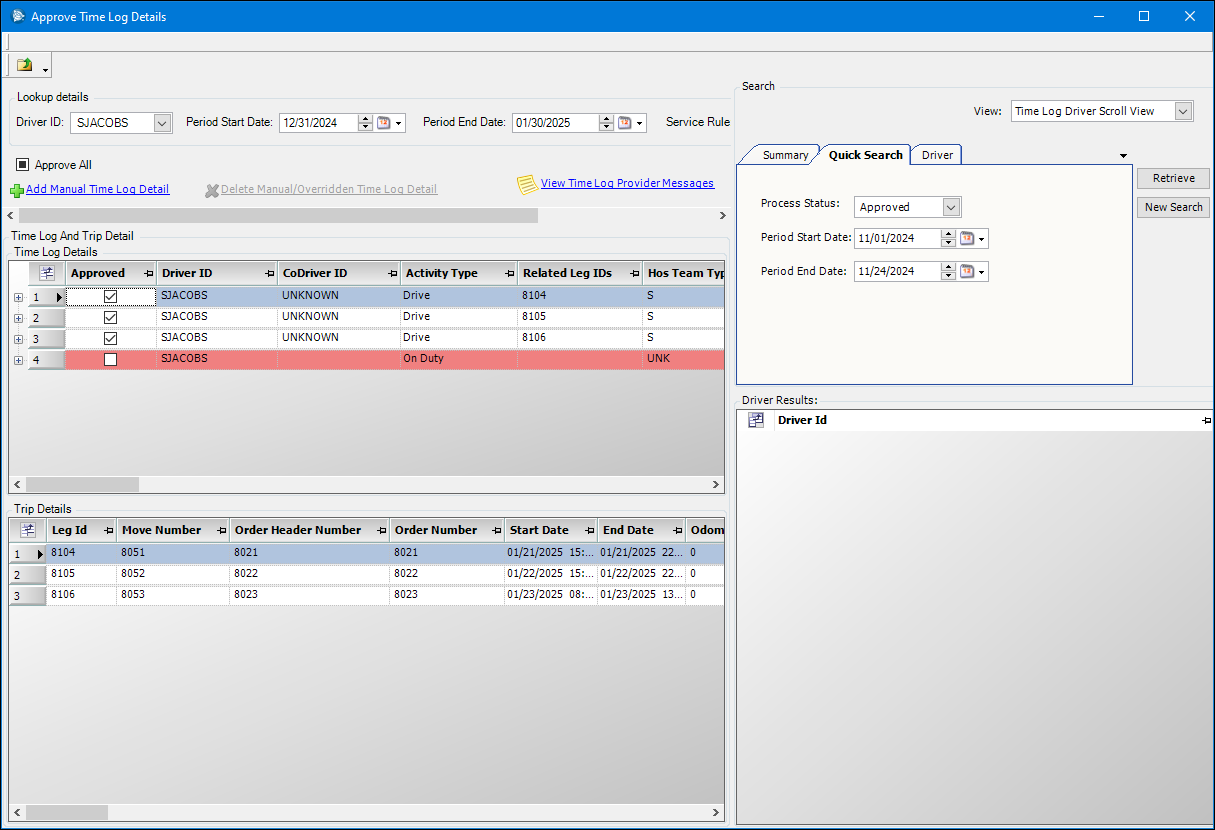
Highlighted rows indicate either of the following:
-
The time log detail is not approved and the Comment column contains a comment.
-
The trip detail does not have a time log detail that falls within the start/end date range.
Add a time log detail
-
Click Add Manual Time Log Detail.
A new row appears in the Time Log Details grid. -
Enter information in these columns.
Column Definition Activity Start Date
Date/time on which the activity began
Activity End Date
Date/time on which the activity ended
Duration
Length of activity in hours
Comment
Information about the time detail.
-
If you want, add a comment in the Comments column.
-
Click Save.
Delete a time log detail
-
Select the row in the Time Log Details grid.
-
Click Delete Manual/Overridden Time Log Detail.
The system removes the record from the grid. -
Click Save.

Calculating pay details
Go to Settlements > Time Settlements Folder.
The Time Settlement Folder window opens.
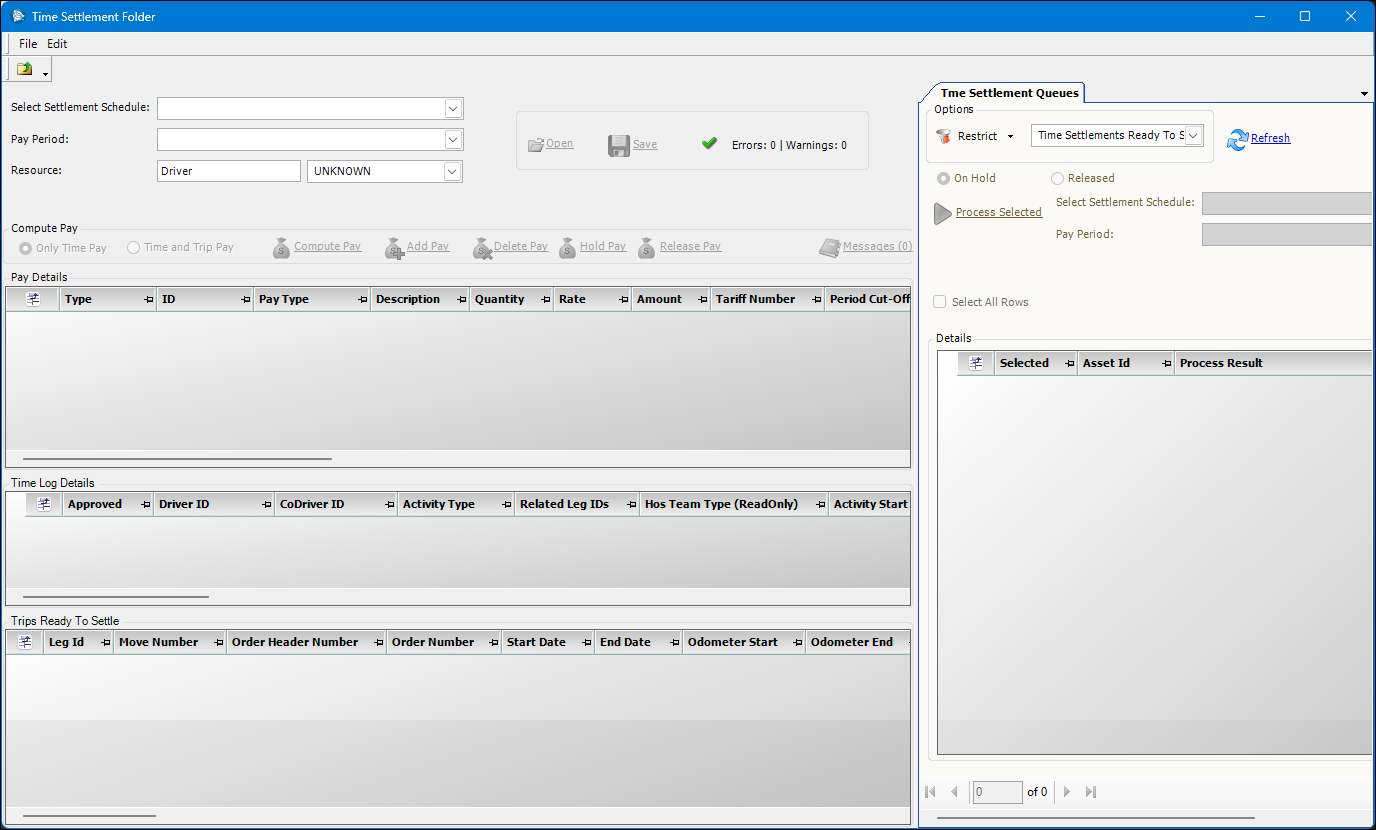
On this window, you can:
-
Compute pay for:
-
Hours of service only (Only Time)
-
Hours of service and trips (Time and Trip)
-
-
Add and/or delete pay details manually
Select resource(s)
To select a single resource, do either of the following:
-
Select information in the Select Settlement Schedule, Pay Period and Resource fields. Click Open.
-
Use any of the views in the Time Settlement Queues tab to filter on and locate a resource:
-
Time Settlements Ready to Settle
-
Time and Trip Settlements On Hold
-
Time and Trip Settlements Ready to Settle
-
You can also select multiple resources in the Time Settlement Queues tab. You can process one, some, or all resources that appear. When you do, the Batch Process Results window appears. Click OK to continue.
|
Add a pay detail
-
Click Add Pay.
A new row appears in the Pay Details grid. -
Enter information in these columns.
Column Definition Pay Type
Pay type used to calculate pay
Quantity
Quantity, in units defined by the pay type (for example, hours)
Rate
Rate used to calculate pay
-
Click Save.
Delete a pay detail
-
Select the row in the Pay Details grid.
-
Click Delete Pay.
The system removes the record from the grid. -
Click Save.
Hold and release pay details
To hold a pay detail, select it in the Pay Details grid and click Hold Pay. The pay detail is given an On Hold status.
To release a pay detail, select it and click Release Pay. The pay detail is given a Released status.
Compute pay
-
Do one of the following:
-
If you want to compute pay for hours of service only, click Only Time Pay.
-
If you want to compute pay for both hours of service and trips, click Time and Trip Pay.
-
-
Click Compute Pay.
The system applies the appropriate rate. If duplicate rates apply, the system uses the first rate found. -
Click Save.
-
Continue with the final settlement process.