Recording/viewing notes about a driver
Notes entered for a driver are accessible in the base applications, except System Administration and Rate Schedules.
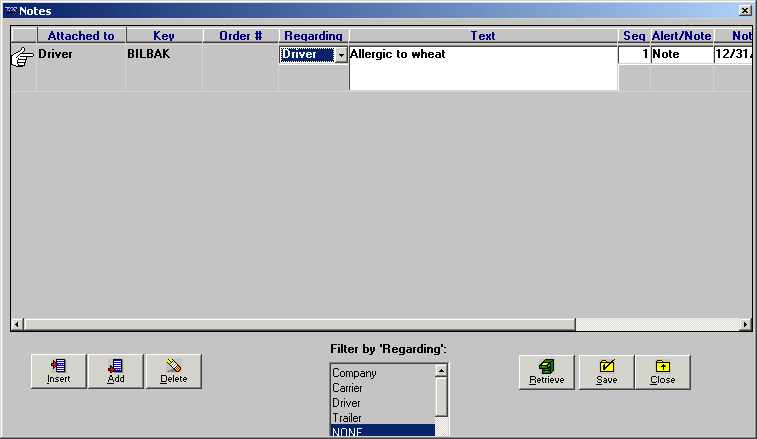
Adding notes to a driver profile
-
With the driver’s profile opened, do one of the following:
-
To add a note to the end of the list, click Add.
-
To insert a note before an existing one, highlight the existing note and click Insert.
The system automatically provides some information:
-
It puts Driver in the Attached to field.
-
It puts the driver’s ID in the Key field.
-
-
Select the appropriate entry in the Regarding field. The option you select controls how the note is filtered when a user retrieves notes later. The options are:
Company
Settlements
Carrier
Pay To
Driver
Billing
Trailer
Order
Tractor
-
Enter the text of the note in the textbox. You may enter up to 256 characters, but only 68 characters can display in the textbox at one time.
-
If your note exceeds 68 characters, use the LEFT ARROW or RIGHT ARROW keys to scroll the rest of the note into view. You can also highlight the note, right-click on the text box, and select Zoom Field from the pop-up menu to view the text in its entirety.
-
To copy a word or phrase from an existing note, highlight the portion you want to duplicate and press CTRL+C. Then position the cursor in the spot where the word(s) are to be pasted and press CTRL+V.
-
You can cut a word or phrase from an existing note and paste it in a different spot. To do so, highlight the portion to be cut and press CTRL+X. Note that the word(s) are deleted from their original location. Position the cursor in the spot where the word(s) are to be pasted and press CTRL+V.
-
-
Position the cursor in the Note/Alert field. Highlight one of the options to rank the importance of your note.
-
Select Note if your note is informational, but not of critical importance.
-
Select Alert if your note is of critical importance, not merely informational.
The ranking determines how the system displays the Note indicator on windows associated with your note. For notes ranked as Note, a yellow indicator is displayed; for notes ranked as Alert, a red indicator is displayed.
-
-
Notes may be assigned an expiration date. Position the cursor in the Expiration Date field, and enter the date and time the note is to expire, if applicable.
Note: Once the expiration date has passed, the note no longer triggers the Note indicator to show as yellow or red. However, the expired note continues to display in the Note window.
-
Click Save to save the note.
Note: To cancel any changes, click the Retrieve button; the system displays the previously existing notes.
-
Click Close to exit the window.
Deleting a note
You can delete a note by positioning the cursor in any field and clicking Delete. The system displays a confirmation dialog box that asks: Are you sure you wish to delete this row?
Click Yes to delete the note.
Viewing notes
Notes are available from almost all TMWSuite applications. The Notes indicator is gray when there are no notes, or when there are only expired notes attached to a particular company, resource, order, or movement, etc.
When an unexpired note is available, the Notes indicator is displayed in yellow. If a note has been assigned Alert status, the indicator is displayed in red. The location of the indicator varies, depending on the application.
-
Click
 Notes in the sheet toolbar or select the Notes command from the Edit menu to open the Notes window. You may also click the Notes indicator.
 -
Use the Filter By Regarding list box to select the type of notes you want to see. To see all notes, select None. As you select different filtering options, the displayed notes will reflect the current filter.
-
Click Close to exit the Notes window.
| If you want to: | You must: |
|---|---|
Add a note |
Click Add. |
Insert a note between existing notes |
Highlight the note you want the new note to be above; click Insert. |
Save your entries |
Click Save. |
Cancel all entries made since the last time you saved, e.g., retrieves only those entries that have been saved. |
Click Retrieve. |
Restrict the notes displayed to those for a specific filter category |
|
Display all notes, regardless of filter category |
|
View a note in its entirety if it exceeds the 68 character limit allowed by the text display |
Do one of the following:
|
Delete a note |
|
Exit the Notes window |
Do one of the following:
Note: If you have not saved your entries, you will be asked if you want to do so before you exit. |