Creating orders from projections
The Forecaster projects when orders are needed, and how much product should be delivered. Saving projections as orders allows you to view updates the Forecaster makes to them each time it runs. Additionally, when you save the orders, they are available for dispatch. Order completions update tank volume information, which is one of the data sources the Forecaster relies on to make accurate predictions.
Depending on the Inventory Services Mode established for the store, the procedures for creating orders from the projections differ.
Creating orders for forecaster-mode stores
You save the projections as orders in the Order Forecast Review window’s Orders Projection tab.
-
Select Tank Forecast > Order Forecast Review.
The Order Forecast Review window opens. -
In the Company field at the top left of the window, enter the store’s ID.
-
Tab out of the field or click
 Open.
Open. -
Select the Orders Projection tab.
-
Click Save Orders.
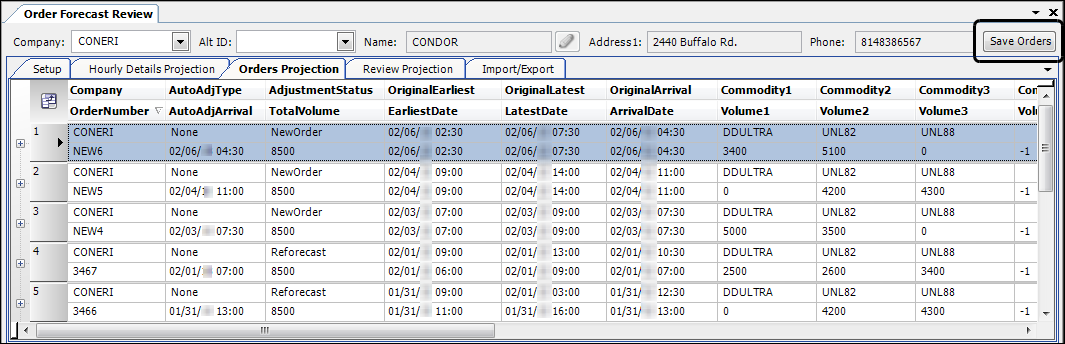
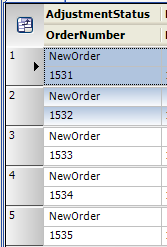
The OrderNumber field displays the system-assigned IDs of the new orders.
|
If the OrderNumber field does not show the new order numbers, click Open |
Forcing the Forecaster to schedule retain and runout dates in a single delivery window
By default, the Forecaster calculates an order’s retain, arrival, and runout delivery dates separately. As a result, the dates may span several days.
Some forecasted stores enforce delivery-time restrictions. These restrictions limit fuel deliveries to occur during specific hours of a day. For example, a store may only accept deliveries between midnight and 5:00AM.
In this illustration, the Forecaster scheduled the retain, arrival and runout dates to span multiple days. The schedule does not avoid restriction hours, shown in yellow.

When delivery restrictions apply, the Forecaster modifies the retain, arrival, and runout dates to occur within an open delivery window. However, the window may not be the same for all dates. This illustration shows how the Forecaster recalculated the retain and runout dates to occur in different delivery windows.
-
The Forecaster moved the retain date to the start of the next open delivery window.
-
The Forecaster moved the runnout date to the end of the previous open delivery window

You can set up the Forecaster to modify the delivery window again to place the retain and runout dates in the same delivery window as the arrival date. With the arrival date scheduled in an open delivery window, the Forecaster recalculates the retain date as the start of the window and the runout date as the end of the window.
In this illustration, the retain, arrival and runout dates all occur in a single delivery window.
-
The Forecaster moved the retain date to the start of the arrival open window.
-
The Forecaster moved the runout date to the end of the arrival open window.

| When a store’s tank is in a critical runout situation, the forecaster overrides any delivery restrictions to get product in the ground. |
To set up the Forecaster to schedule the retain, arrival, and runout dates in a single delivery window, you must:
-
Set a store’s delivery window restrictions
You can enter store restrictions in either Inventory Services or Fuel Dispatch.
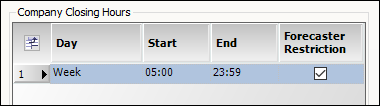
In Inventory Services, enter the store’s restriction information. In Fuel Dispatch, see the Entering the hours a company is closed topic.
-
Activate the Do not Span Delivery Window feature
-
In Inventory Services, go to Tank Forecast > Order Forecast Review.
-
Enter a store ID in the Company field.
-
Click the Setup tab.
-
Select the Do not Span Delivery Window checkbox.

-
Click Save.
-
Creating orders for threshold-mode stores
The orders you see in the Order Generation Review window are not immediately saved. Using the Order Scratch Pad window, you can review the list of projected orders before saving them. If a particular order is not needed, or if any of its data is incorrect, you can be remove it from the list before you save. If a commodity quantity is incorrect, you can change it before you save.
Use this procedure to review a listing of the stores and the needed commodities, to enter the delivery amount, and to create orders for those stores.
-
Go to Tank Forecast > Order Generation Review.
-
If you want to limit the list of stores needing deliveries, filter by any of these restrictions.

Rev Type 1
Stores associated with a terminal
Note: Terminals are user-defined.
Region 1
Stores associated with a Region 1 value
Note: Regions are user-defined.
Controlling
Stores associated with an IVR company for call-in readings
Tripped
Stores that have a reading below the threshold amount
No Order
Stores that do not currently have orders to be completed
Hide Marked
Custom
Rev Type 2 - 3
Stores associated with a revenue type value
Note: Revenue type values are user-defined.
Other Type 2
Stores associated with an Other Type 2 value
Note: Other Type 2 values are user-defined.
No Prior Order
Custom
No Future Order
Stores that have no orders created for a future date
No CMP After Reading
Stores that have no completed orders since the last reading
-
Click
Open.
Note: If you need to clear the list and select other restrictions, click New.
New. -
Review the list of projected orders to determine where deliveries are needed.
Note: If necessary, review the Commodity/Orders Details tabs at the bottom of the window for the selected store. -
Create the orders.
Note: Address only those stores that include a master order ID in the Master # field.-
In the NewDelivery field, for a store and commodity record, enter the delivery amount.
-
Press TAB.
The number of projected orders is displayed in the upper right corner of the window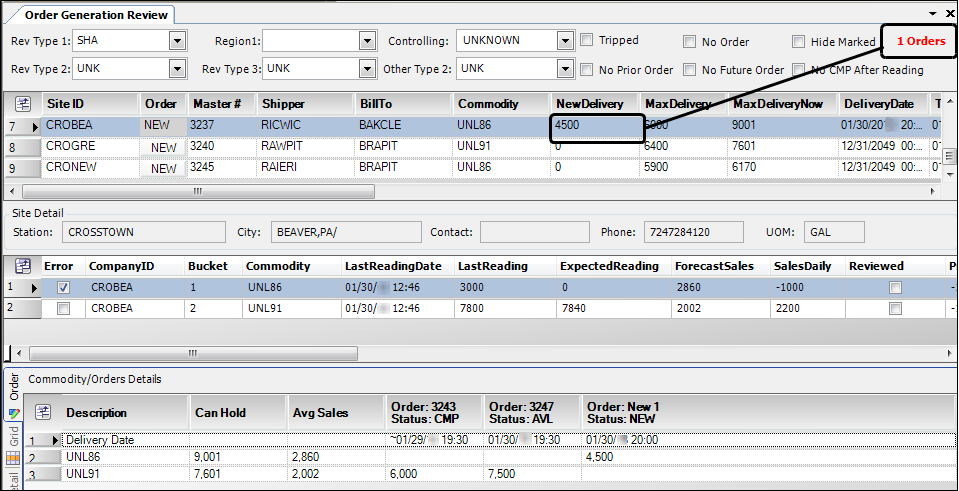
-
Repeat these steps for each order you want to create.
-
-
To save the orders without reviewing them, click
 Save.
Save.
The Order Scratch Pad message opens, stating how many orders are on the scratch pad.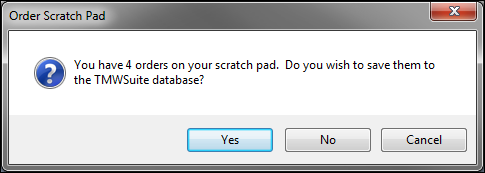
Do one of the following:
-
To save the orders, click Yes.
-
To review and save the orders later, click No.
-
To return to the Order Generation Review window, click Cancel.
-
-
To review the orders before saving:
-
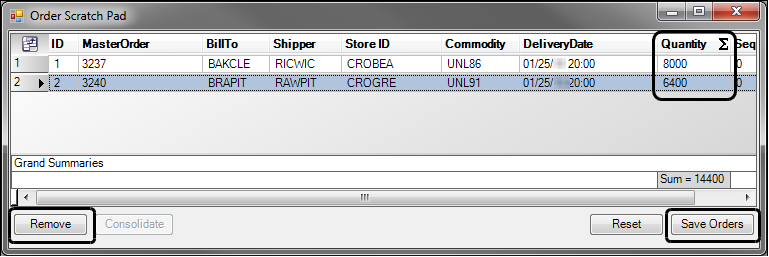
Go to Tank Forecast > Order Scratch Pad.
-
Review the list of projected orders.
-
If necessary, remove unwanted orders from the list.
-
Select the row or rows to be removed.
-
Click Remove.
-
-
If necessary, in the Quantity field, change the delivery amount.
-
-
Do one of the following:
-
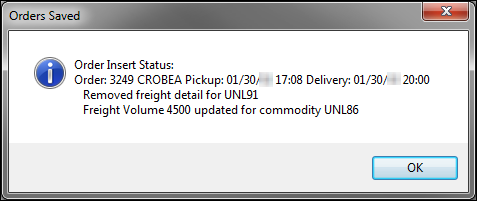
Click Save Orders.
The Orders Saved message appears.It shows a list of saved orders. If the store’s master order includes all products the store handles, any commodity not on the order is noted. The window also shows the ordered quantity you entered in the Order Generation Review window’s New Delivery field.
-
If you want to abort the order creation, do the following:
-
Click Reset.
The window is cleared. -
Close the Order Scratch Pad.
-
Return to the Order Generation Review window, and recreate the projected orders.
-
-
Planning and dispatching a store’s orders
You plan and dispatch orders in the Fuel Dispatch Card Planner or Planning Worksheet. To do so, you complete tasks, following this basic order:
-
Open the Fuel Dispatch Card Planner or Planning Worksheet.
-
Set restrictions as needed and refresh the window.
-
In the Avl. Orders or Priority Orders tab, locate an order number to be planned.
-
Plan the order with the desired resources.
-
Click Update.
-
Repeat Steps 3-5 for other orders you want to plan.
-
Dispatch planned orders as needed.
Once the orders are in TMWSuite, they can be dispatched and completed. The deliveries will be reflected in the tank readings windows in Inventory Services.

| For detailed information about planning and dispatching trips, see Assigning resources to trips and Dispatching a trip in the Fuel Dispatch help system. |