Setting up master bills
To set up master bills, you must do the following:
-
Record the Bill To as a master bill company in the Company Profile window.
-
Assign a master bill format in the Output Maintenance window.

Recording a Bill To as a master bill company
To set up a Bill To company as a master bill company, follow these steps.
-
Go to Tools > Profiles > Company Profile.
The Company Profile window opens. -
In the Company ID field, enter the Bill To company ID.
-
Press ENTER.
The company’s information appears in the fields.
-
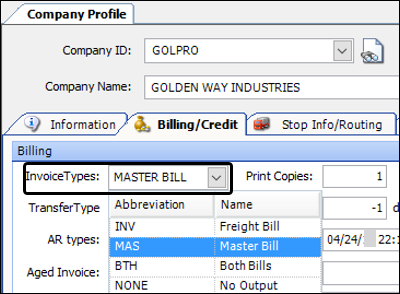
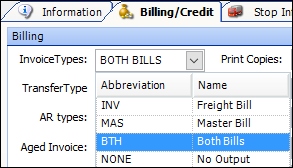
Click the Billing/Credit tab.
-
In the InvoiceTypes field, do one of the following:
-
If the company will receive only master bills, select MAS (Master Bill).
-
If the company will receive both master bills and individual invoices, select BTH (Both Bills).
-
-
Click
 Save.
Save.
Assigning master bill schedules
Before you can print master bills, you must do the following:
-
Assign a master bill format to orders that meet the criteria you specify.
-
Define the schedule used to print master bills that use the format.
| If you do not define a schedule, the system will use the default schedule. This schedule allows you to print a master bill every Thursday. |
To define a master bill schedule, follow these steps.
-
Go to Tools > Setup > Output Maintenance.
The Output Maintenance window opens. -
In the Output section, select the master bill format.
The Master Bill Dates tab appears at the bottom of the window.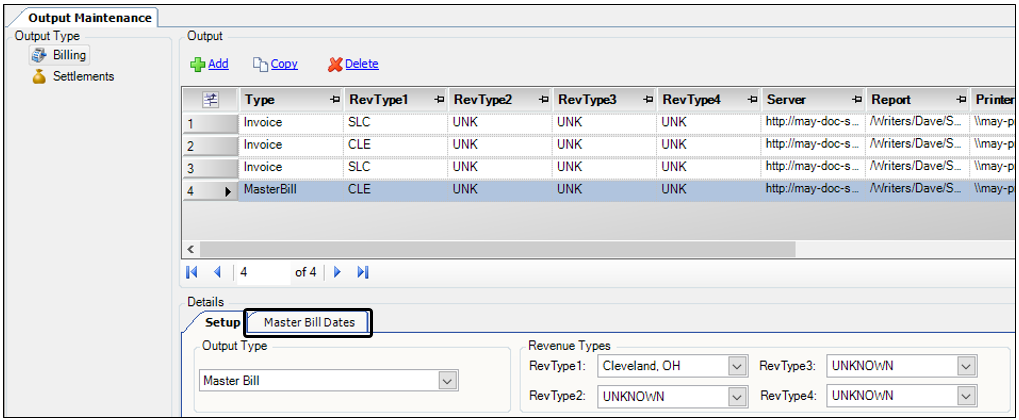
-
Click the Master Bill Dates tab.
-
Click Edit Master Bill Schedule.
The Master Bill - Edit Details window opens.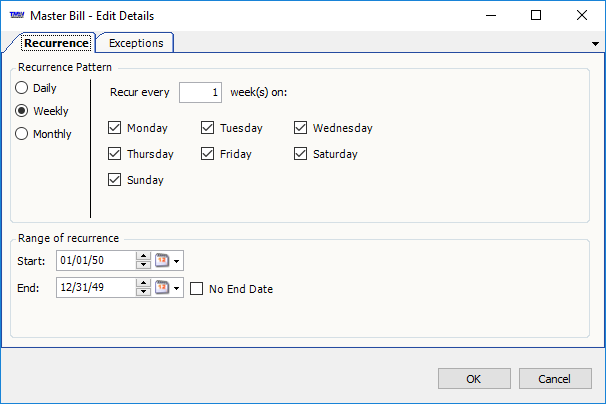
-
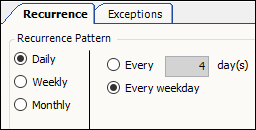
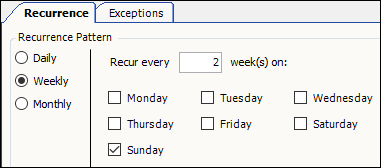
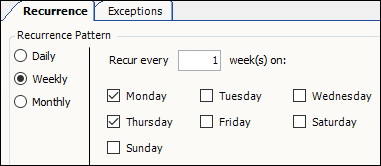
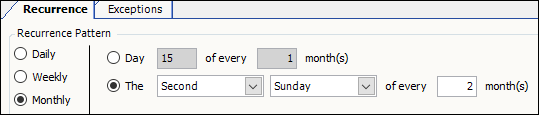
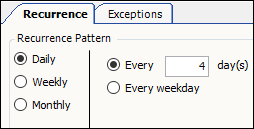
In the Recurrence Pattern section, specify when the master bill will be created.
-
In the Range of recurrence section, specify the date range the recurrence pattern will be in effect.
-
In the Start field, enter a date.
-
Do one of the following:
-
If the date range has a defined end date, enter it in the End field.
-
If there is no end date, select the No End Date check box.
-
-
-
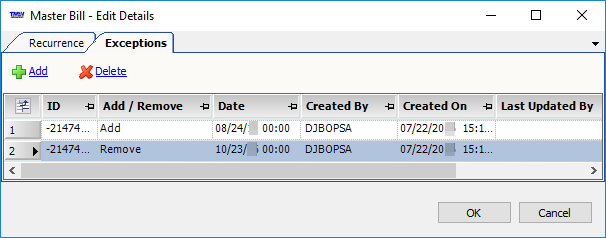
Specify any pattern exceptions if needed.
-
Click the Exceptions tab.
-
Click Add.
The system adds a blank row to the grid.Note: To delete a row, select the row and click Delete.
-
In the Add/Remove field, do one of the following:
-
To include a date that is outside the pattern, select Add.
-
To exclude a date that is inside the pattern, select Remove.
-
-
In the Date field, enter the date.
-
-
Click OK.
The Calendar section displays master bill dates in green. The Dates section lists each date in mm/dd/yyyy format.
This illustration shows a sample master bill schedule for a company based in the United States.
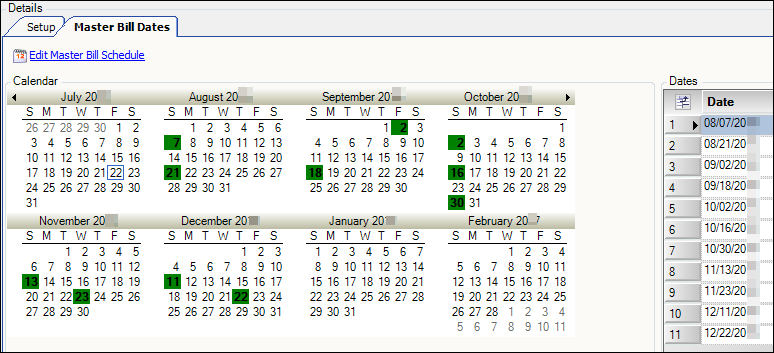
In this schedule:
-
The recurrence pattern is in effect from August 1 to December 31.
-
The master bill is printed every other Sunday with the following exceptions:
-
Sunday, September 4 is excluded because it is the day before Labor Day. Friday, September 2 is included.
-
Sunday, November 27 is excluded because it is the Sunday after Thanksgiving. Wednesday, November 23 is included.
-
Sunday, December 25 is excluded because it is Christmas Day. Thursday, December 22 is included.
-
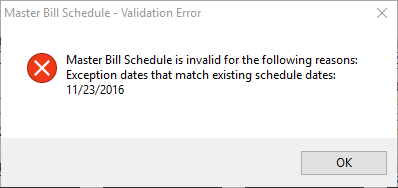
If you make a change to a schedule, and there is a conflict between a schedule date and an exception date, the following error message displays:
Daily examples
In this illustration, the master bill is created every fourth day.
In this illustration, the master bill is created every weekday (Monday through Friday).