Using Dedicated Billing
Dedicated Billing is a licensed add-on module that must be purchased from Trimble Transportation. It is similar to TMWSuite’s master bill feature. Like master bills, a dedicated bill combines charges from individual invoices for a particular Bill To company.
Dedicated Billing provides these advantages:
-
You can create billing schedules that determine how often a dedicated bill is generated.
-
You can select individual invoices for inclusion on a dedicated bill. Invoices that are not included can be processed individually, or deferred to a subsequent dedicated bill.
-
You can set up the system so that charges from dedicated and/or aggregate line item rates can be automatically allocated, or spread, across all the invoices included in the dedicated billing period.
-
You have more options for controlling the way in charges are arranged on the printed bill.
Required license
Dedicated Billing requires a license to be applied to your TMWSuite database. The license is contained in a SQL script that is applied to your TMWSuite database.
| To purchase a license for Dedicated Billing, please contact your Trimble Account manager. |
To verify that the licensing has been properly applied to your database, follow these steps:
-
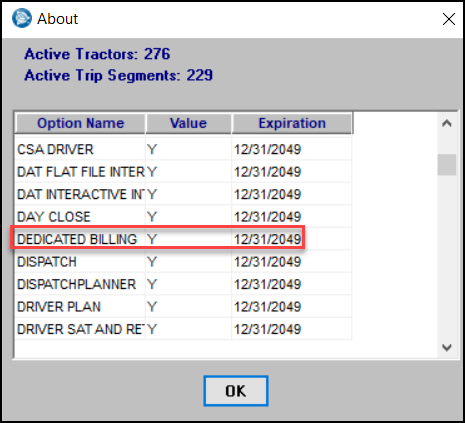
From any TMWSuite application, select Help > About. The system displays an About window.
-
Click the More button located near the window’s bottom right corner. The system displays a second About window, which lists all licensed TMWSuite applications, add-on modules and provides the following information for each:
-
Option Name
Lists the applications and features available in TMWSuite. -
Value
Signifies whether the application/feature is active. -
Expiration
Lists the date that the subscription to each feature will expire.
-
-
Scroll through the alphabetical list to find the Dedicated Billing license and verify that the Value field contains a value of Y, indicating that the license is active.
Setting up Dedicated Billing
To begin using Dedicated Billing, follow these steps:
-
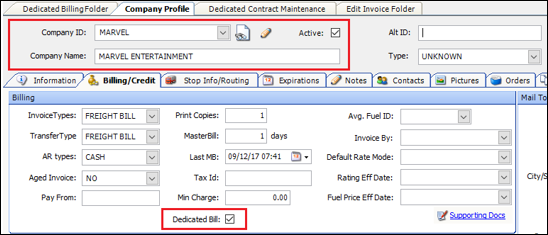
In TMW Back Office, go to Tools > Profiles > Company Profile.
The Company Profile window opens. -
Create or modify a Bill To company and select the company checkbox for Dedicated Billing on the Billing/Credit tab.
-
Create several other orders for that Bill To company, complete and invoice the orders.
Note: Make sure they are marked in a Ready To Print (RTP) status.
Tariff setup in TMWSuite
In TMWSuite, charge types and rates will need to be created specifically for Dedicated Billing.Follow the steps below to create these options.
-
Open the TMWSuite Tariffs application and create a new charge type for dedicated billing.
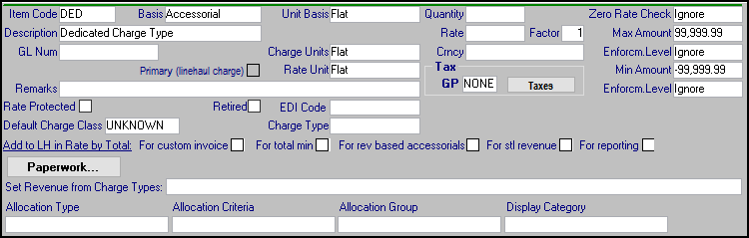
-
Select the Billing
 icon and create a new billing rate with Dedicated selected as the Type.You will also use the charge type that you had created.
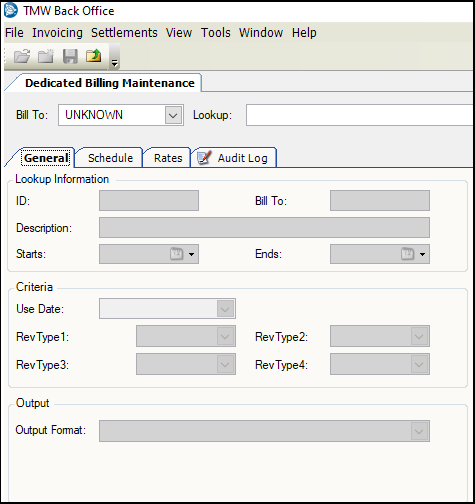
Creating a Dedicated Billing maintenance schedule
After completing the initial setup steps above, you can create a Dedicated Billing maintenance schedule. The Dedicated Billing Maintenance schedule is used to create schedules for Dedicated Billing.
You can create three types of schedules in this window:
-
Billing schedule
The Billing schedule determines how often a dedicated bill is created.
All Bill To companies set up to use Dedicated Billing will have at least one Billing schedule. While a Bill To company can have multiple Billing schedules, this is not common.
You can access and set up the Billing Schedule under the Schedule tab.
-
Dedicated Rate schedule
The Dedicated Rate schedule determines how often to apply a fixed charge, such as a monthly equipment fee.
Most dedicated Bill To companies will have at least one Dedicated Rate schedule. Many Bill To companies will have multiple Dedicated Rate schedules.
You can access and set up the Dedicated Rate schedule under the Rates tab. Select the Dedicated tab option.
-
Aggregate Rate schedule
The Aggregate Rate schedule determines how often Dedicated Billing will apply a charge based on aggregate quantities across multiple invoices. An example of such a charge would be a fuel surcharge based on total mileage during the prior quarter.
Some dedicated Bill To companies may have one or more Aggregate Rate schedules.
You can access and set up the Aggregate Rate Schedule under the Rates tab. Select the Aggregate tab.
To create a schedule:
-
Go to Tools > Setup > Dedicated Billing Maintenance.
-
Choose the appropriate tab in the window for the type of schedule you want to create.
In this example, if you are creating a Dedicated Rate schedule, choose the Rates tab and select the Dedicated tab option. You will assign the tariff that you created previously.
-
Save your setup.
Using Dedicated Billing
Once setup is completed, follow these steps to use Dedicated Billing.
-
Go to Invoicing > Dedicated Billing
The Dedicated Billing folder window opens. -
Use the Search tab on the right side of the window and select Lookup.
This lets you search for the Bill To for which you created orders, and the dedicated rates for in the setup steps.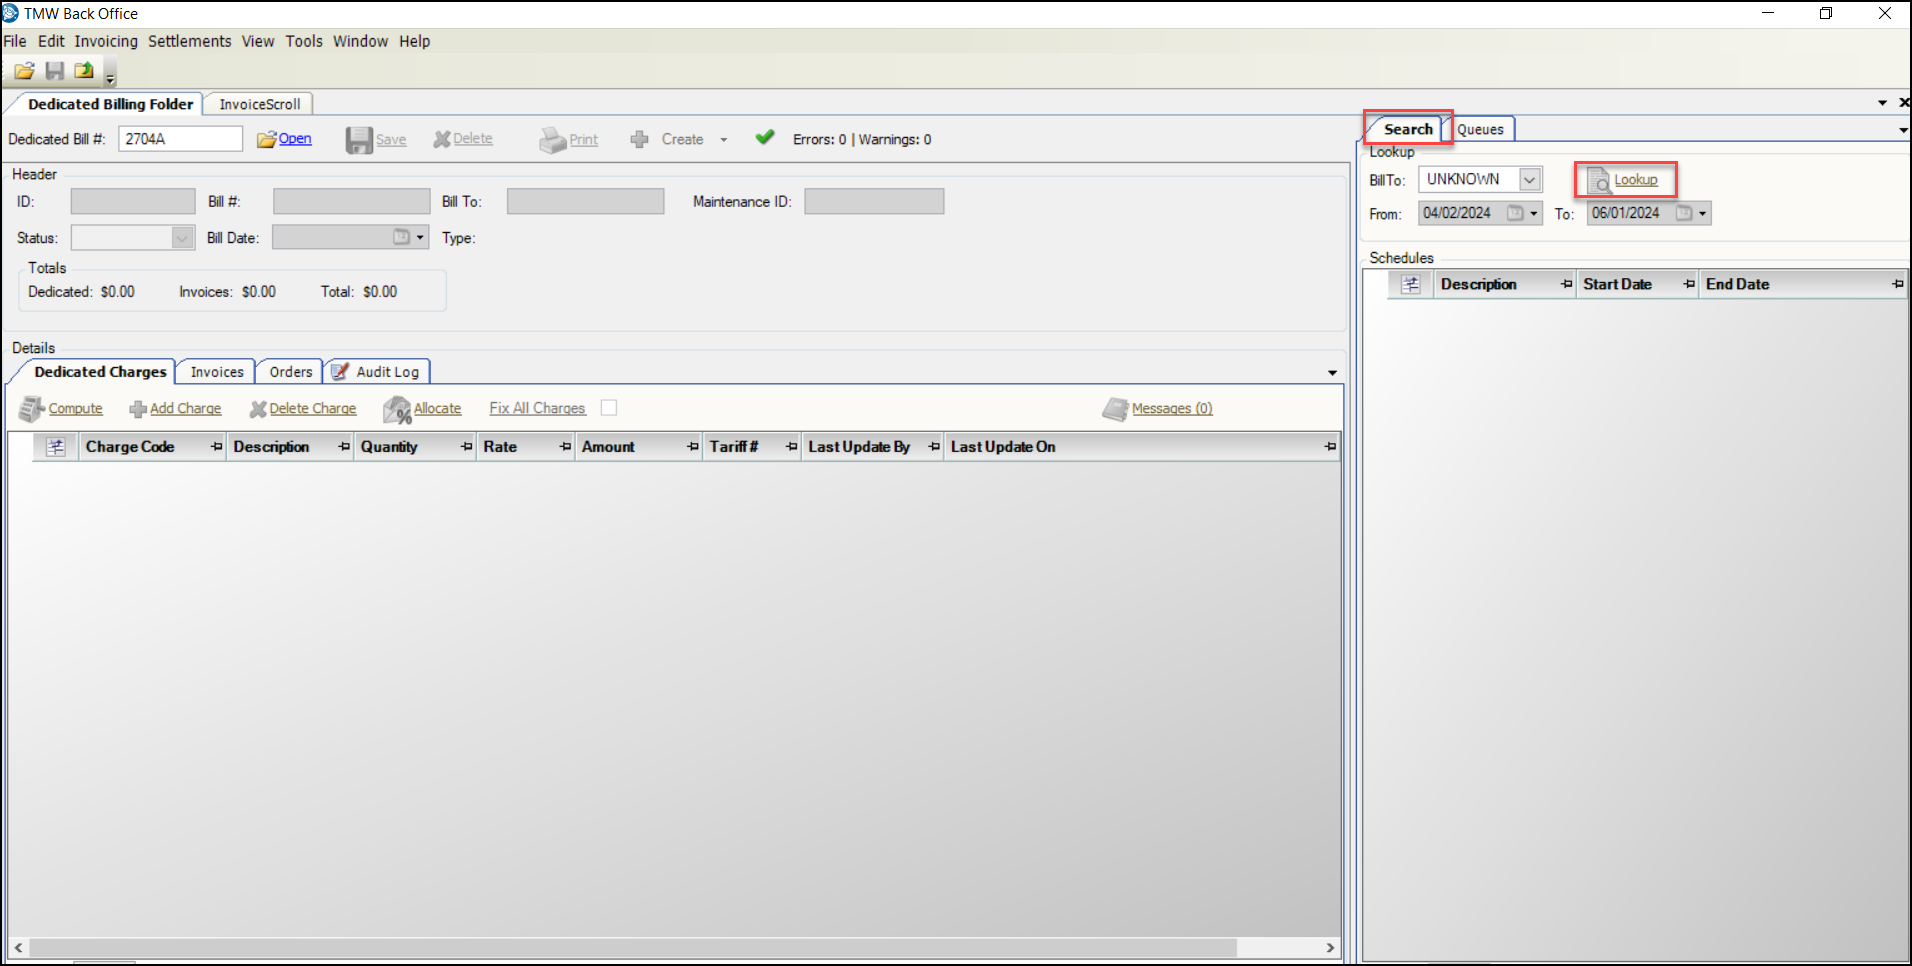
-
Select a Start date on the results grid. Double-click to select it.
-
Go to the Invoices tab under the Details section of the window. Verify you have chosen a period of one of your Ready To Print (RTP) invoices for your Bill To.
-
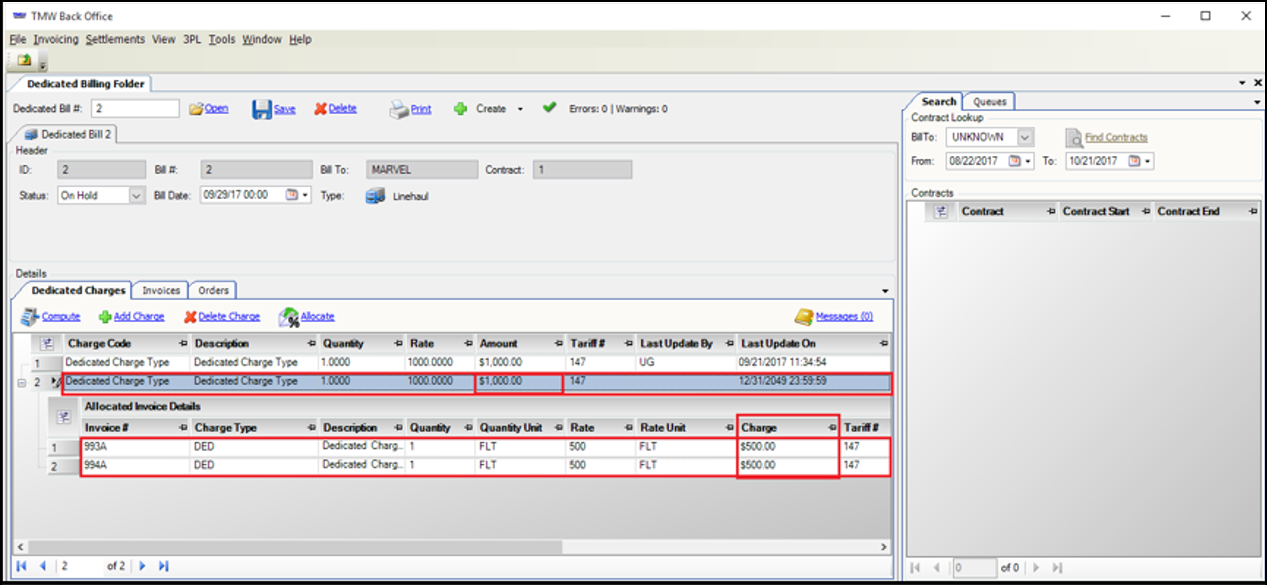
Select the Dedicated Charges tab under the Details section.
-
Click Compute. Note: If you are several periods ahead, expect it to catch up creating additional charges for past periods.
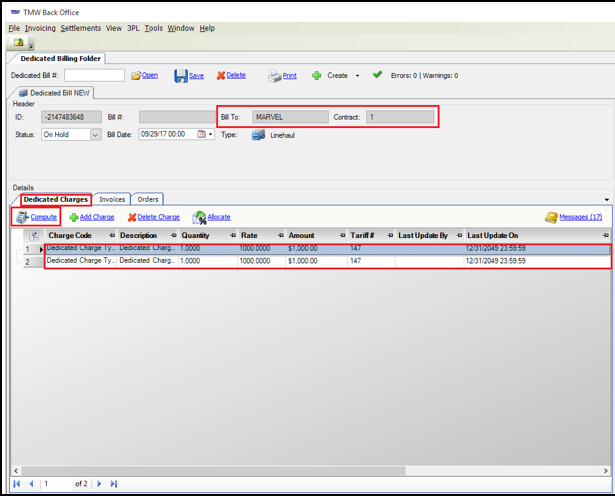
-
Select a charge in the grid and click Allocate.
You will see a screen like the example below.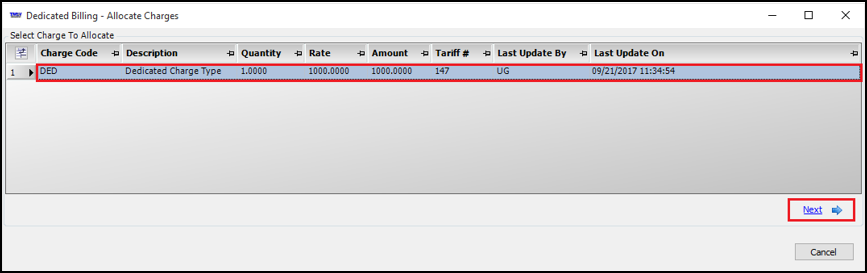
-
Click Next after you select your charge.
You will see a screen like the example below.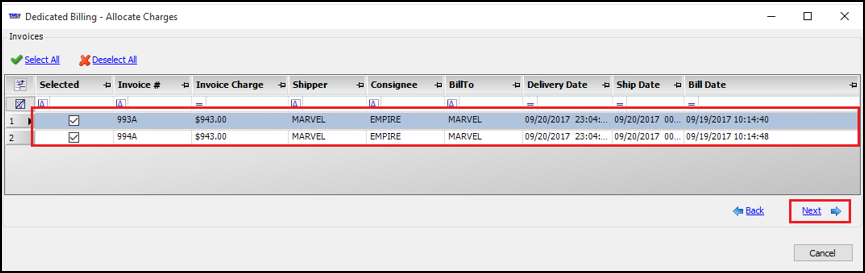
-
Click Next after you select your invoice(s).
You will see a screen like the example below.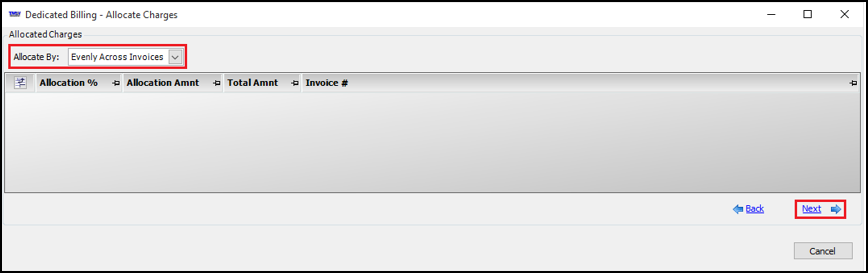
-
Select the method from the Allocate By drop-down and click Next. Options are:
-
Revenue
The charge will be allocated based on each invoice’s total billed revenue. -
Billed Mileage
The charge will be allocated based on each invoice’s billed miles. -
Billable Stops
The charge will be allocated based on each invoice’s number of billed stops. -
Billable Drop Stops
The charge will be allocated based on each invoice’s number of billed deliveries. -
Evenly Across Invoices
The charge will be allocated evenly across all invoices. -
Manually
The charge can be manually processed.
In this example, Evenly Across Invoices was used.

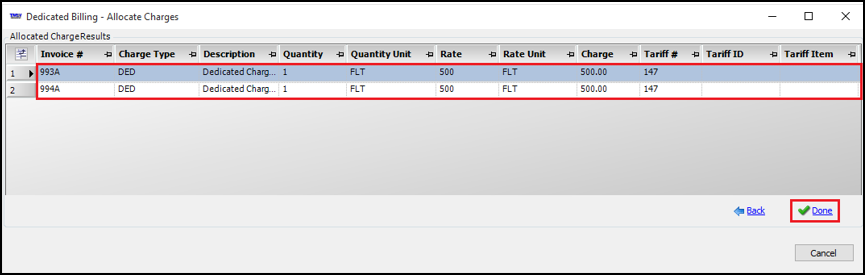
-
-
Review your allocated charge results and click Done.