Mapping a template
Shippers provide RFPs as Microsoft Excel (.xlsx) files. These files detail the lanes and loads on which you will bid. Lane details can include rates, volumes, and other information. The files follow the shipper’s specific format. To standardize different formats, you map the important fields in the template to the corresponding fields in Engage.Bid.
-
Click
 Open Menu and go to Shippers > Bid Import/Export Templates.
The Bid Templates page opens.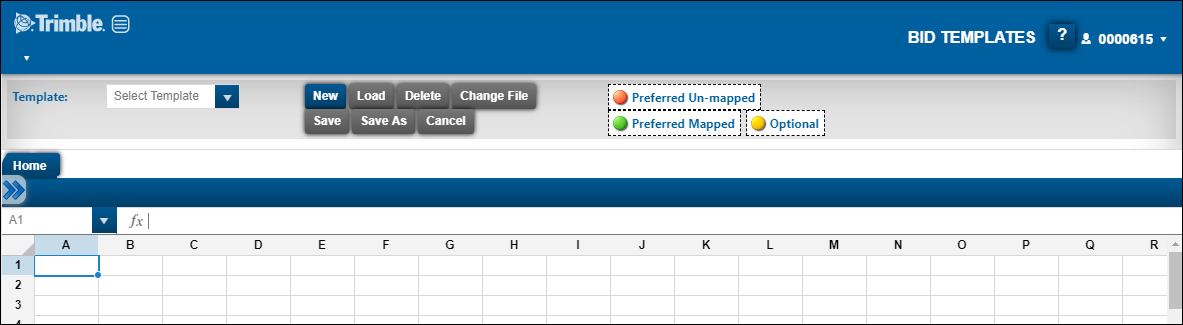
-
Click New.
The Create New Template window opens. -
In the New Template Name field, enter a name for the template.
-
In the Sample Bid Lane File field,
-
Click Select files
-
In the Open window, select the RFP file you want to map to the template.
Note: The file must be in .xlsx format -
Click Open.
The Create New Template window is shown again.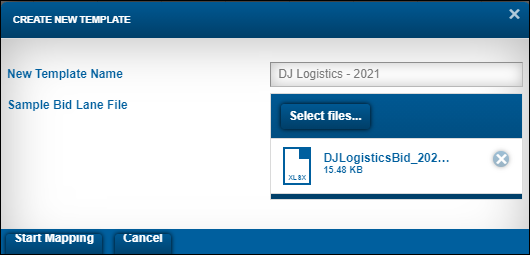
-
-
Click Start Mapping.
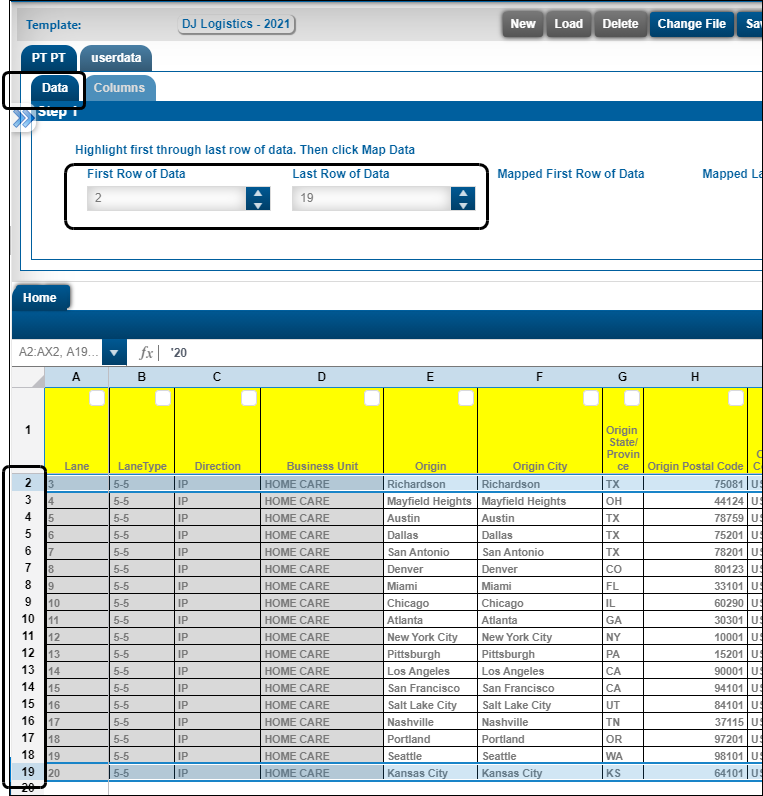
The imported file appears on the Home tab.
Step 1 is shown on the Data tab.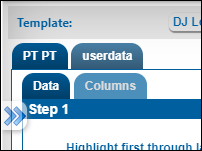
-
On the Data tab, enter the first and last row where lane data appears in the file.
In this illustration, the first lane is in Row 2 and the last lane is in Row 19.
Notes:-
Do not select the header row of the file.
-
Also, you can select the first row and drag down to the last row to make the selection.
-
-
Click Map Data.
-
Click Next.
The page refreshes:-
The top set of tabs represent the sheets in the Excel File.
-
Step 2 is shown on the Columns tab.
-
Each field has a color-coded indicator:
-
Orange indicates a preferred unmapped field.
They are important to the system. It is best that you map them, but not mapping them will not necessarily break the system. -
Green indicates a preferred mapped field.
The fields are already mapped, or a better field has been mapped in their place. If you want, you can map them. -
Yellow indicates an available field.
You can map them, but they are not critical.
These fields allow for more advanced features.
-
-
-
On the Columns tab, do the following:
-
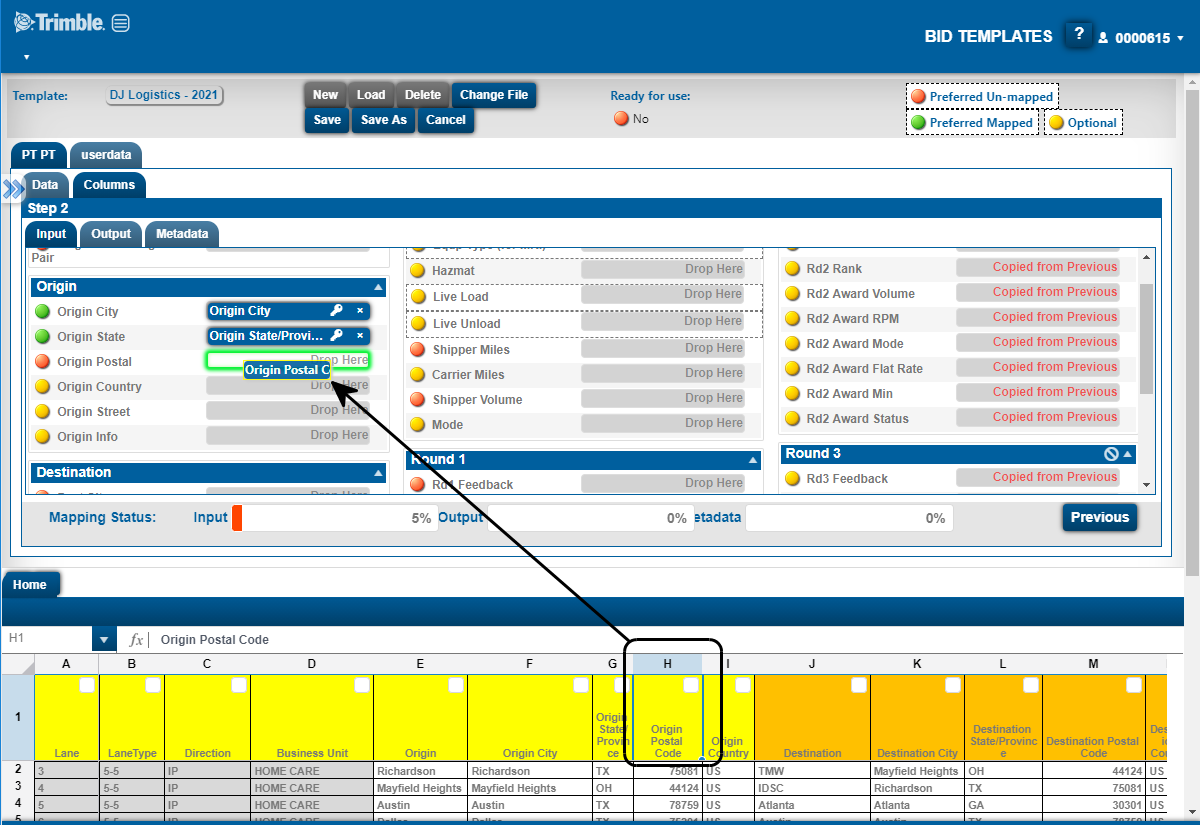
On the Input sub tab, map fields from the source RFP.
You do this by left-clicking the source RFP column heading and dragging it to the corresponding fields. When dragging a heading, be sure the destination field has a green outline before dropping it, as shown in this illustration.Notes:
-
For Market Rate Index (MRI) matching, be sure to map the equipment type.
-
When possible, map 5-digit postal codes.
-
-
On the Output sub tab, map rates and volume data from the lane file.
-
On the Metadata tab, you can map non-standard lane data.
-
-
Click Save when you are done mapping.
A Confirm window opens. Note: The message may state that "The template is not mapped to be ready to use. Do you want to override this value and mark it ready for use?"
You can save a template that is in progress and finish the mapping later. -
Click Yes to continue.
|