Creating and editing shippers
Creating a new shipper
Bids are associated with shippers. So, you must create the shipper record before you can create a bid for the shipper.
-
Click
 Open Menu and go to Shippers > View/Edit Shippers.
The Bid Shippers page opens. Available shippers appear in the grid.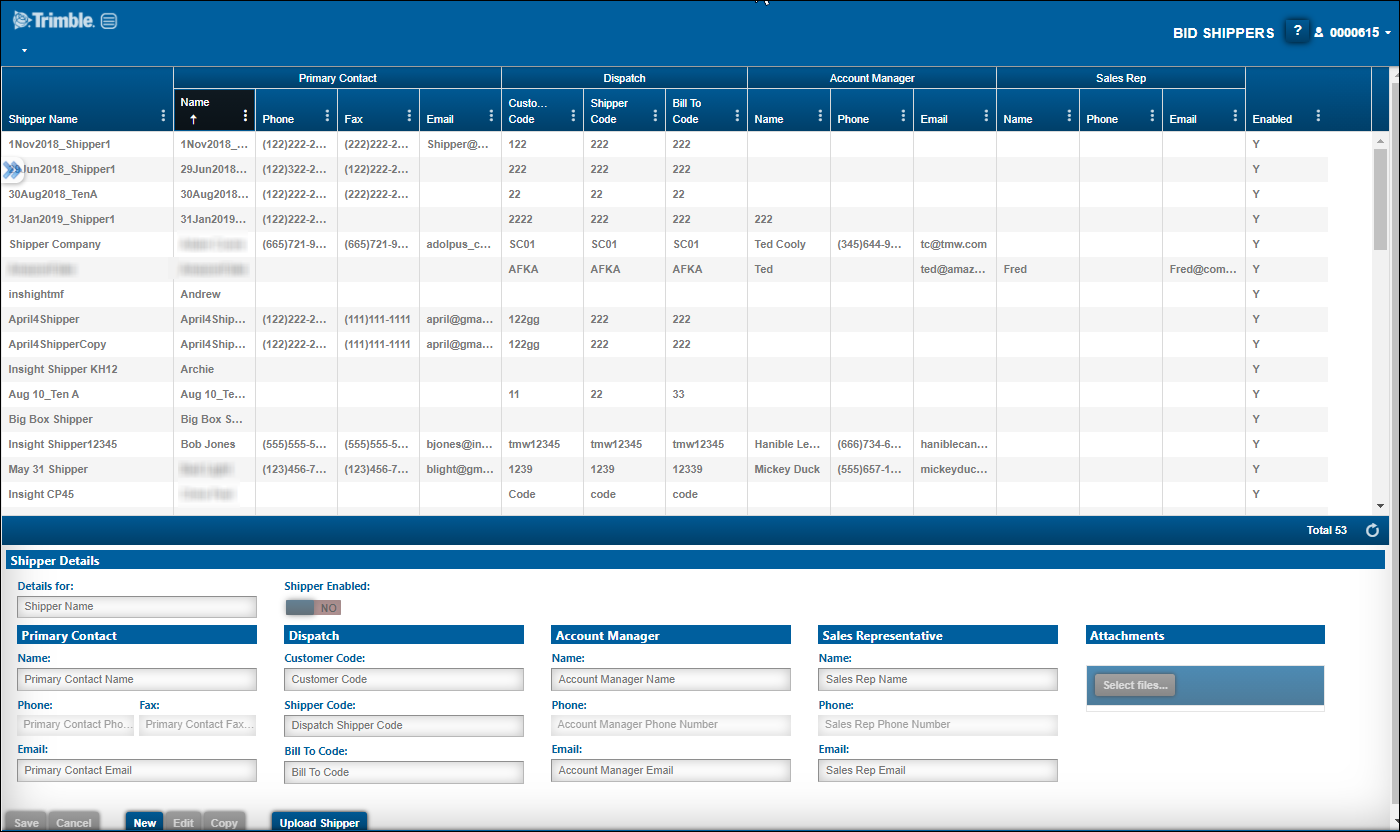
-
In the Shipper Details section, click New.
-
Enter shipper details.
Note: Make entries in as many fields as you feel are relevant. These fields are required:-
Shipper Name
-
Shipper Code
-
Customer Code
-
Bill To Code
-
-
When you are done, click Save.
Once the record is saved, you can attach files or edit shipper details as needed.
|
You can also access the Bid Shippers page by clicking Shippers on the Bid Home page. |
Editing shipper details
To edit shipper information:
-
Click
Open Menu and go to Shippers > View/Edit Shippers.
The Bid Shippers page opens. Available shippers appear in the grid.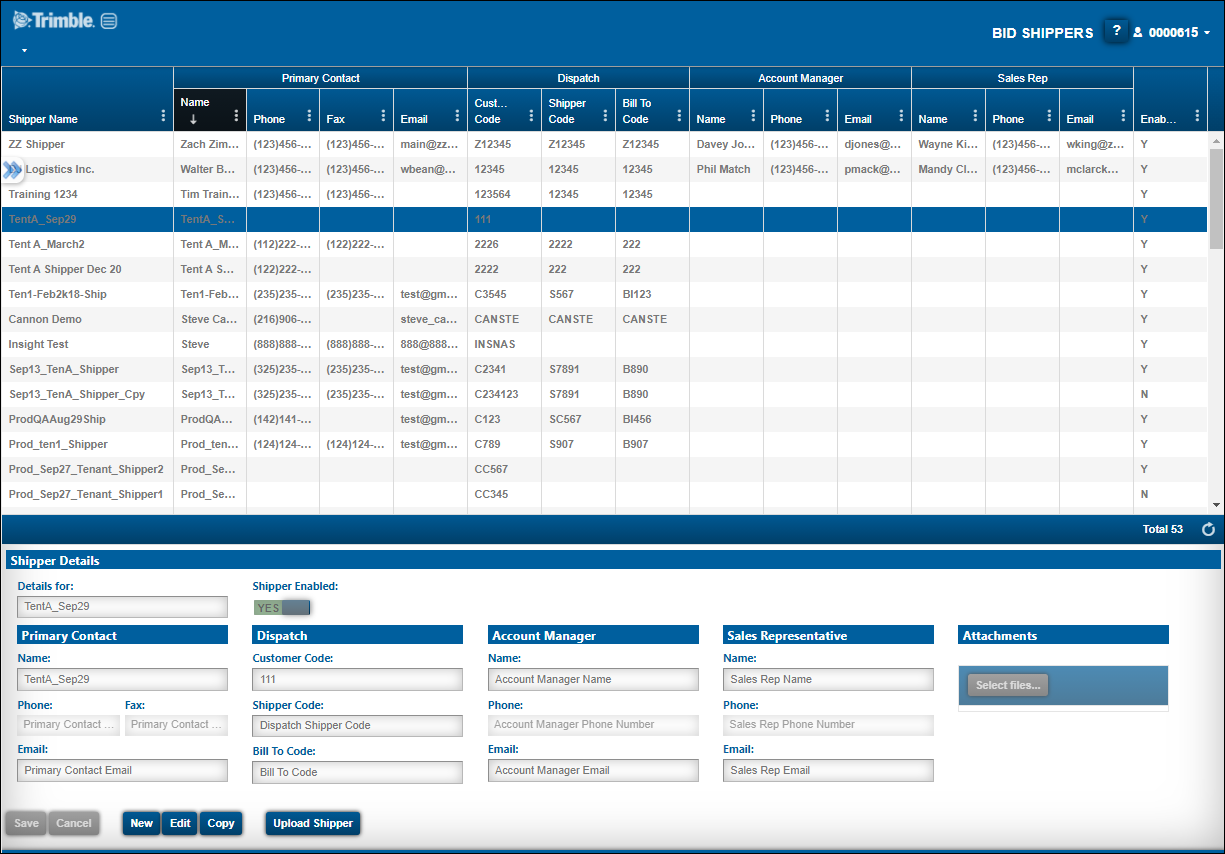
-
In the grid, select the shipper you want to edit.
The shipper’s details appear in the Shipper Details section. -
In the Shipper Details section, click Edit.
-
Make any necessary changes.
-
If you want, attach one or more files.
-
When you are done, click Save.
Using attachments with shippers
You can attach files, such as a letters, contracts, historical data, to the shipper record.
-
Select the shipper you want to edit in the grid.
-
In the Shipper Details section, click Edit.
-
To attach a document:
-
In the Attachments section, click Select files.
-
In the window that opens, go to and select the file(s) you want to attach.
-
Click Open.
The file names appear in the Attachments section.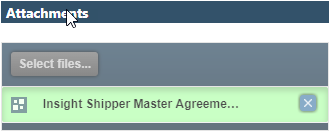
-
-
To view an attached document, click on it in the Attachments section.