Generating table values automatically
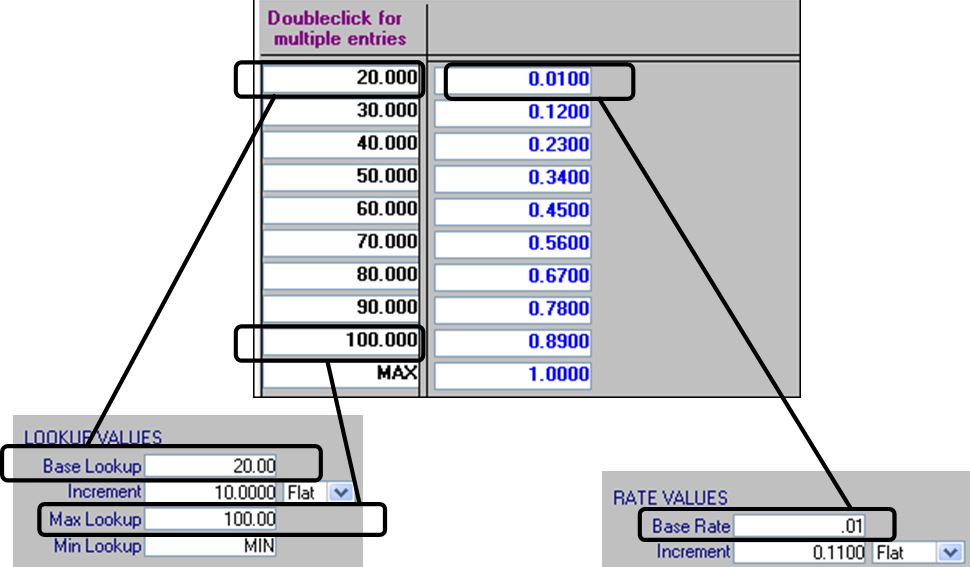
To add ranges and their associated amounts quickly, you can use the Add Table Rows or Add Table Columns windows to automatically generate a rate table. The table must be based on ranges of numeric values, such as distance, weight, volume, average fuel price, etc. In addition, the rates and quantity ranges should increment in equal amounts.
Follow these steps to automatically generate rows and/or columns:
1. If you have not already set up your rate header, make the appropriate selection in the Rows and/or Col’s fields.
Note: For details, see Required entries for a rate table.
2. If the table portion of the Edit Billing Rate Schedule Folder is not already in view, click the Table tab (located under the rate header).
3. To open the Add Table window, do one of the following:
To add a row, click  Add Row in the sheet toolbar, or go to Edit > Add > Row(s)/Index.
Add Row in the sheet toolbar, or go to Edit > Add > Row(s)/Index. To add a column, click  Add Column in the sheet toolbar, or go to Edit > Add > Column(s).
Add Column in the sheet toolbar, or go to Edit > Add > Column(s). 4. Select the . . . or generate check box.
5. Make entries in the fields shown under the LOOKUP VALUES and RATE VALUES headings.
Note: For information about these fields, see:
Add Table Rows window  | Add Table Columns window 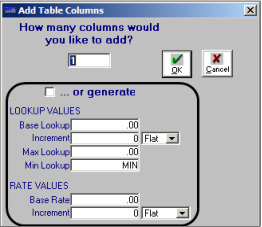 |
6. Click OK.
The system closes the window and generates the table based on your entries.
7. Click  Save in the sheet toolbar, or go to File > Save.
Save in the sheet toolbar, or go to File > Save. 8. If the table is set up to use both rows and columns, repeat Steps 3 - 7.
9. If your table is defined by both rows and columns, some of the cells will probably still be displaying 0.0000 rates. To create rates for those cells, see Completing the generation of rates in a table defined by both rows and columns.