Creating a new WorkCycle activity
WorkCycle is comprised of two components:
-
Windows service
-
Workflow Designer
The designer allows you to build processes that can then be executed by the windows service. In WorkCycle, these processes are called workflows. A workflow consists of one or more activities. This document will help you to build an activity.
Workflow
-
Start and End Activities
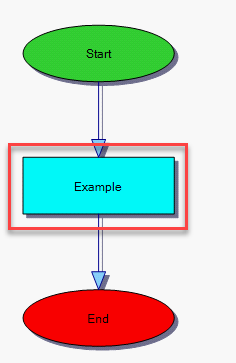
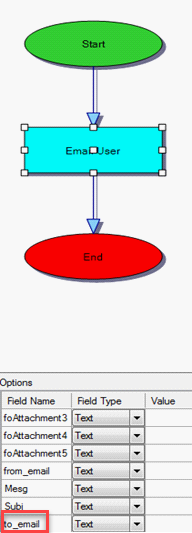
The first and last activities in a Workflow template are the Start and End activities. The Workflow Designer adds them to a workflow template automatically when you drag an activity from one of the activity groups to the canvas. -
Start + Activity + End = Workflow
Workflow Activities Panel 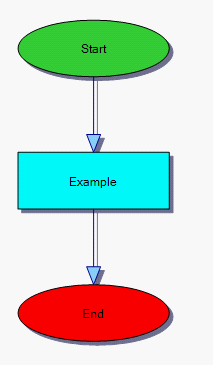
Development Environment
Everything that is needed to create a workflow is explained in this section.
Software Requirements
-
WorkCycle
Installed and running -
Microsoft Visual Studio
Installed and running -
Microsoft Framework
See Installation for versions. -
Visual Basic or C#
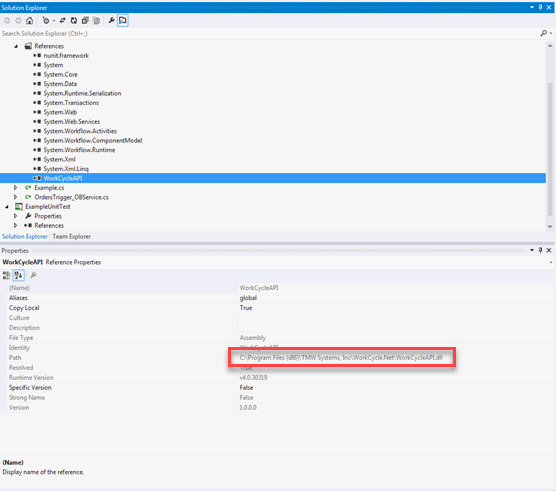
Required References
To create a new activity for WorkCycle, Visual Studio must be set up with the following references.
WorkCycleAPI.dll must be stored in the reference folder in which Activity is stored.
Activity
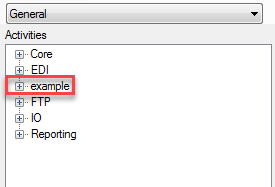
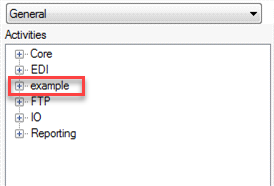
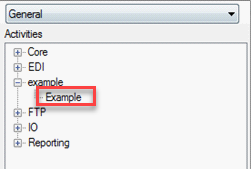
Activities Panel
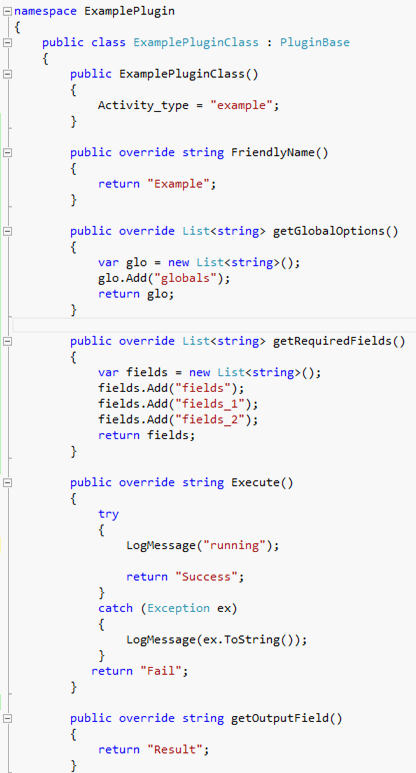
The name of the activity appears in the Activities panel in the Workflow Designer and is defined in the PlugIn as Activity_type.
Activity methods are:
-
Initialize
-
Friendly Name
-
Global Options
-
Required Fields
-
Execute
-
Output Fields
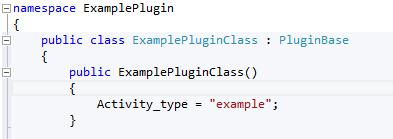
Initialize
-
Part of the class initializer inherited from PluginBase
-
Initialize will include the definition of Activity Type
Friendly Name
-
The actual name of the activity as it is displayed in Activities list in the designer.
-
The FriendlyName defined in the code:
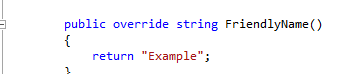
-
The Friendly Name also appears in the Activities drop down. Once the activity is used in a workflow, the activity appears there too.
Activities Panel Workflow 
Global options
Global options are parameters that can be used in more than one activity but the value remains the same.
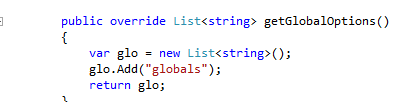
In this example, the IP Address is global and remains the same for all instances of the Email User activity.
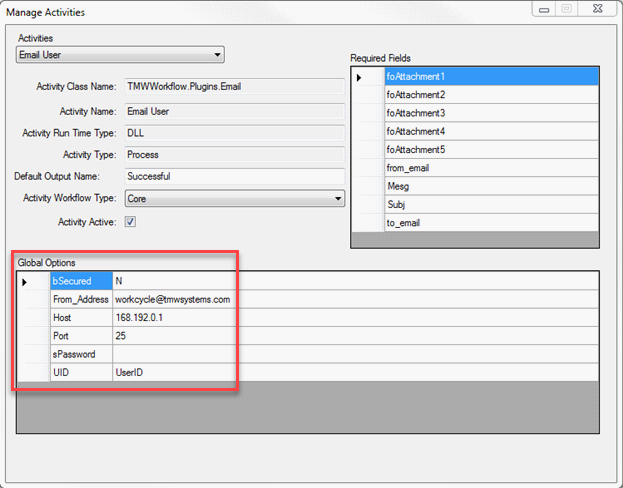
Required Fields
Required fields are parameters that change for each instance of an activity.
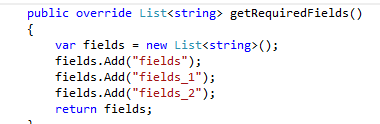
In this example, the 'to_email' parameter is a local variable.
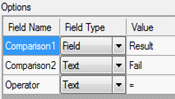
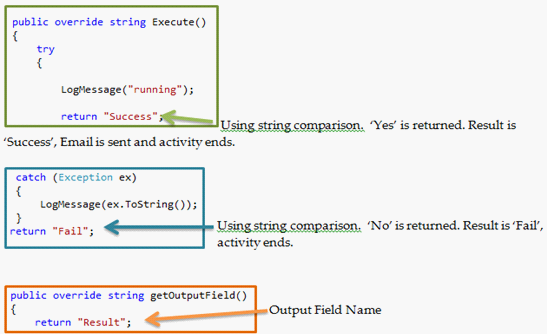
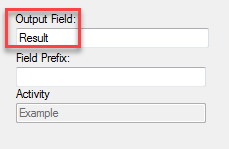
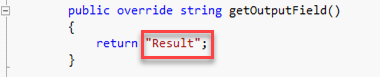
Output Field
-
Field name that contains the return value from your activity.
-
In this example, the Output Field returns Result.
Public Methods
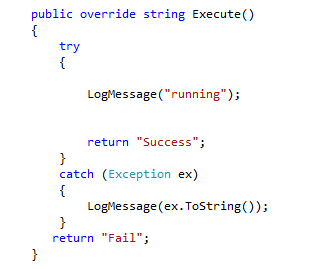
Log Message String
-
Enabling the log
-
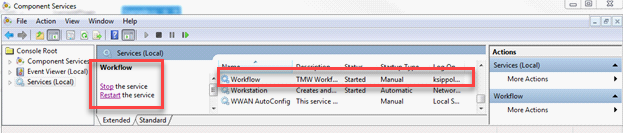
Stop the Workflow service
-
Go to workflow.exe.config
-
C:\Program Files (x86)\TMW Systems, Inc\WorkCycle.Net
-
Workflow.exe.config opens in Microsoft Visual Studio
-
Set log file option to True
-
Restart the Workflow service
Log File Option:

-
-
Location of the log for viewing logged messages
C:\Program Files (x86)\TMW Systems, Inc\WorkCycle.Net\logout.txt
Unit Testing
Create unit tests to execute your activity by adding Microsoft unit test project to your solution.
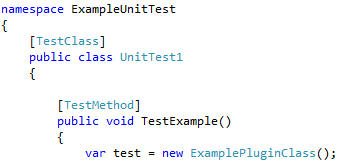

Populates fields added as specified in the options fields (outlined above).
![]()
tells Workcycle what to use
![]()
Runs the test
Test and Run Activity
-
Stop the workflow service.
-
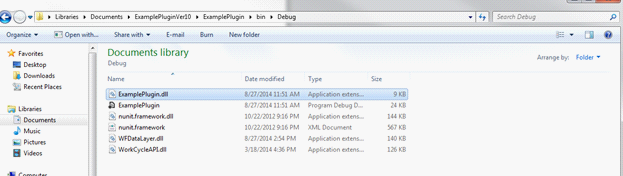
Update the PlugIn DLL.
-
Copy the updated DLL from this location.
-
Paste the updated DLL in this location.

-
Restart the workflow service.
-
-
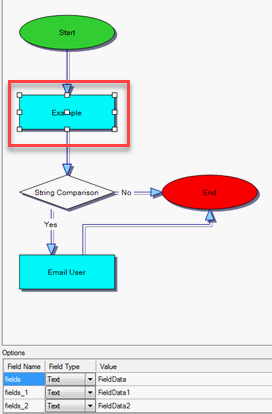
New Activity will appear in the Activities Panel in the Workflow Designer.
-
Create a workflow using the new Plugin (Activity).
-
Create a workflow using the new Plugin (Activity).
-
-
Drag the Activity to the canvas.