Workflow Designer screen features
The Workflow Designer is used to combine and arrange activities into workflow templates. The Designer uses an interactive, graphical interface that allows activities to be added, moved, and resized through simple drag-and-drop manipulation. An activity’s output(s) can be routed to other activities in a similar fashion.
WorkCycle user interface (Workflow Designer)
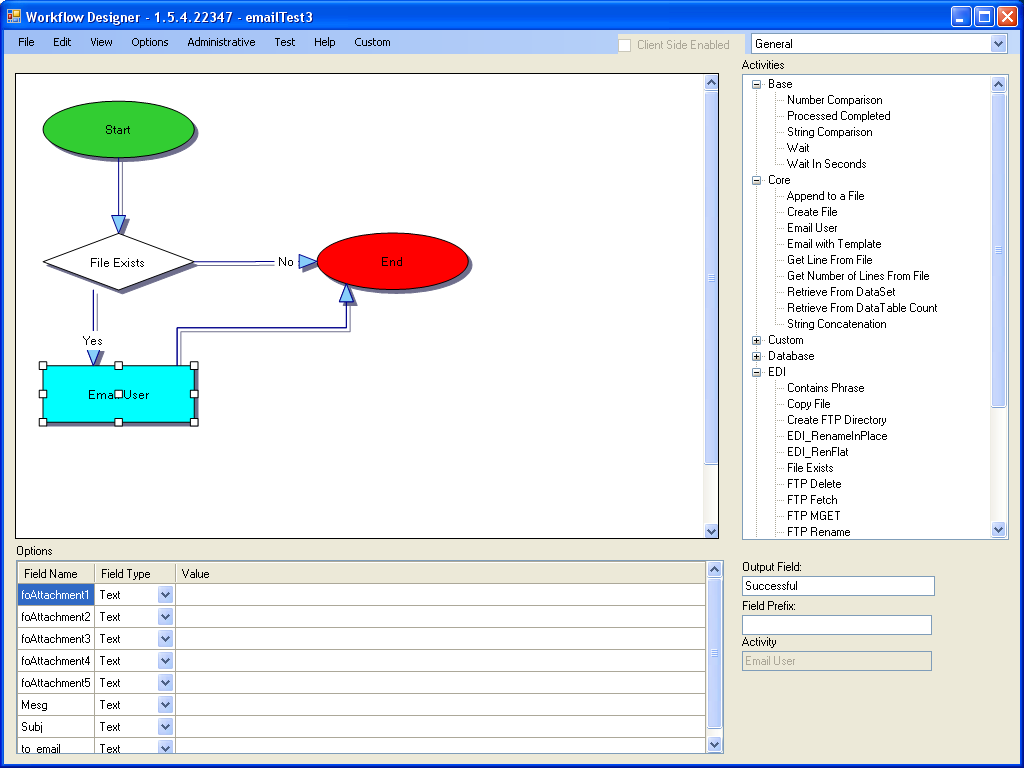
| The appearance of the Workflow Designer depends on the WorkCycle version and configuration. Your Workflow Designer can differ slightly from this illustration. |
Main areas of the Workflow Designer include:
Canvas
The Canvas area is the workspace where you assemble activities into workflow templates. To start building a workflow template, drag an activity from the Activity panel to the Canvas area. To insert an activity into a displayed workflow template, drag the activity to the Canvas area and drop it over a connecting line in the workflow.
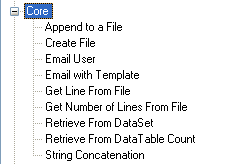
Activities
The Activities panel displays a list of available activity groups and the activities within each group. To expand or collapse a group, click the ![]() or
or ![]() button next to the group name.
button next to the group name.
|
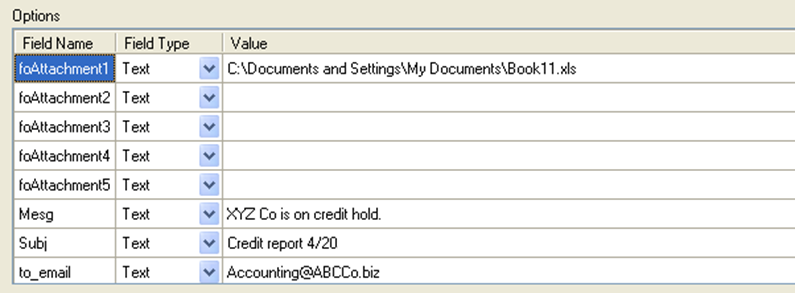
Options
When you click an activity in the Canvas area, the Options panel displays the activity’s required parameters, if any, and their current values. This example shows the options and some values for the Email User activity:
-
If you set the Field Type to Text, you can enter a string in the Value field. Alternately, a window might open where you browse to a file or folder.
-
If you set the Field Type to Field, you select the Value field from a list of available output field names from other activities.
Required parameters vary for different activities. The values for a given parameter can be set differently in different workflow templates. If the activity is used more than once in a workflow template, each instance can have unique required parameter settings.
Output
The Output panel displays information about the output of the currently selected activity.

-
The Output Field displays the activity’s default output name. For some activities, you can modify this string; the new value applies only to the instance of the activity where you make the change.
-
The Field-Prefix field is used to enter a string that will be added to the beginning of an activity’s output name. This field can be blank but editable, or empty and read-only.
-
The name of the activity is shown in the Activity field. This field is read-only.
Menus and commands
The following tables list WorkCycle’s menus and commands. Commands marked as Reserved might be absent from your version of WorkCycle.
| Italicized commands, if present, are reserved for future use. |
File menu
| Command/Subcommand | Function | Shortcut Key |
|---|---|---|
New |
Clears the Canvas area and makes the Designer ready for creation of another workflow template. |
CTRL+N |
New Client Side Workflow |
Reserved |
|
New Client Side Event |
Reserved |
|
Open |
Opens the Workflow window, which provides a list of available workflow templates. |
CTRL+O |
Delete |
Removes the workflow template displayed on the screen from the list of available templates. When you select Delete, a message requests confirmation. If you select Yes, the workflow template is erased and will no longer be available. |
CTRL+D |
Export Image |
Opens the Save As… window, where you can save a graphic image of the Workflow template in one of several popular common file formats. |
|
Connection |
Opens a sub menu that allows you to view the current server and database connection, or to select a new database connection. Note: The database connections must already exist. You can create database connections using the Manage Connections window, which can be accessed by selecting Options > Manage Connections. |
|
Connection > Connections |
Reserved |
|
Connection > Current Connection |
Shows the server and database to which the Workflow Designer is currently connected. Note: If you have multiple database connections, those connections are displayed above or below the current connection. You can change connections by choosing a new connection from the list. |
|
Connection > connection_name(s) |
Multiple database connections are listed in this sub-menu by connection name, for example, Default, MyDb, Test, etc. To change the database connection, select the desired name. |
|
Save |
Saves the currently displayed workflow template. |
CTRL+S |
Save As… |
Opens the Save As… window, where you can save the currently displayed workflow template under a different name. |
|
Import |
Loads an exported (.XML) workflow that was saved by another user. Note: The workflow itself retains the original name under which it was saved, regardless of the .XML filename. When you attempt to import the .XML file, the original workflow name cannot already exist among your saved workflows. |
|
Export |
Saves the currently displayed workflow template as an .XML file that can be loaded by another user. Note: The workflow itself retains the original name under which it was saved, regardless of the name you assign during export. When the file is imported, the original workflow name cannot already exist among the user’s saved workflows. |
|
Exit |
Quits the Workflow Designer. |
Edit menu
| Command/Subcommand | Function | Shortcut Key |
|---|---|---|
Undo |
Rolls back the last operation performed on the Canvas area. |
CTRL+Z |
Redo |
Re-applies the last rolled-back operation. |
CTRL+Y |
Properties |
Reserved. |
View menu
| Command/Subcommand | Function | Shortcut Key |
|---|---|---|
Refresh Layout |
Rearranges and redraws the currently displayed Workflow template. |
|
Zoom > Zoom In |
Magnifies the size of the currently displayed Workflow template. |
CTRL + |
Zoom > Zoom Out |
Reduces the size of the currently displayed Workflow template. |
CTRL + - |
Zoom > Zoom to Fit |
Magnifies or reduces the size of the currently displayed Workflow template to fit the Designer Canvas. |
|
Activities |
Hides and displays the Activities panel at the right of the Canvas. Selecting this option sets a check box next to the option. Selecting it again clears the check box. |
|
Options |
Hides and displays the Options and Output panels at the bottom of the Designer window. Selecting this option sets a check box next to the option. Selecting it again clears the check box. |
Options menu
| Command/Subcommand | Function |
|---|---|
Refresh Plugins |
If you modify available plugins in the WorkCycle.NET\Plugins folder, clicking the Refresh Plugins command will reload the plugins. |
Manage Connections |
Opens the Manage Connections window, which lets you define a new connection to a server and database, or modify or delete an existing database connection. |
Manage Activities |
Opens the Manage Activities window, which lets you define global parameters for an activity. Note: Global parameters are used only by some activities. |
Manage Workflow Launching |
Opens the WorkflowLaunching window, which lets you define and update parameters for WorkCycle’s File Monitor and Workflow Timer service functions. |
Create Activity from this Workflow |
Reserved. |
Add Database Connection as Activity |
Opens the Manage Connections window, which lets you define a database connection as an activity. The new activity will be added to the Activities list under the Database group. |
Load Client Side Library |
Reserved. |
Use Full Path on Load |
Reserved. |
Query Builder |
Opens the QueryBuilder window, which lets you define an activity as a SQL query. The new activity is added to the Activities list under the SQL Query group. |
Edit Scripts |
Allows Python Scripts to be created, modified, or imported. This is an advanced topic. |
EDI Transaction Table |
Reserved. |
View Stats |
Displays the Stats window, which contains metrics for the running workflows. |
Manage Task Templates |
Displays a window containing setup parameters for the tasking system. |
Administrative menu
| Command/Subcommand | Function |
|---|---|
Manage Server Connection |
Used to change the database connection on a local server installation. |
Delete Workflow Data |
Deletes workflow data between user-specified dates. This is the data associated with a workflow. Once a workflow has run, the data is no longer needed and can be purged. Note: Do not attempt to clear WorkCycle data while the Workflow service is running. |
Test menu
| Command/Subcommand | Function |
|---|---|
Run |
Opens the Run Workflow window, where you can enter a value to be passed to the workflow template’s Start activity. You can then step through execution of the workflow. |
Run Unattended |
Opens the Run Workflow window, where you can enter a value to be passed to the workflow template’s Start activity. When you launch the workflow, the workflow completes automatically. |
Run now on server |
Inserts a record into the workflow table and starts the current workflow. |
Run remote |
Executes a Workflow via Windows Communication Foundation (WCF) on the server, rather than on your local machine. |