AutoPlan Overview
First available in Fuel Dispatch: V.2024.2
The AutoPlan feature lets you assign multiple orders to your preset default carriers in the Planning Worksheet. It can check the planned orders for changes to the Retain Date and will automatically assign the order’s default carrier to the Available (AVL) orders.
AutoPlan Setup
Before you can use AutoPlan, you must set the General Info Table AutoPlan setting to Y in the TMWSuite System Administration application. This enables the AutoPlan functionality in the Planning Worksheet. The setting also lets you set and adjust the Start Time, End Time, Hours back prior to Start Date and Hours out past End Date. Once the AutoPlan setting has been set, you can proceed.
Commodity Setup
To select the products you would like to include for AutoPlan, in Fuel Dispatch:
-
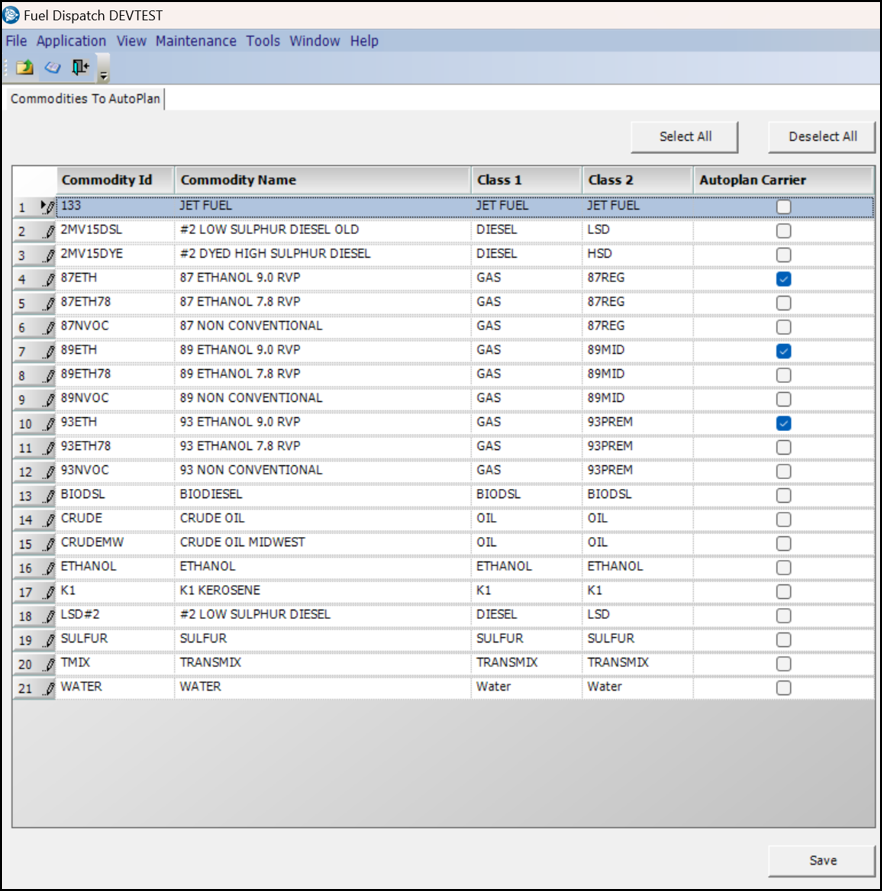
Go to Maintenance > Commodity AutoPlan Maintenance
The Commodities to AutoPlan window opens.
-
Select the checkbox under the Autoplan Carrier column to choose the product you would like to be used for AutoPlan.
-
Select Save.
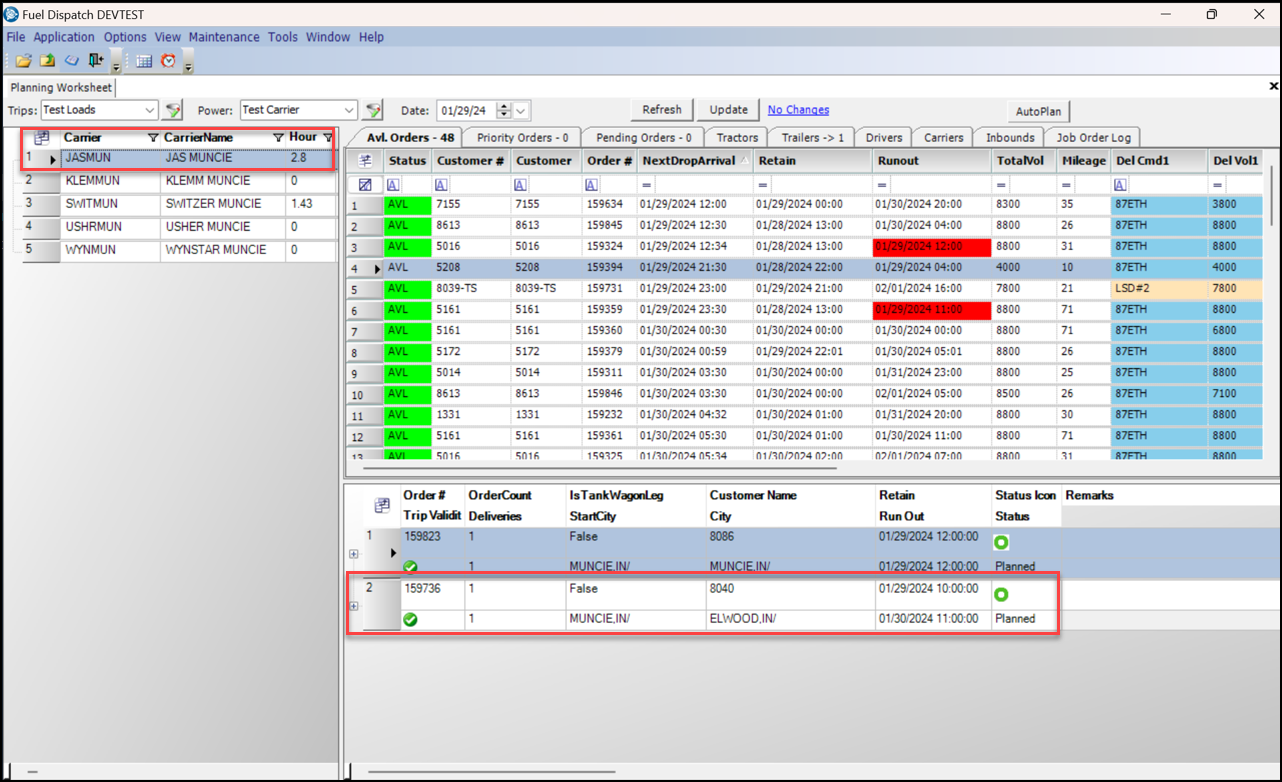
Using AutoPlan in the Planning Worksheet
After completing the initial setup, you can use the Planning Worksheet with the AutoPlan feature to plan orders.
-
Go to Application > Planning Worksheet
-
Select a group of AVL orders
You can select multiple orders at once. -
Select the AutoPlan button, located in the top right header
The AutoPlan window opens.
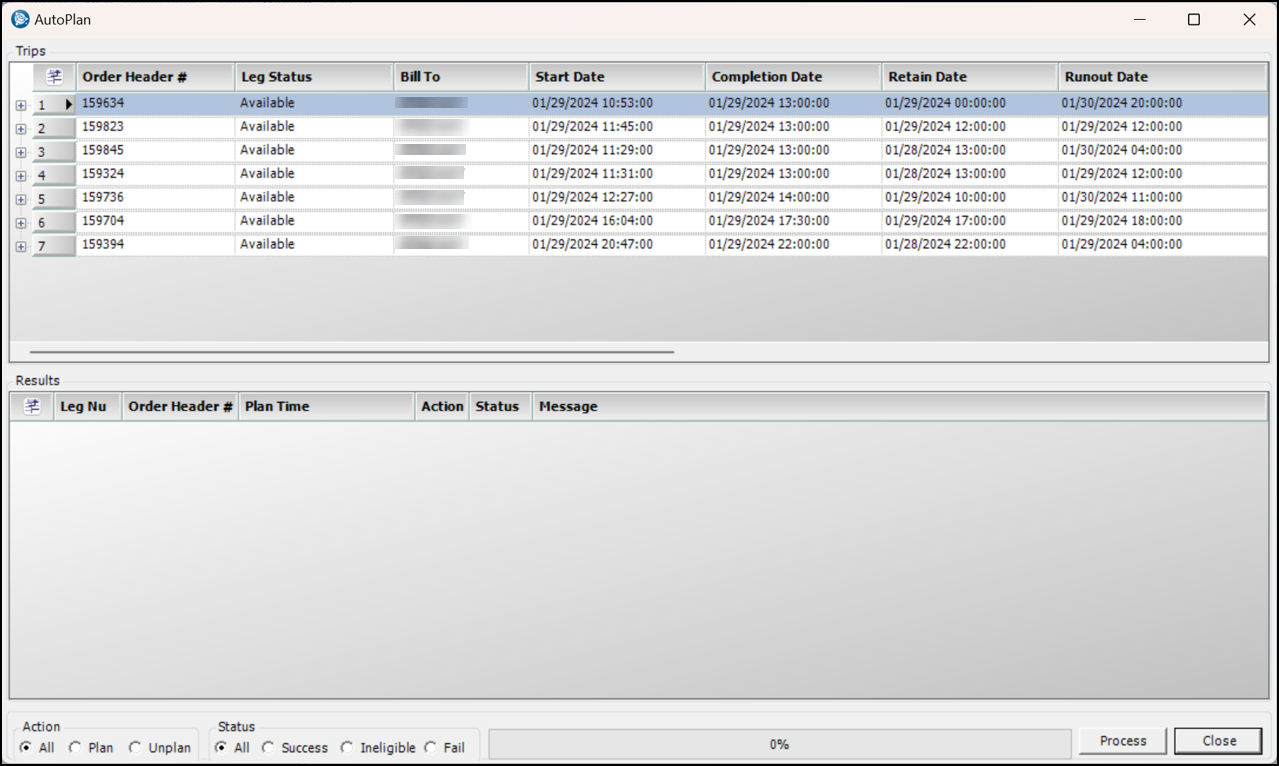
The orders that you selected will display in the Trips header.
-
Click the Process button.
The order results will display in the Results section of the window.
Note: You can filter your results with the Action and Status radio button options at the bottom of the window.
-
After reviewing your results, click the Close button.
-
The orders processed will be planned on the eligible carrier(s) on the Planning Worksheet.
Reviewing AutoPlan results
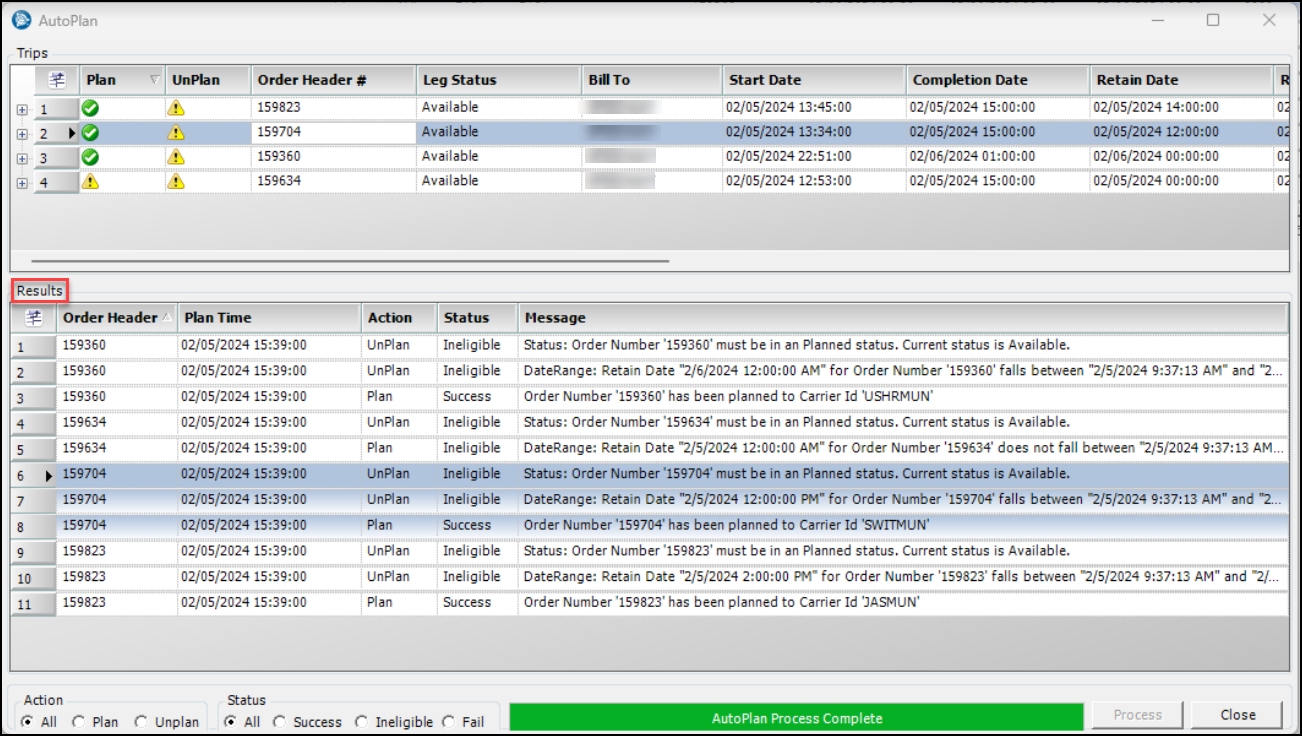
When you process AutoPlan orders, the AutoPlan window displays the results in the Trips header and in the Results section of the window.
The following icons will display in the Trips header:
-
A green checkmark

-
A caution icon

When you select one of the records in the Trips header, all rows related to the Order Header # will highlight in the Results section. You can review and verify if the order is planned successfully and eligible in the Action, Status and Message columns.
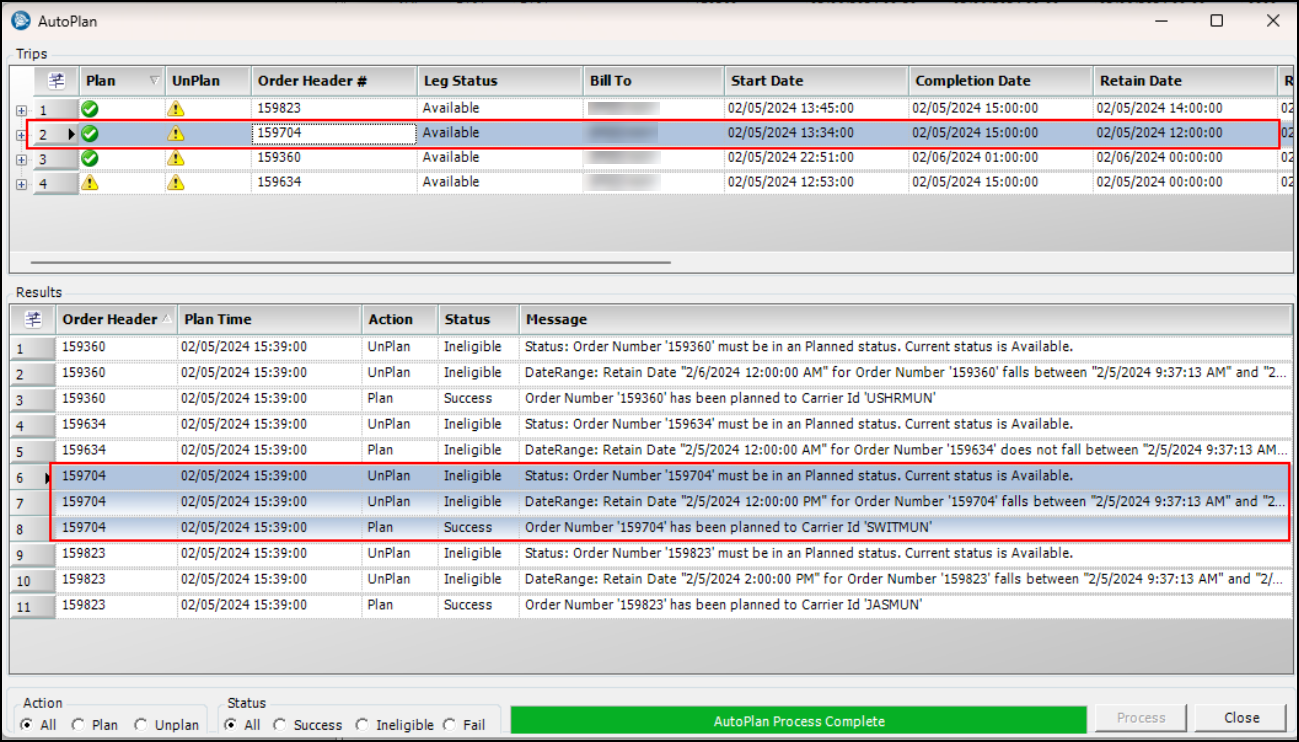
| Use the Action and Status radio button options at the bottom of the window to help filter your results. |