Working with pay details
The Pay Details window in Call On Demand Order Entry allows you to:
-
Create pay for resources assigned to a trip
-
View pay associated with a trip
-
Delete pay associated with a trip
You can add, insert or delete pay details. Sum values for compensation, reimbursements, and deductions appear in the Totals section of the window.
Adding pay details
Use this procedure to add pay details in Call On Demand Order Entry.
-
Go to Application > Call On Demand Order Entry.
-
Create a new order or retrieve an existing order.
-
If needed, assign resources and click Save.
-
Go to Dispatch > Edit Pay Details.
The Pay Details window opens.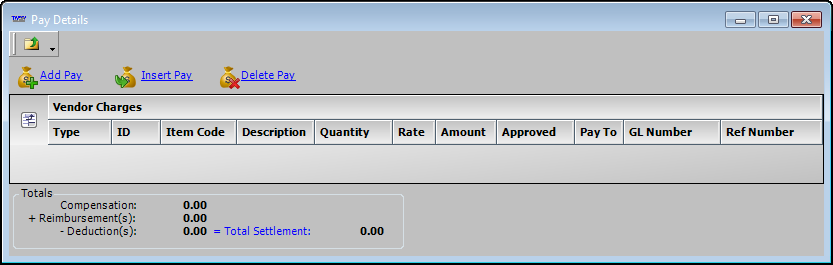
-
Enter pay details.
Use the pay detail icons to add or insert pay details in the Vendor Charges grid.
Adds a new pay detail row to the grid or below the last row in the grid
Inserts a new pay detail row between existing rows in the grid
-
Make entries in the fields as needed.
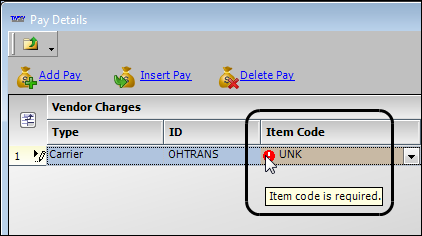
Note: The
 Required Entry indicator appears in fields where you must enter data.
-
You cannot save the pay detail until you make an acceptable entry in the field.
-
When you rest the cursor over the icon, a ToolTip displays related information about the requirement.
-
Required field: *
Type |
Select the asset type that represents the resource to which the pay detail applies. |
ID * |
Enter the ID of the resource to which the pay detail applies. |
Item Code * |
Select the item code ID assigned to the pay type. |
Description |
The system provides the description recorded for the pay type in the Settlement Item Maintenance window. Warning: If you select a pay type in the Item Code field and then change your selection, the Description field is not updated to reflect the new pay type. To keep your item code and description in sync, you should delete the pay detail and start over. |
Quantity |
Enter the number of units on which to apply the rate. For example if you want to pay by the mile, add the mile count as the quantity. For flat rates, enter the number 1. |
Rate |
Enter the dollar per unit amount on which to calculate pay. For example, if you want to pay a driver 75 cents per mile, enter $0.75 for the rate. |
Amount |
The system automatically multiplies the Quantity times the Rate and displays the total here. |
Approved |
checkbox to indicate approval of the pay detail |
Pay To |
Enter the ID of the Pay To entity to receive payment. Note: A Pay To is a third party that receives payment for providing resources to haul freight. The resources may include drivers or equipment, such as tractors and trailers. A Pay To is also referred to as an owner/operator. |
GL Number |
Free-form field for entering a general ledger number |
Ref Number |
Free-form field for entering a reference number |
-
When you are finished, review your entries before closing the window.
-
Save the order. If you do not, the pay details are not saved.
Note: When you try to close the order before saving, a message appears asking if you want to save your changes.
Viewing pay information
Use this procedure to view pay details associated with an order.
-
Go to Application > Call On Demand Order Entry.
-
Retrieve the needed order.
-
Go to Dispatch > Edit Pay Details.
The Pay Details window opens.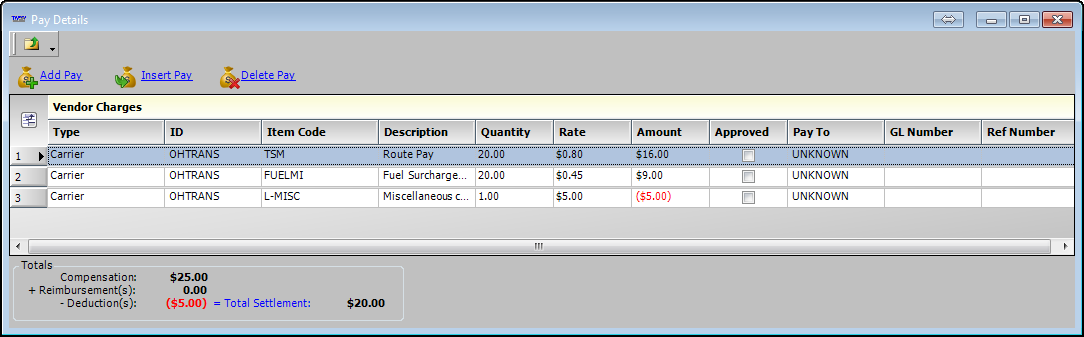
-
View pay details for a trip.
The Pay Details window includes the Vendor Charges grid and Totals section.
-
The Vendor Charges grid lists pay details for resources assigned to the trip.
-
The Totals section shows the full amount of pay recorded for the resource(s) performing the trip. The information appears in an itemized list format.
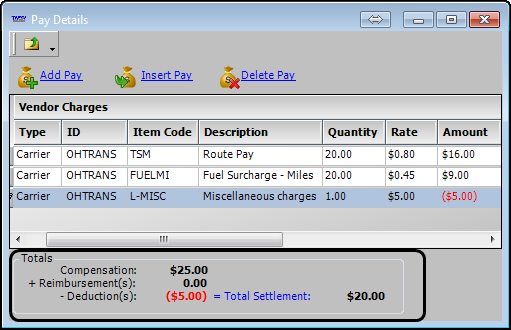
Compensation
Total line haul pay calculated for all trip segments
Reimbursement(s)
Total dollar amount due the resource(s) for out-of-pocket expenditures they covered while performing the trip
Deduction(s)
Total dollar amount that will be subtracted from the resources' trip pay
-
-
When you are finished viewing pay details, close the window.
Deleting pay details
There may be times that you must delete a pay detail. For example, the pay may have been recorded for the wrong asset.
Use this procedure to delete pay details associated with an order.
-
Go to Application > Call On Demand Order Entry.
-
Retrieve the needed order.
-
Go to Dispatch > Edit Pay Details.
The Pay Details window opens.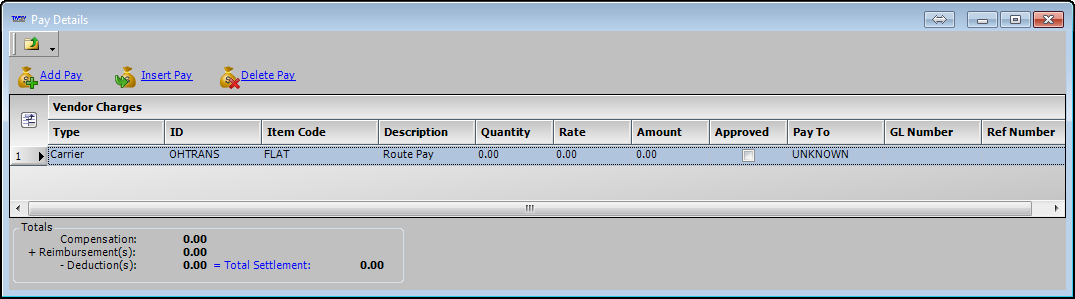
-
Click the pay detail row that you want to delete.
-
Click the Delete Pay icon to remove the pay detail row from the Vendor Charges grid.
The Delete Confirmation window opens.
-
Click Yes to delete the pay detail row.
-
Save the order. If you do not, the pay details are not deleted.
Note: When you try to close the order before saving, a message appears asking if you want to save your changes.