Adding a restriction field to a scroll window
If the default view for a scroll window does not provide a restriction field that you need, you can add it. This procedure illustrates how you could add a restriction field to the Order Scroll window that allows the user to retrieve orders according to the entry in the TrlType1 field on the order header.
Adding the field to a scroll view with SQL
-
Open the appropriate scroll view.
-
Add the following to the
selectstatement of the view:orderheader.trl_type1 as 'Trl_Type1',`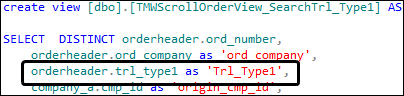
Since the trl_type1 column already exists in the orderheader table, it is a simple addition.
| Now that the scroll view can retrieve this column of data, you can add a restriction field using Quick Designer. For more information, see Adding the field to the scroll window with Quick Designer. |
Adding the field to the scroll window with Quick Designer
When you add fields to a SQL view, those fields become available for you to add to the window layout. This is done through the Quick Designer. The basic process is as follows:
-
In Board Setup select the newly added columns to be available for the board view.
-
Use Quick Designer to add the new columns to the appropriate scroll window.
-
Make the column available:
-
Go to File > Board Setup.
-
In the Board Type field, select the view to which you added new column(s) with SQL.
Note: If you did not add new columns of data for retrieval to the board view, see the section Adding the field to a scroll view with SQL.
-
Select the appropriate user group.
-
On the right, select the appropriate board view.
-
Click Edit.
The Board Definition window opens. -
Click Change View.
The Create/Edit Board Definitions window opens. -
In the View Name field, select the appropriate view.
Note: You will only have multiple views listed if you used SQL to create nested views. -
Click Edit Columns.
The View Editor window opens. -
Select the checkbox next to the new columns that you had added.
For example, if you added trl_type1 to the TMWScrollOrderView, then select the checkbox next to trl_type1. -
Close the View Editor window.
-
Click OK in the Create/Edit Board Definitions window.
-
Click OK in the Board Definition window.
-
In the bottom right-hand corner of the Board Setup window, click Save.
-
-
Add the restriction field to the window:
-
Open the appropriate scroll window.
-
Load the window layout that needs to include the new restriction field.
-
Follow the steps in Adding fields to a window to add the restriction field to, for example, the Assets tab of the Order Scroll window.
-
Select Add New Item > Standard tab.
Note: The Add New Item window contains objects appropriate for the window you are modifying. The fields you added to the view are included in the list in the lower-right portion of the window.
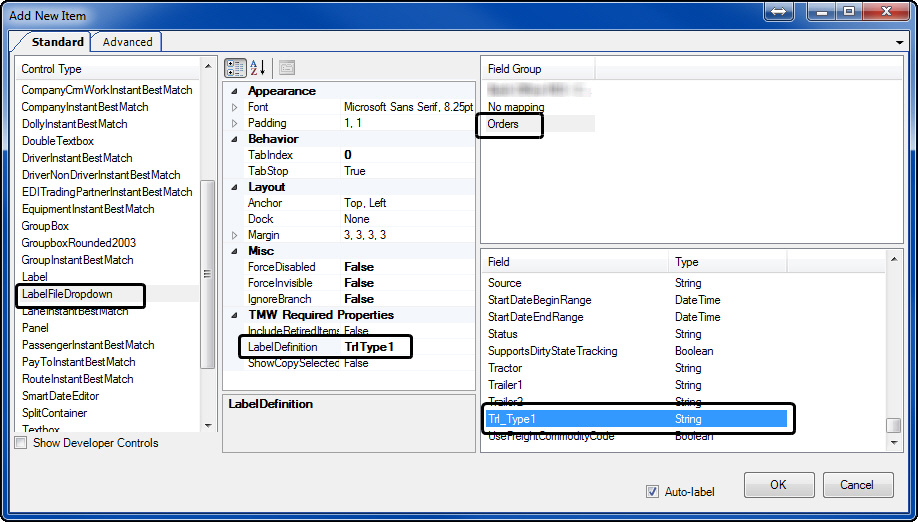
The following mappings were used for our example and selected in this order:
-
Control Type: LabelFileDropdown
-
TMW Required Properties: In the LabelDefinition field, TrlType1 was selected.
-
Field Group: Orders
-
Field / Type: The TrlType1 field is identified as Trl_Type1. This is because when we added the column to the view in SQL Server, we used As in our Select statement. This gave the field a new name.
-
-
Select the Auto-label checkbox.
-
Click OK.
-
Toggle out of Quick Designer.
The new restriction field is added to the layout.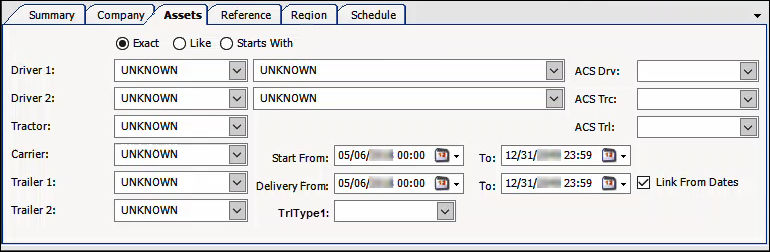
-
After you add the data field and label to the window, you must save the layout and assign it to users.
-
-
Attaching the saved layout to the view
Now that the layout is saved, you must attach the saved layout to the scroll view definition.
-
Go to File > Board Setup.
-
From the user groups grid, select the group or user that has access to this view.
-
From the list, select the view to modify.
-
Click Edit.
The Board Definition window opens. -
Click Change View.
The Create/Edit Board Definitions window opens.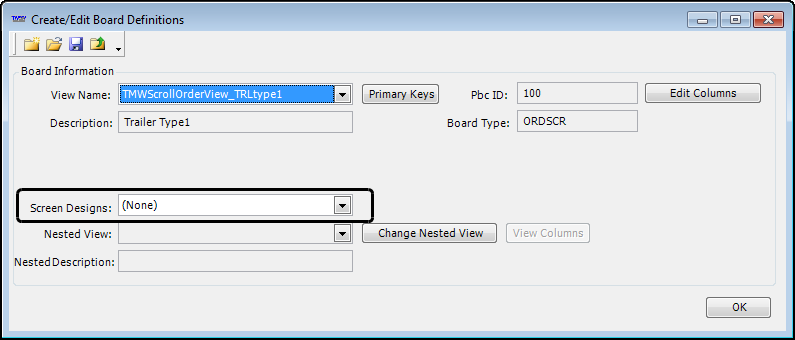
-
In the Screen Designs field, select the layout.
-
When finished, save the changes.
-
On the Create/Edit Board Definition window, click OK.
-
On the Board Definition window, click OK.
-
On the Board Setup window, click Save, and then OK.
-
The board is automatically assigned to all users. If you want, restrict access to the view.