Photos or attachments
If your company wants you to capture photos or attach photos, they will set up their TotalMail forms to include the Photo button and/or the Attachment button.
These buttons may appear when you:
-
Reply to a trip-based message
-
Open a form that has this button
-
Update a schedule using the Schedules screen
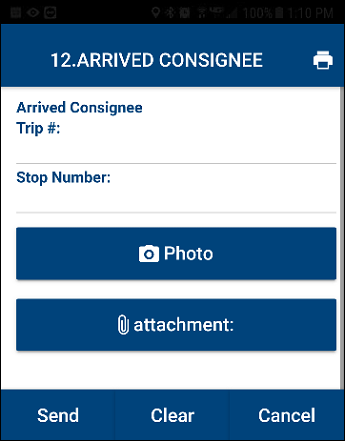
This illustration shows a form with the Photo button and the attachment button.
Take a photo
To take photos:
-
Tap Photo.
The device’s default camera app opens.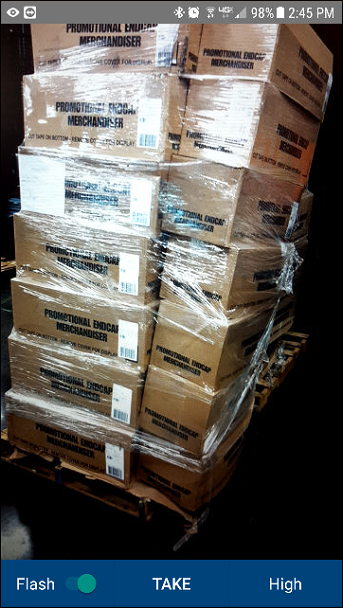
Note: This screen may look different based on your device and camera app.
-
If needed, toggle the Flash option on or off.
-
Specify the image resolution.
-
In the lower-right corner of the screen, tap the Resolution field.
The resolution menu appears.Note: This field displays the last resolution used. Options are Low, Medium, and High.
-
Tap the resolution.
-
-
Tap TAKE.
The captured photo is displayed under the Photo button.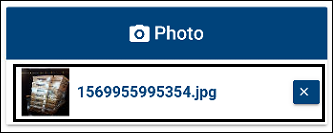
-
If needed, do one of the following:
-
View the photo.
When you tap on the photo’s thumbnail, the Preview screen opens. To close the Preview screen, tap Close.
-
Remove the photo.
Tap
 next to the photo that you want to remove.
 -
Take additional photos.
Follow Steps 1-4 as needed.
-
Attaching photos
To attach photos:
-
Tap Attachment.
The device’s default file maintenance app opens. -
Search for the photo that you want to attach.
-
Tap the photo.
The photo is displayed under the Attachment button.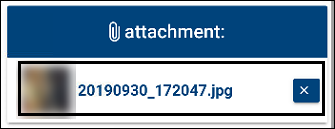
-
If needed, do one of the following:
-
View the photo.
When you tap on the photo’s thumbnail, the Preview screen opens. To close the Preview screen, tap Close.
-
Remove the photo.
Tap
next to the photo that you want to remove. -
Take additional photos.
Follow Steps 1-3 as needed.
-