Validating tank setup data
For the Forecaster to accurately predict when a store needs product and how much to deliver, it must have access to good tank data. Each tank’s properties, such as its commodity, size, and safe fill, are part of the Forecaster’s calculations. Using the Tank Data Validation window, you can enter basic parameters that apply to all tanks and compare them with your tank records. The window shows any errors that result from the validation process. You can also view your tank setup data and export it to an Excel spreadsheet.
To open the Tank Data Validation window, go to Maintenance > Tank Data Validation.
The Tank Data Validation window includes two tabs:
Setting up tank verification
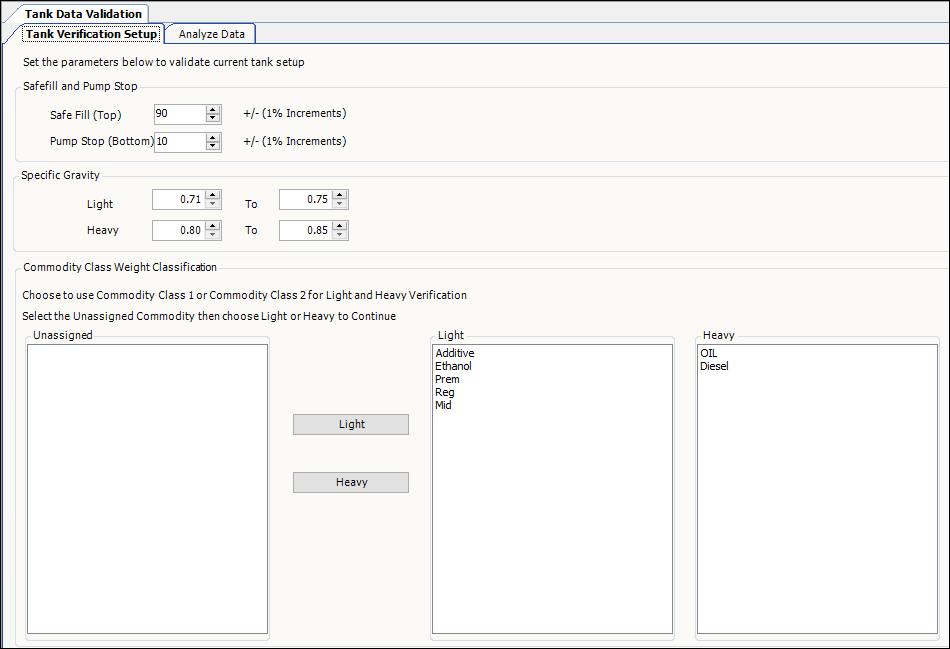
Use the Tank Verification Setup tab to enter basic parameters that apply to all tanks and compare them with your tank records.
Defining safe fill and pump stop percentages
Use this section to define Safe Fill and Pump Stop percentages. This illustration shows the default and recommended field values for this section.
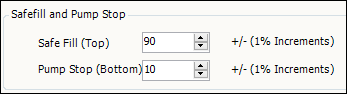
Safe Fill (Top) |
The difference between the tank size and the volume it can safely hold, while allowing for product expansion Exceeding the safe fill percentage of the tank allows overfilling the tank, which can cause a spill.
|
Pump Stop (Bottom) |
The volume where the tank can no longer syphon product to the pumps for resale
This volume is usually between 7% and 10% of the tank size. |
Identifying specific gravity ranges
Use this section to define Light and Heavy commodity weight ranges. This illustration shows the default and recommended field values for this section.

Specific gravity is the ratio of the density of a substance to the density of another substance taken as the standard. For example, you could use water as the standard for liquids and solids, and hydrogen or air as the standard for gases.
Light |
Unit of measure is gallons |
Heavy |
Unit of measure is gallons |
Classifying commodity class weights
When you first open the Tank Verification Setup window, the system displays commodities in the Unassigned list. The entries are based on your company’s commodity class setup.
Use this section to specify a commodity’s classification. You must categorize all commodities as Light or Heavy, including the Unknown commodity. This illustration shows an example of commodity weight assignments.

Light |
Generally, low-density fuels that flow freely at room temperature |
Heavy |
Generally, high-density fuels that do not flow freely at room temperature |
To classify a commodity as Light or Heavy, follow these steps.
-
Select a commodity in the Unassigned list.
-
You must assign a commodity to either class. Do one of the following:
-
Click Light to assign a commodity to the Light list.
The weight of a commodity in this list should fall within the Light weight range as described by the Specifying gravity ranges. -
Click Heavy to assign a commodity to the Heavy list.
The weight of a commodity in this list should fall within the Heavy weight range as described by the Specifying gravity ranges.
-
-
When you are finished classifying commodities, click Save.
Note: If you do not assign all commodities listed in the Unassigned list, and run the Analyze query on the Analyze Data tab, a message appears. It states, "Tank Verification Setup must be completed before Analyzing Data."
Analyzing data
Once you complete your tank verification setup, use the Analyze tab to view, validate, or correct tank setup data. To run the Analyze query, click Analyze. Tank setup information does not display by default. The system determines whether the tank’s actual values exceed the amounts permitted by your specified verification parameters. You should resolve setup errors because they affect how the Forecaster schedules deliveries.
Reviewing tank setup information
Once you click Analyze, you can view the results on the Analyze Data tab. Query results appear in tabs in spreadsheet-style formats.
The Analyze tab includes the following tabs.
RAW Setup
This tab allows you to view tank setup data for all tanks in all stores of a company. You can also use the tab to export tank setup data to an Excel spreadsheet.
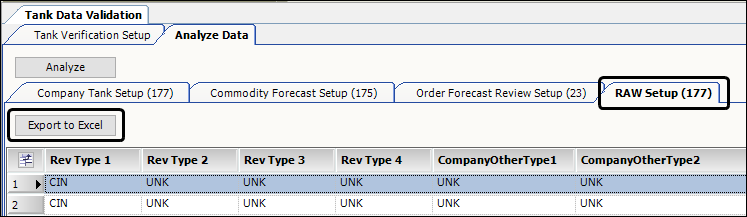
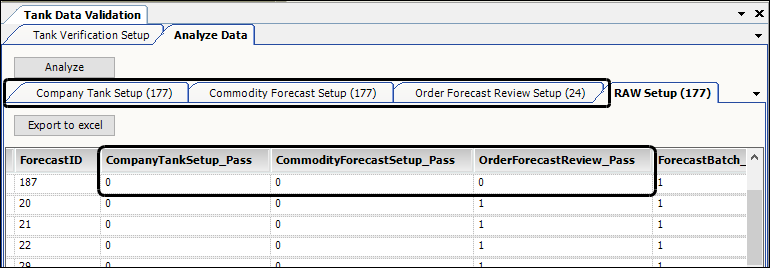
The spreadsheet contains columns that show descriptive entries, and columns that show tank setup entries. The system validates the setup entries on a pass/fail basis, according to your company’s verification requirements.
-
1 represents Pass
-
0 represents Fail
Three columns on the RAW Setup tab show the pass/fail status of a tank:
-
CompanyTankSetup_Pass
-
CommodityForecastSetup_Pass
-
OrderForecastReview_Pass
If a tank’s actual value exceeds the amounts permitted by your verification parameters, the column related to the failure shows a zero (0 = Fail), which indicates that something in the data for that particular setup window, failed the test. When zero shows in any of the columns, the tab for that column appears in the Analyze Data tab.
Each tab name includes the number of records listed in the tab. The number decreases as you correct all errors in a tank row, rerun the Analyze query, and rerun the Forecaster, if applicable.
The spreadsheet contains more columns including _Pass in their names. These columns appear to the right of the first three. They show a more specific result of what failed by having a value of zero.

Company Tank Setup
This tab lists records showing tank setup errors.
Use this tab to:
-
View, validate, or correct a company’s tank setup information
-
Open the Company Tank Setup window
Commodity Forecast Setup
This tab lists records showing commodity setup errors pertaining to sales.
Use this tab to:
-
View, validate, or correct commodity setup information
-
Open the Commodity Forecast Setup window
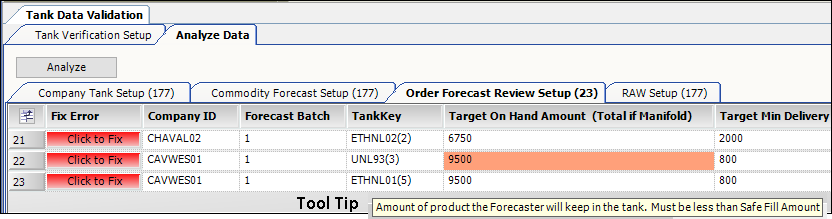
Order Forecast Review Setup
This tab lists records showing errors that affect order forecasting.
Use this tab to:
-
View, validate, or correct forecasted order information
-
Open the Order Forecast Review window
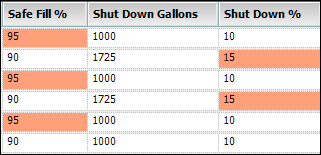
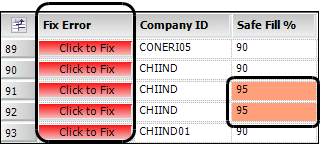
The Company Tank Setup, Commodity Forecast Setup, and Order Forecast Review Setup tabs list tank and setup information in spreadsheet-style grids. In these grids:
-
Fields containing data errors appear with orange highlighting.
-
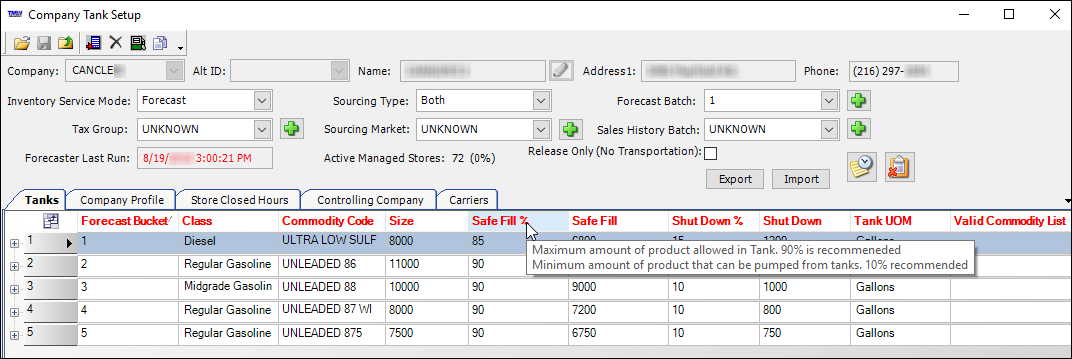
ToolTips display when you position the pointer over validation fields. They show setup descriptions and recommendations.
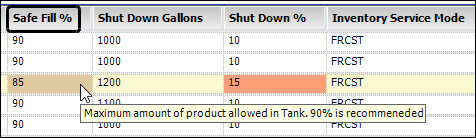
ToolTips also display in the Company Tank Setup and Commodity Forecast Setup windows when you use the Tank Data Validation window to correct errors.
Validation field names display in red text.
Correcting tank setup information
After running the analysis, you can correct tank setup data from the Tank Data Validation window. The Company Tank Setup, Commodity Forecast Setup, and Order Forecast Review Setup tabs open based on field values showing in the RAW Setup tab.
-
To view tank setup information for all tanks in all stores of your company, select the RAW Setup tab.
To transfer analysis data to an Excel spreadsheet:
-
Click Export to Excel.
The Browse For Folder dialog box opens.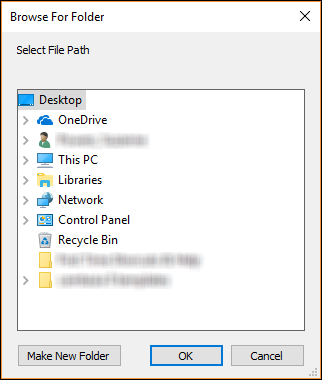
-
Select a file path and click OK.
By default, the system:-
Names the file HealthCheckRawData_*, with * being the current date and time of the export

-
Sets the file type as .xls (*.xls)
-
-
-
To correct validation errors, select one of the following setup tabs.
-
Company Tank Setup
This tab shows the results of the tank setup validation. It identifies the tanks that do not meet the validation parameters. For each tank that produced an error, you can access the Company Tank Setup window and revise the tank’s setup. -
Commodity Forecast Setup
This tab shows the results of the commodity forecast setup validation. It identifies the commodities that do not meet the validation parameters. For each tank that produced an error, you can access the Commodity Forecast Setup window and revise the commodity’s setup. -
Order Forecast Review Setup
This tab shows the results of the order forecasting setup that could prevent accurate forecasting, such as the Target on Hand amount. For each tank that produced an error, you can access the Order Forecast Review window and revise the order forecast setup.
Each tab displays information in a spreadsheet-style grid.
-
The Fix Error column displays a red Click to Fix command button for each record.
-
Fields containing setup errors appear with orange highlighting.
-
-
Locate the error (highlighted field) that you want to fix.
For example, the company CAVWES01 with commodity UNL93 in tank 3 shows an error in the Target On Hand Amount field. Based on the ToolTip, the field entry 9500 exceeds the tank’s Safe Fill amount.
-
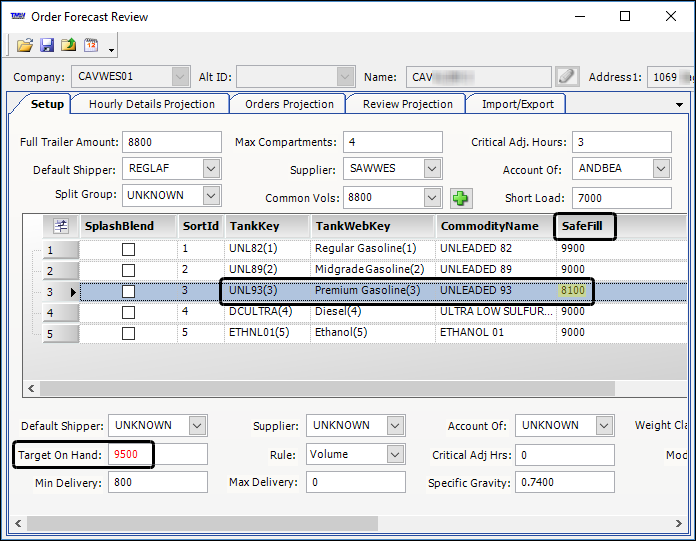
Select Click to Fix in the row showing the error.
A setup window opens. -
In the setup window, locate the field(s) that contains the error.
In our example, the Target On Hand amount 9500 shows in red text. This amount should not exceed the Safe Fill amount of 8100.
-
Enter the correct value(s) in the field(s) containing errors.
-
Click Save and exit the setup window.
The Click to Fix button changes to Viewed, and the color turns green.
Note: This change occurs when you exit the setup window, whether you view data only, or make a correction.
-
To clear corrected rows from a grid list, click Analyze.
When you clear records, the number in the tab name decreases by the number of rows removed from the list. These illustrations show a decrease in the number of total records for the Order Forecast Review Setup tab.

-
Repeat steps 6-8, to correct all errors.
-
When you are finished making corrections, click
 Close to exit the Tank Data Validation window.