Specifying a trading partner’s required reference numbers
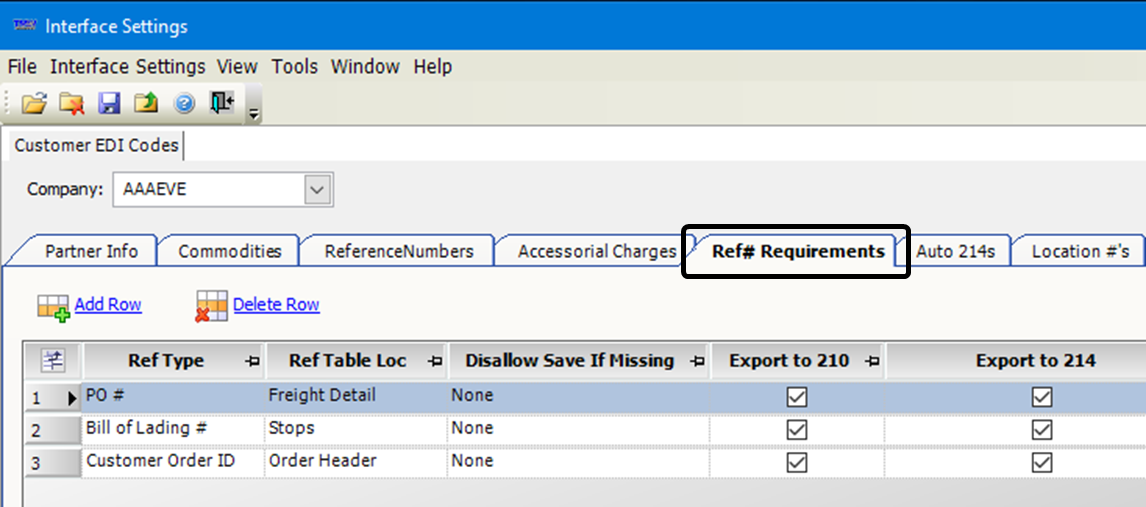
In the Customer EDI Codes window, use the Ref# Requirements tab to specify which reference numbers will be written to a 214 or 210 flat file for the trading partner. Reference numbers may be entered manually in TMWSuite orders or exported into the system from the 204 flat file.
For orders, reference number may appear in the:
-
Order header
Reference numbers that appear here are associated with the order as a whole. -
Stop detail
Reference numbers can be associated with each stop detail. -
Freight detail
Reference numbers can be associated with each freight detail.
To specify which reference numbers will be written to a 214 or 210 file, follow these steps.
-
Go to Interface Settings > Customer EDI Codes.
The Customer EDI Codes window opens. -
Enter the trading partner’s TMWSuite company ID in the Company field and press TAB.
-
Select the Ref# Requirements tab.
-
Click Add Row to create a new row.
-
Make entries in the following fields:
Field Definition Ref Type
Select the type of reference number to be included in the 214 or 210.
Notes:
-
The reference number location you specify in the Ref Table Loc field helps determine the reference number type. For example, if PO numbers are required on the stops, you must set up two entries of PO, with one Ref Table Loc set as Stops and the second set as Freight Detail.
-
The most important reference number type for 210s and 214s is the incoming order’s SID (Shipment ID). Depending on customer requirements, you must enter the appropriate reference numbers.
-
You create reference number types in the ReferenceNumbers label.
Ref Table Loc
Specify where in the order the reference number type specified in the Ref Type field is to be found. The system will export the reference number of that type only when it is associated with the selected option. The options are:
-
Order Header
-
Stops
-
Freight Detail
-
Invoice Header
Disallow Save If Missing On
If a reference number of the specified type is not recorded for the selected option, you cannot save the order or invoice until the reference number is supplied. The options are:
-
Order
You cannot save the order for the Bill To if the specified reference number type is missing from the order. -
Invoice
You cannot save the invoice for the Bill To if the specified reference number type is missing from the invoice.For example, if the reference number is recorded for the order header but not for the selected option, Invoice, then you cannot save the order.
-
Both
You cannot save the order or invoice for the Bill To if the specified reference number type is missing from both the order and the invoice. -
None
The EDI document will be saved if there are no requirements placed on the reference numbers.
Note: If you specified Stop or Freight Detail in the Ref Table Loc field for an order, invoice, or both, a reference number must exist for each drop stop or freight detail.
Export to 210
Exports any reference numbers that match the specified criteria to the 210.
Note: Select this check box only when setting requirements for 210 documents.
Export to 214
Exports any reference numbers that match the specified criteria to the 214.
Note: Select this check box only when setting requirements for 214s.
-
-
Repeat this process for each reference number type that you want to include in a 214 or 210 for the trading partner.
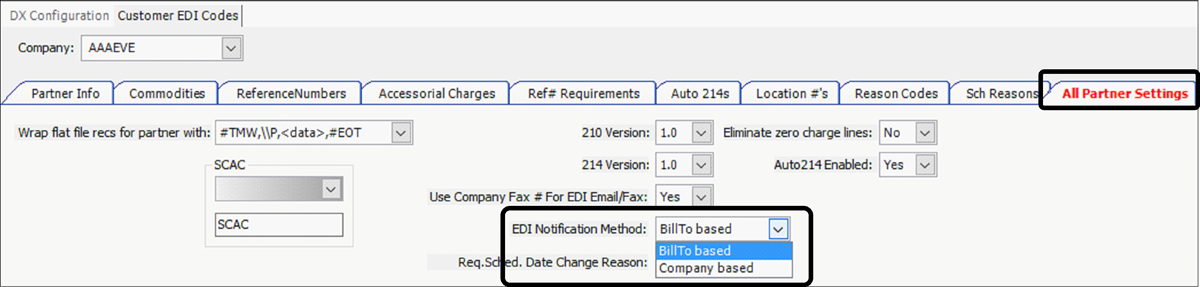
Specifying the EDI notification method for Auto-214s
You can specify whether the options that appear in the Send As and Recipient fields on the Auto 214 tab for each trading partner are company-based or Bill To-based.
-
Go to Interface Settings > Customer EDI Codes.
The Customer EDI Codes window opens. -
Click the All Partner Settings tab.
-
In the EDI Notification Method field, select an option:
-
BillTo based
Sends Auto-214s only if the trading partner appears as the Bill To on the order. This is the default for most EDI trading partners and carries through when you create trading partner-specific settings.Specify a trading partner in the Company field and select the Auto 214s tab. Note that the recipient fields (BillTo, Shipper, and Consignee) show disabled options when you select EDI 214 in the Send As field.

-
Company based
Sends Auto-214s when the trading partner is any of the specified entities on the order. The trading partner can be the Bill To, Order By, shipper, or consignee. This carries through when you create trading partner-specific settings.
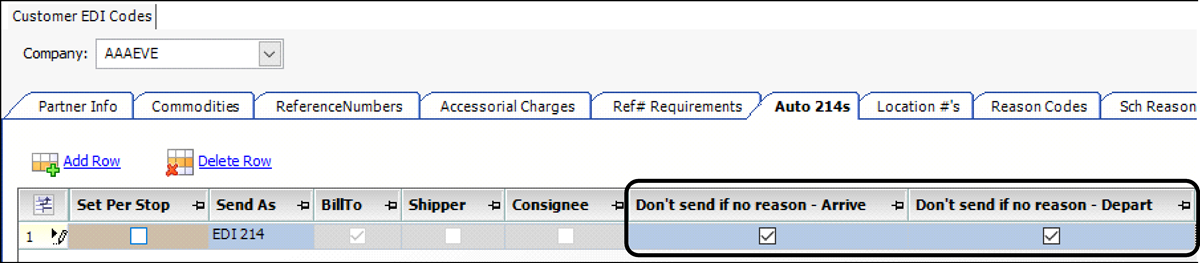
When you specify a trading partner in the Company field and select the Auto 214s tab, that trading partner must appear as each selected company type on the order for an Auto-214 to be sent: Bill To (B), Shipper (S), Consignee ©, and/or Order By (O).
In this example, because the S and C options are selected, the trading partner AAAEVE must be designated as the shipper and consignee on each order for Auto-214s to be sent.

-
-
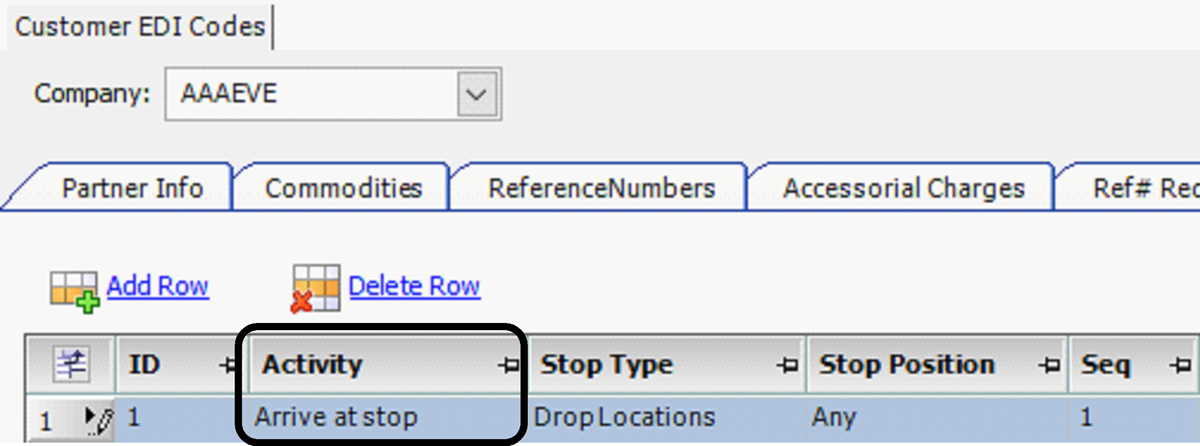
If the trading partner requires a change reason code to be recorded for Earliest and Latest Date field changes before the system sends an Auto-214, follow these steps.
-
Select the activity that will trigger a reason code requirement from the Activity drop-down list.
-
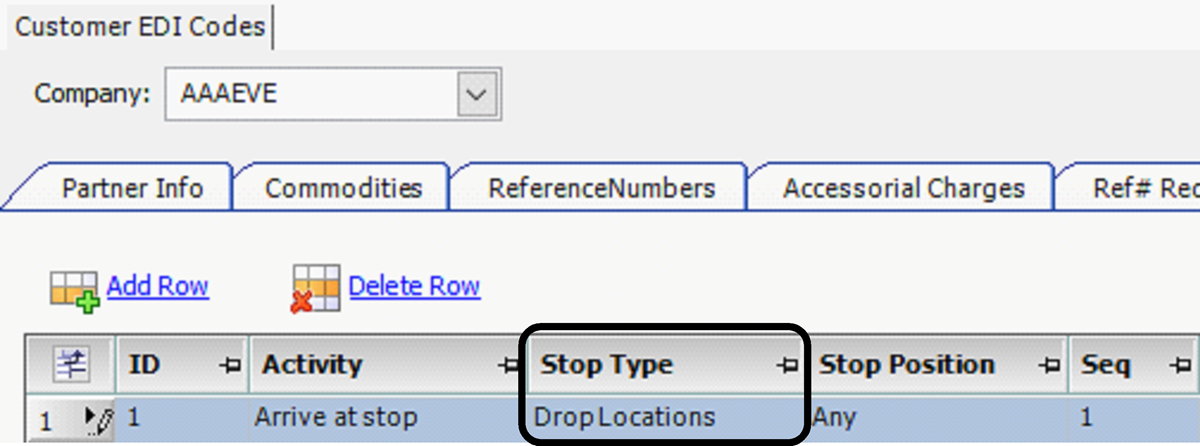
Select the type of stop that will trigger a reason code requirement from the Stop Type drop-down list.
-
Select the Don’t send if no reason - Arrive and/or Don’t send if no reason - Depart check boxes.
-
-
Click Save to keep your changes.
For details, see: Guide: General EDI | Chapter: Working with 214 Status Updates | Section: Setting up activities to trigger an Auto-214 |
Specifying a trading partner’s store location ID codes
You can set up the system to use a store location ID (EDI N104 reference number) for the shipper or consignee. Link a company’s store location ID to a trading partner using the EDI Codes Maintenance window’s Location #s tab. You can set up the system to populate store location IDs automatically or you can manually enter each one.
To have the store location numbers appear on the flat file, you must have a Bill To on the order.
Creating the Location #s reference number type
To create the Location #s option in the ReferenceNumbers label, follow these steps.
-
Go to Tools > Tools Maintenance > Edit User Definable Fields.
-
In the Field Name field, select ReferenceNumbers.
-
Click Retrieve.
The Edit User Definable Fields window opens.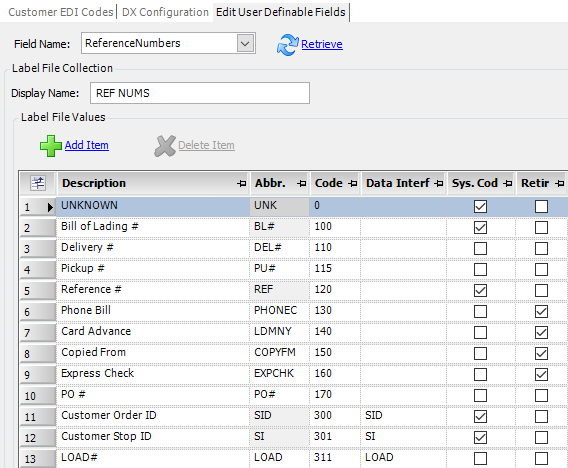
-
Click Add Item.
-
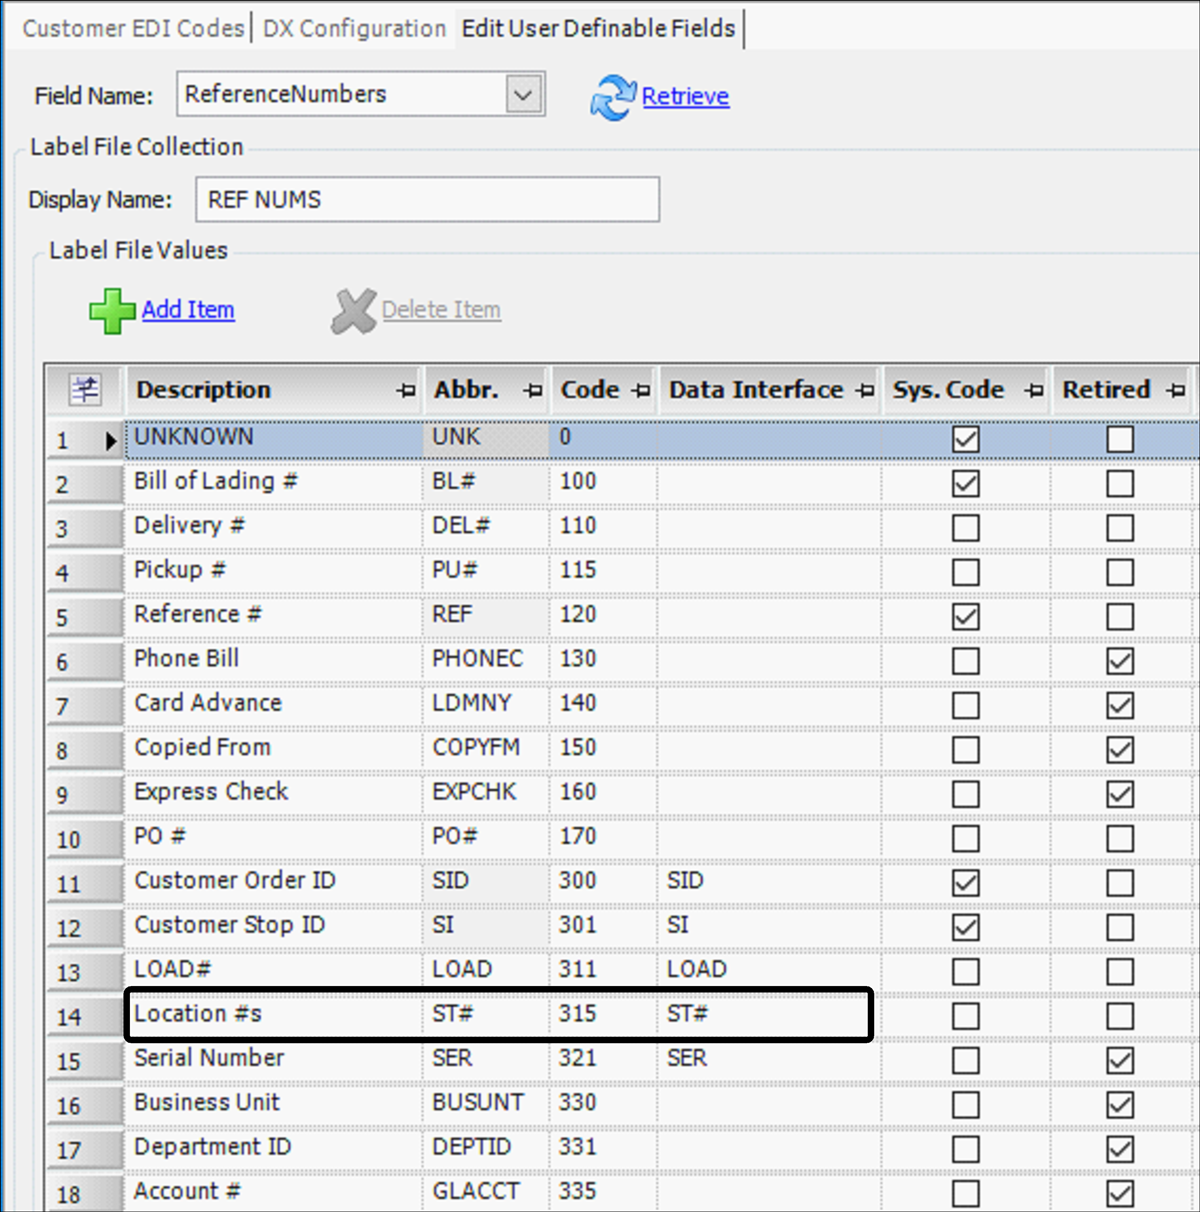
In the Description field, enter Location #s.
-
In the Abbr field, enter ST#.
-
Enter a number that has not yet been used in the Code field.
-
In the Data Interface field, enter ST#.
-
Click Save.
Identifying the reference number used to pull location numbers
The reference number that will automatically populate the store location IDs is set up in the Interface Constants Maintenance window.
-
In the System Administration application, do one of the following:
-
Click
 Interface Table Maintenance.
 -
Select Edit > Interface Constants Maintenance.
The Interface Constants Maintenance window opens.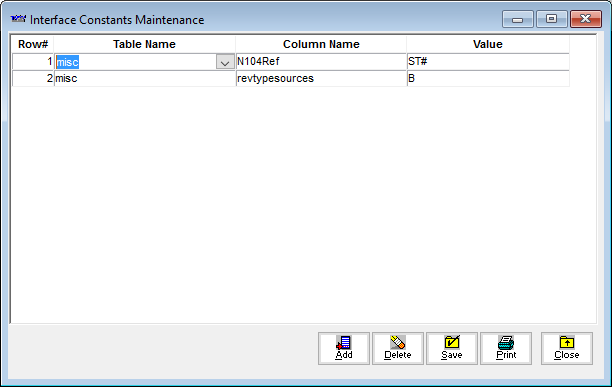
-
-
Click Add to create a row.
Note: If you cannot see the blank row, click in the Value field of the last row and press the DOWN ARROW until the blank row appears.
-
Make the following entries:
Field Definition Row#
System automatically inserts the next sequential row number
Table Name
Enter misc
Column Name
Enter N104Ref
Note: N104Ref is the standard that specifies the reference number that will be used to populate the EDI location codes table. The table appears on the EDI Codes Maintenance window’s Location #s tab.
Value
Enter ST# as the reference number type
Notes:
-
Your entry in the Value field must match the entries in the Abbr and EDI Code fields for the Location #s option in the ReferenceNumbers label.
-
The reference number must be linked to the stop event on the 204. TMWSuite reference numbers are not created from this association; only entries in the Location #s tab are created.
-
-
Click Save.
-
Click Close to exit the window.
Defining store locations in the Location #s tab
If you:
-
Do not use 204s to bring orders into TMWSuite
and
-
Your trading partner requires each stop location to be identified with a store or warehouse number of their designation
You must set up store numbers manually.
-
Go to Interface Settings > Customer EDI Codes.
The Customer EDI Codes window opens. -
In the EDI Codes Maintenance window, select the trading partner’s TMWSuite company ID in the Company field and press TAB.
-
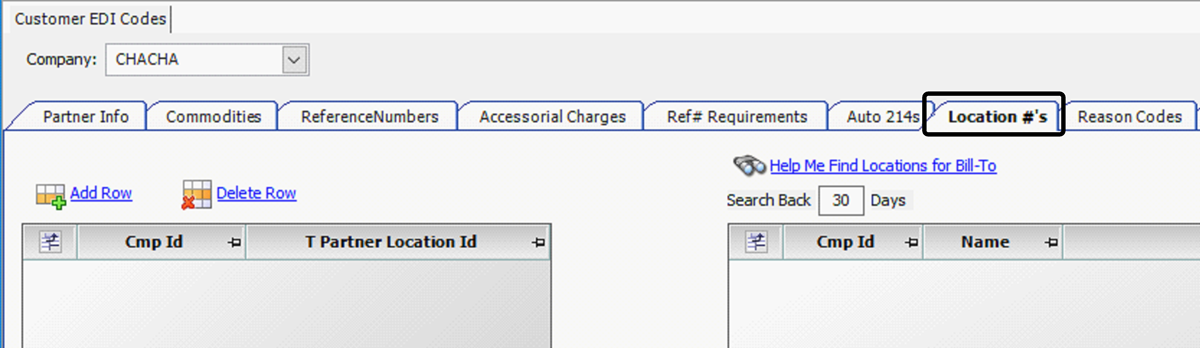
Select the Location #s tab.
-
Click Add Row.
-
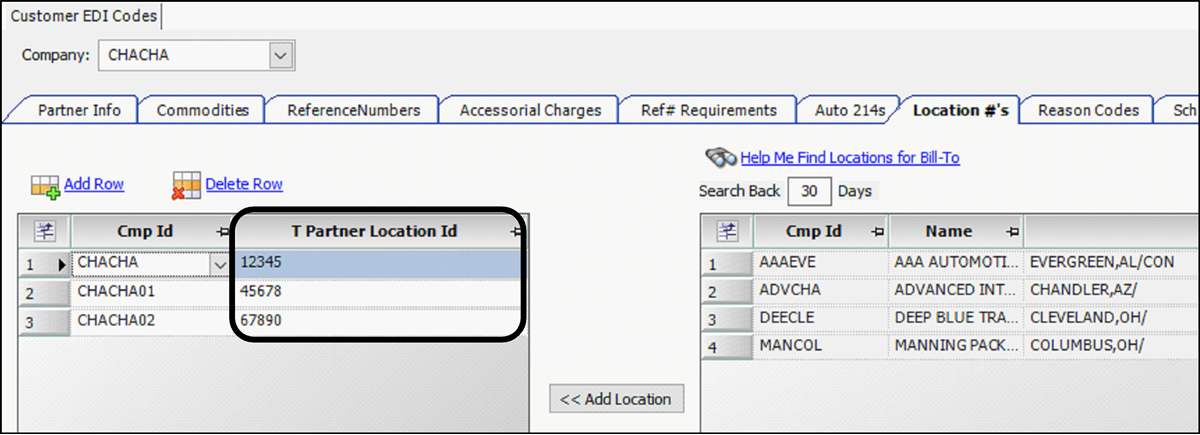
Select the company ID from the Cmp ID drop-down list.
-
Enter the trading partner’s location ID in the T Partner Location ID field.
Note: This ID is any number that your trading partner has designated to represent a company’s location, such as a plant code or a store number.
-
To find TMWSuite company IDs for locations that might need trading partner-specific location IDs:
-
In the Search Back _ Days field, enter the number of days back from the current date you want the system to search. The default setting is 30 days.
-
Click Help Me Find Locations For Bill-To.
The system will retrieve a list of pickup and drop locations that appeared on orders that have been billed to the company you are setting up as a trading partner.
Note: The list on the right will not duplicate any company that is listed on the left.
-
-
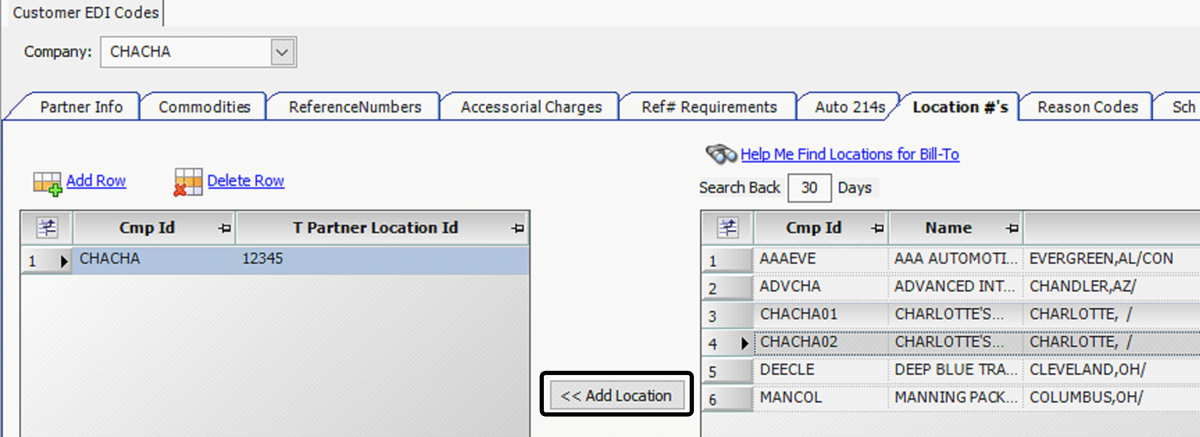
From the retrieved list, add pickup and drop locations to the location list on the left:
-
Select one or more rows.
-
Click the Add Location button.
-
-
In the T Partner Location ID field for each record, enter the trading partner ID code.
-
Click Save at the right side of the window.