TMS Connector on-prem setup
There are six steps to setting up TMS Connector for an on-prem (on-premises) TruckMate system:
Set up REST API services
TMS Connector uses REST API services to retrieve your data from TruckMate. There are two required services:
-
TruckMate REST API
-
Master Data REST API
These services are set up using the ART Server Administrator application in TruckMate. The REST API services you use for TMS Connector should be separate from REST API services used for other purposes.
For more information on REST API services, see ART Server Administrator Guide.
If you need help setting up these services, contact Trimble Transportation Support. If you do not have an account, you can create one by selecting Sign Up.
Check API licenses
To set up the API services, you need to have the correct licenses.
-
Sign in to any TruckMate application.
-
Go to Help > About.
-
Select Licenses.
-
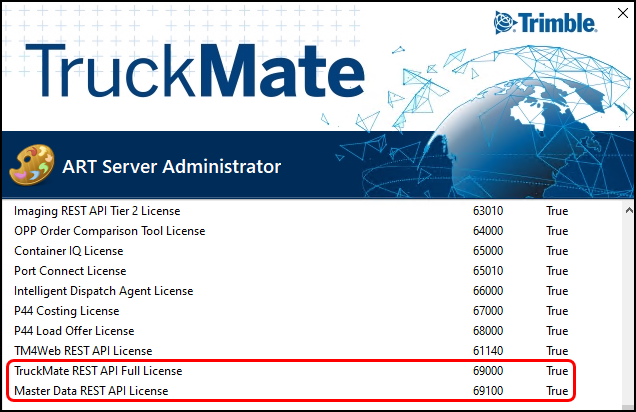
In the Feature Licenses section, check that both of these licenses are set to True.
-
TruckMate REST API Full License (69000)
-
Master Data REST API License (69001)
-
-
If you do not have these licenses enabled, contact your sales representative so you can purchase them.
Set up the TruckMate REST API
-
Open ART Server Administrator.
-
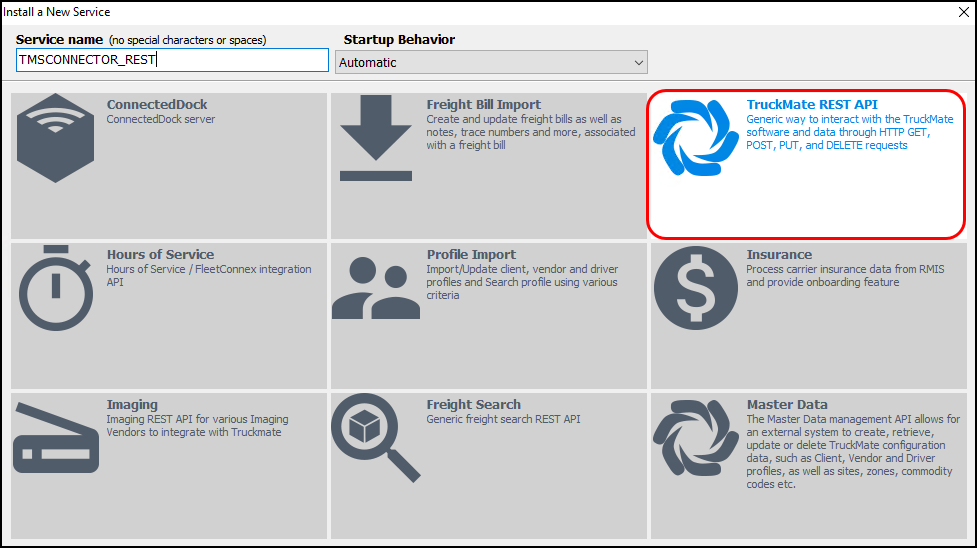
Select New Service. The Install a New Service window opens.
-
Select the Service Name field and enter a name such as TMSCONNECTOR_REST.
-
Select the Startup Behavior dropdown menu and set it to Automatic.
-
Select TruckMate REST API as the API service.
Note: This service requires license 69000. If you do not have this license, the TruckMate REST API option cannot be selected.
-
Select OK. The new service appears in the left pane of the ART Server Administrator window.
-
If you have multiple databases that you want to access from TMS Connector, repeat Steps 2-6 for each database. Give the additional services names such as TMSCONNECTOR_REST2, _TMSCONNECTOR_REST3, and so on.
Set up the TruckMate Master Data REST API
-
Open ART Server Administrator.
-
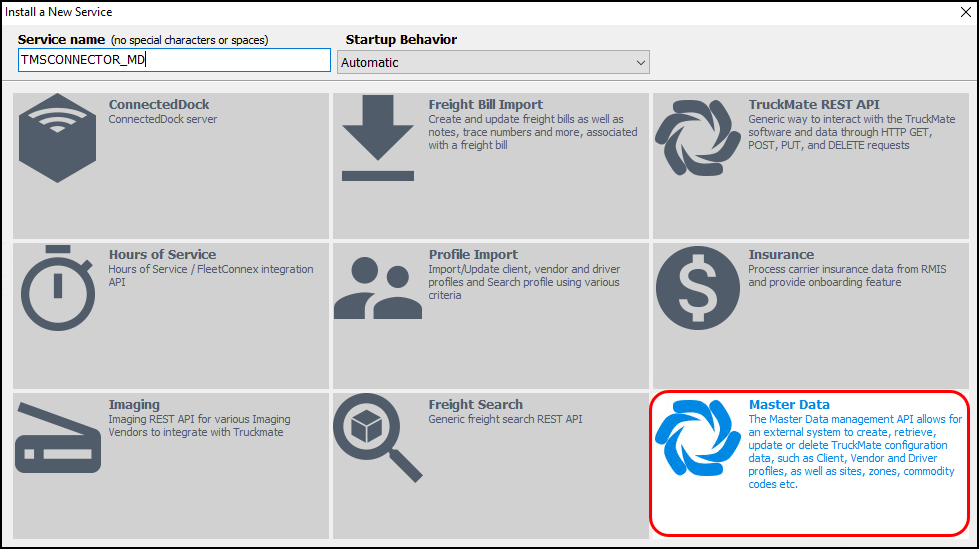
Select New Service.
-
Select the Service Name field and enter a name such as TMSCONNECTOR_MD.
-
Select the Startup Behavior dropdown menu and set it to Automatic.
-
Select Master Data as the API service.
Note: This service requires license 69001. If you do not have the license, the Master Data option cannot be selected.
-
Select OK. The new service appears on the left pane of the ART Server Administrator window.
-
If you have multiple databases that you want to access from TMS Connector, repeat Steps 2-6 for each database. Give the additional services names such as TMSCONNECTOR_MD2, TMSCONNECTOR_MD3, and so on.
Change the value data in Registry Editor
If your TruckMate version is 25.1 or older, there are additional steps you need to take to make sure the API services run properly:
-
Open the Registry Editor on your computer.
-
Go to Computer\HKEY_LOCAL_MACHINE\SOFTWARE\Wow6432Node\TMW\TMWin\ART.
-
Select one of the newly created ART services.
-
Double-click the TrustedJwksIssuers registry key. The Edit String window opens.
-
Select the Value data field and enter https://id.trimble.com,https://stage.id.trimblecloud.com.

-
Repeat these steps for each of your newly created ART services.
Set up a primary administrator in TruckMate
A Trimble employee will give an administrator (admin) access to MyOrg and Identity Access Management so they can complete the TMS Connector setup steps.
Before they can be given access to these portals, the primary admin needs be set up in TruckMate.
-
Open the Security Configuration application.
-
Select User. The Single User Setup pane opens.
-
There are two ways to find the user you want to make the primary admin:
-
Select
 First Record,
  Prior,
  Next, or
  Last Record to move between users.
 -
Select Search to look up a specific user.
-
-
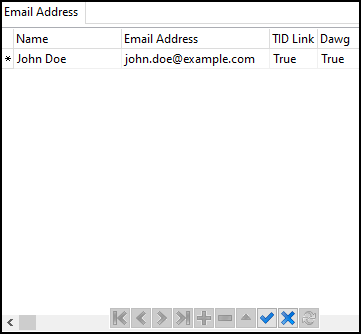
On the Email Address pane, enter the admin’s name in the Name field.
-
Enter the admin’s email in the Email Address field.
The email address you enter here is what the primary admin will use to sign in to IAM, MyOrg, and TMS Connector.
-
Double-click the TID Link field. A dropdown menu appears.
-
Select the TID Link dropdown menu and set it to True.
-
Select
 Post Edit. The user appears as a pending internal user on the Trimble ID tab.
Note: If you are on a TruckMate version prior to 24.2, you will need to stop and re-start the REST API services for TMS Connector after enabling the user. You can restart the REST API services from Art Server Administrator.
-
Contact Trimble Transportation Support.
After you have set up the primary admin in TruckMate, a Trimble employee can create a Trimble ID for them. After their Trimble ID has been created, the primary admin can sign in to MyOrg, IAM, and TMS Connector using their email address.
MyOrg setup
In MyOrg you:
-
Create divisions for your company if you have a multi-company database.
Sign in to MyOrg
-
Go to https://myorg.trimble-transportation.com in your web browser.
-
Enter your email address in the Email or username field.
-
Select Next.
-
Complete the two-factor authentication process.
The two-factor authentication process can vary depending on the type of email account you have. For example, Gmail accounts may get a push notification to complete authentication.
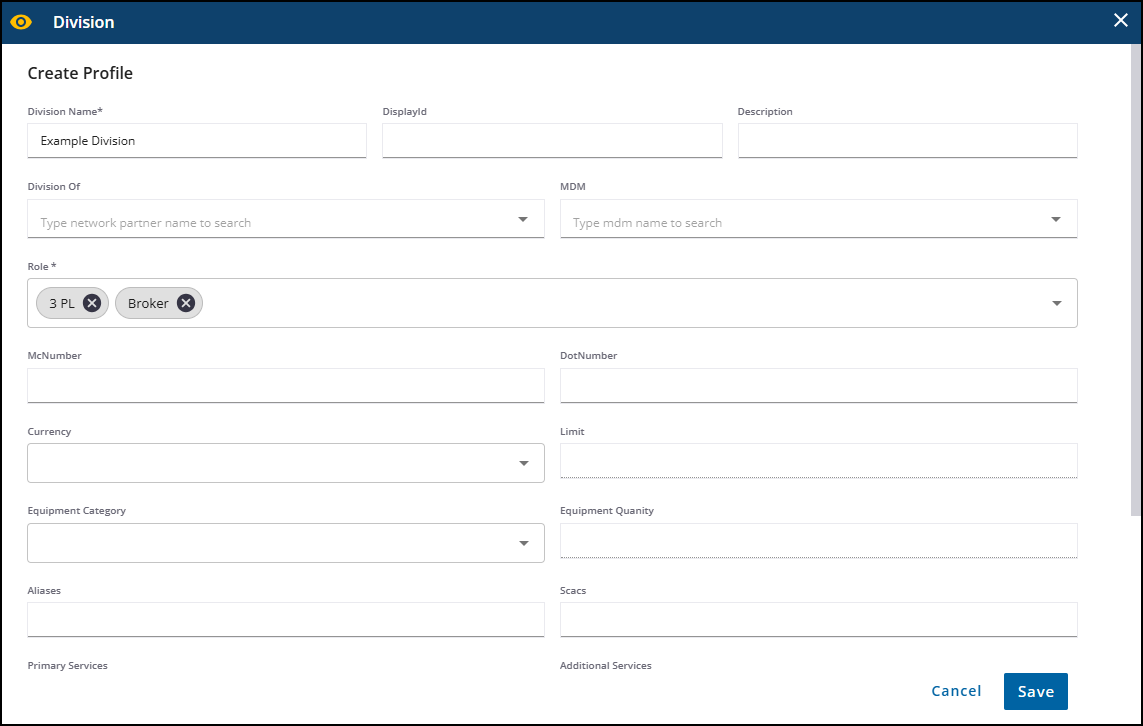
Create divisions
If your business has a multi-company database, you can set up a division in MyOrg for each database.
-
On the My Org home page, select New. The Create Profile window opens.
-
Select the Division Name field and enter the name of the division.
-
Select the Role dropdown menu and select the roles the division has for your business.
Examples include Broker, Consignee, and Shipper. You can select more than one role.
-
Fill out optional fields as needed for your business.
-
Select Save.
Configure API connections
A TMS Connector CloudHub and TMS Connector OnPrem API connection are required for TMS Connector to access your database.
You can configure multiple API connections if you have more than one database. You will also need to do this if you have set up multiple divisions for your organization.
Configure a TMS Connector CloudHub API connection
-
Select a division from the pane on the left side of the home page.
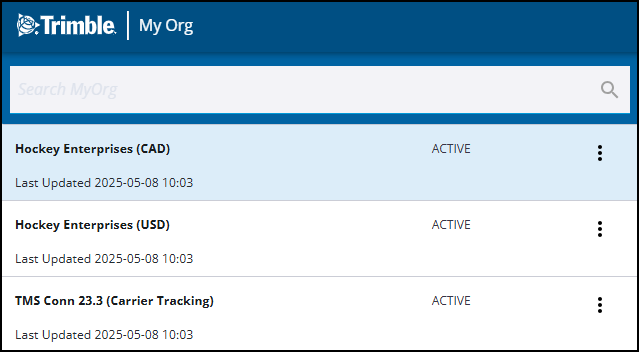
If you have not set up any divisions, there will only be one option.
-
Select
 Actions > Configurations. The Configuration page opens.
 -
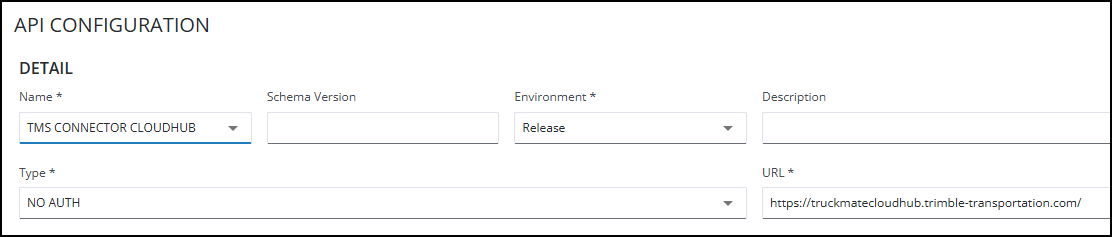
Select New > API. The API Configuration window opens.
-
Select the Name dropdown menu and select TMS CONNECTOR CLOUDHUB.
-
Leave Environment set to Release.
-
Select the Type dropdown menu and select NO AUTH.
-
Select the URL field and enter https://cloud.api.trimble.com/transportation/tte-truckmate/v0.
-
Select Next. The Authorization Custom Fields page opens.
-
Leave these fields blank and select Next. The Custom Fields window opens.
-
Leave these fields blank and select Next. The Endpoints window opens.
-
Leave these fields blank and select Save. A TMS CONNECTOR CLOUDHUB record appears on the Technical Capability tab.
-
Repeat these steps for each database.
Configure a TMS Connector OnPrem API connection
-
Select a division from the pane on the left side of the home page. If you have not set up any divisions, there will only be one option.
-
Select
Actions > Configurations. The Configuration page opens. -
Select New > API. The API Configuration window opens.
-
Select the Name dropdown menu and select TMS CONNECTOR ONPREM.
-
Leave Environment set to RELEASE.
-
Select the Type dropdown menu and select NO AUTH.
-
Select the URL field and enter a URL that corresponds to your REST API instance. This should be a public URL to reach your on-prem or Cloud-hosted ART API instance.
It is important that there is no slash at the end of the URL. Here is an example of a correctly formatted URL: https://tde-truckmate.tmwcloud.com/multico1
-
Select Next. The Authorization Custom Fields page opens.
-
Leave these fields blank and select Next. The Custom Fields window opens.
-
Leave these fields blank and select Next. The Endpoints window opens.
-
Leave these fields blank and select Save. A TMS CONNECTOR ONPREM record appears on the Technical Capability tab.
-
Repeat these steps for each database.
Invite other users
The primary admin can invite users to TMS Connector. There are two categories of TMS Connector users:
-
Internal
Internal users are members of your organization who can see all of your company’s data.
-
Web
Web users are external vendors and clients. They can only see data related to their organization.
Set up internal users in TruckMate
To invite an internal user, they must first be set up in Security Configuration the same way as the primary admin. Once they are set up, the primary admin can invite them from IAM.
Set up external users in TruckMate
Any external users you set up to have access to TMW4Web can be set up for TMS Connector by inviting them from IAM. You do not need to recreate these users.
To invite a new web user, their company’s profile in the Customer & Vendor Profiles application must be set up for TM4Web. For information about setting up a profile for TM4Web, see TM4Web Admin Guide - Introduction.
Once their company’s profile is set up for TM4Web, their email address must be set up in Customer & Vendor Profiles.
-
Open Customer & Vendor Profiles.
-
There are two ways to find a customer profile:
-
Select
First Record, Prior, Next, or Last Record to move between profiles. -
Select
 Find to look up a specific profile.
-
-
Select
 TM4WEB Configuration. The TMW4Web Configuration page opens.
 -
Select
 search next to the Default Access Code field and select an access code.
 -
On the Account Configuration pane, select
 Insert. The TM4Web New User Wizard opens.
 -
Select either New User Registration or Based on Existing Contact.
-
Select Next. The User Information window opens.
-
If you selected New User Registration, enter the user’s information.
The email address you enter is the email address they will use to sign in to TMS Connector.
-
Select Next. An optional User Information pane opens.
-
Enter any optional user information you want to include.
-
Select Next. The Account Configuration window opens.
-
Select Finish. The user appears on the TMW4Web Users grid. They also appear as a pending external user on the Trimble ID tab in Security Configuration.

After the user appears on the Trimble ID tab, you can invite them to TMS Connector from IAM the same way as internal users.
Invite a user to TMS Connector
After you have set up a user in TruckMate, you can invite them to TMS Connector from IAM.
Sign in to IAM
-
Go to https://iam.trimble-transportation.com in your web browser.
-
Enter your email address in the Email or username field.
-
Select Next.
-
Complete the two-factor authentication process.
The two-factor authentication process can vary depending on the type of email account you have. For example, Gmail accounts may get a push notification to complete authentication.
Invite a user
-
Select the
 menu.
menu. -
Select Users. A list of users opens.
-
Select INVITE USERS. The Invite Users page opens.
-
Enter the user’s name and email address in the Invitee Name and Email fields.
-
In the Role dropdown menu, select both of these roles:
-
Account User
-
TTE-TMSCONNECTOR-FULL
Note: You can assign a user the Account Admin and TTE-TMSCONNECTOR-FULL roles to give them the same user rights as the primary admin. Account admins can add, remove, and edit other users.
-
-
Select INVITE USER. An invitation email is sent to the user.
Sign in to TMS Connector
After you have invited a user, they can sign in to TMS Connector.
-
Go to https://tmsconnector.trimble-transportation.com in your web browser. The Trimble sign in page opens.
-
Enter your email address in the Email or username field.
-
Select Next.
-
Complete the two-factor authentication process.
The two-factor authentication process can vary depending on the type of email account you have. For example, Gmail accounts may get a push notification to complete authentication.