Set up dashboard views
You can use the filters and widgets to create personal dashboard views that are tailored to your needs. Each view can use different filters and widgets. The only restriction is that all views must have unique names (that is, you can’t have two views with the same name).
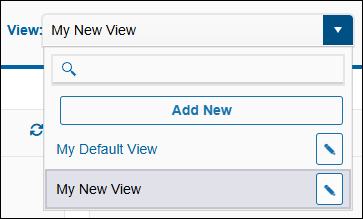
When you set a view as your default, TMT Fleet Maintenance will open to that view each time you log in. This illustration shows that the user has created a filter called My Default View.

Create a view
-
Use the filters and available widgets to arrange the dashboard the way you want it.
-
In the Filters section of the dashboard, select the View menu. The menu drops down to show a search box, the Add New button and, if you already have a view selected, the view’s name and the
 Edit icon.
-
Select Add New. The Add View Name field opens.
-
Add the view name. There is a limit of 40 characters.

-
Save your name by selecting
 Save or select
  if you decide you don’t want to save your changes.
 -
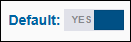
The program saves your view. If you want to, you can make this view your default by setting the Default field to YES.
Find a view
-
Select the View menu. The View menu dropdown opens.
-
The dropdown list shows your views. Select the view you want to open that view.
-
If you don’t see the view you want, you can look for it using the search box. As you start typing, the menu shows you all the views available to you.
-
Select the view you want to open the view.
Edit a view
-
Select the View menu. The View menu dropdown opens.
-
The dropdown list shows your views. Select
Edit beside the view you want to change. The Filters menu opens so that you can change your filters. -
If you want, select Widget Configuration to choose the widgets you want to add or remove from the view.
-
When you’ve completed your changes, select
Save. -
The program saves your edited view. If you want to, you can make this view your default by setting the Default field to YES.
Delete a view
-
Make sure the view you want to delete is selected.
-
Select
 Delete. The program opens a window asking "Are you sure you want to delete this view?"
 -
Select YES. The program gives you a confirmation message stating that the view was successfully deleted. The page returns to your default view. If you deleted your default view, the page returns to the standard Dashboard page.