Adding rest stops
-
Audience: Drivers
-
Conditions/restrictions:
-
Your company must be licensed for TruETA and TMWGoTripPlanning to use the Trip Planning functionality. If your company does not have both licenses, you will not see the
 Trip Planning icon or the Trip Planning screens.
 -
Your company must be licensed for and running SystemsLink 2018.3 or later.
-
Your company must be licensed for Trimble Maps to see your stops on the Stop Detail screen.
-
When TruETA plans trips, it generates suggested Rest Stops from one stop event to the next. Rest stops are locations where you can park and take a break or rest (including the 34-hour reset).
You can add rest stops to planned trips as needed.
To add a rest stop:
-
Determine where you want to add the rest stop and tap Add Rest Stop.
In this example, the rest stop will be added between the Rest Stop in Jacksonville, FL and the Love’s #206 rest stop in Loxley, AL.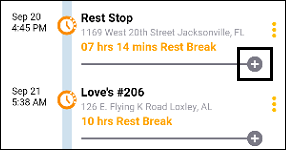
The Add Rest Stop screen opens.
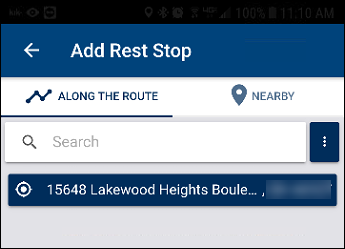
-
Follow the steps listed in the sections below based on how you want to search for the rest stop.
Searching for a rest stop
-
Specify the search method.
-
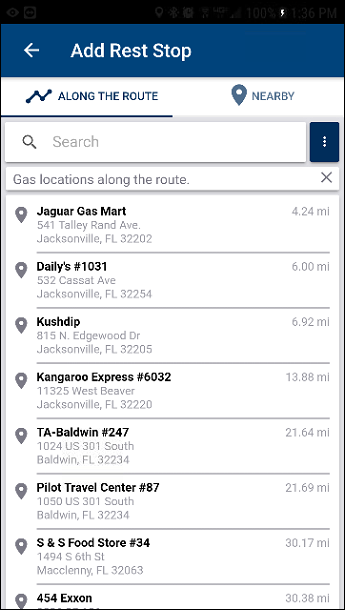
Tap Along the route to search for rest stops along the planned route.
-
Tap Nearby to search for rest stops near the last planned stop event.
Note: The following steps are the same between these options. The results will be different.
-
-
Do one of the following:
-
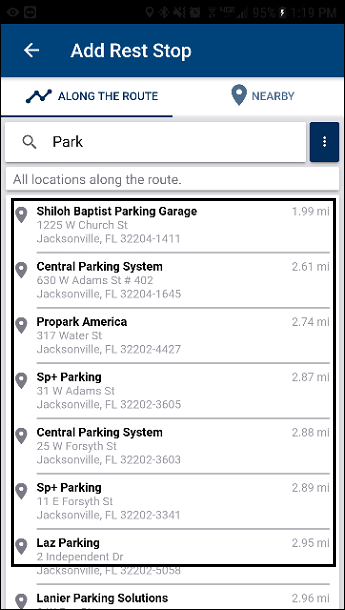
Enter search criteria
-
Enter search criteria, such as Park in the Search field.
-
Tap
 Search.
Note: Depending on your device and OS, this button may look different.The results are displayed under the Search field.
-
If needed, refine your search criteria.
-
Tap on the location where you want to stop.
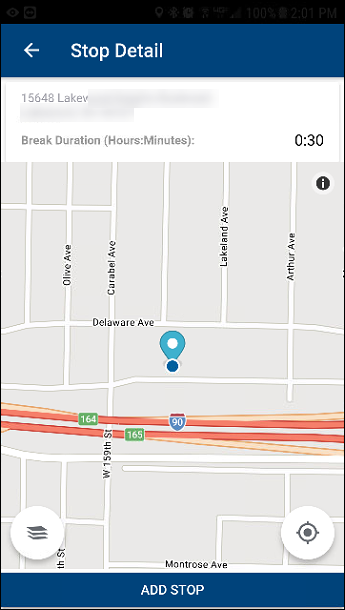
The Stop Detail screen opens.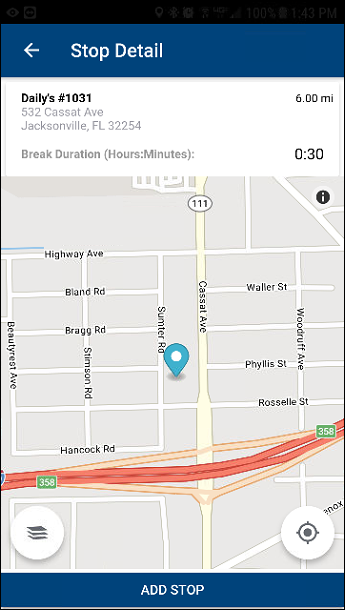
-
-
Search based on Point Of Interest (POI)
-
Tap
 Point of Interest.
The Select POI Category screen opens.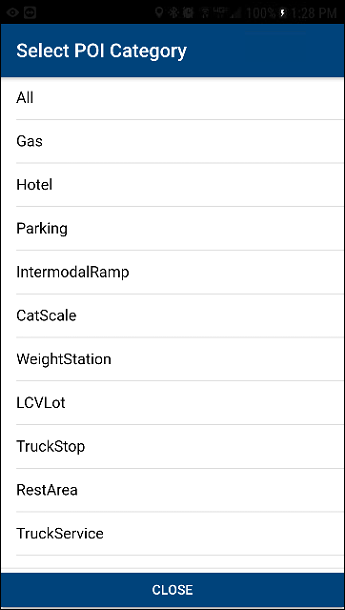
-
Tap on a category.
Suggested locations are displayed.To close this screen without choosing a POI, tap Close.
-
Tap on the location where you want to stop.
The Stop Detail screen opens.
-
-
-
If needed, change the Break Duration.
-
Tap Break Duration (Hours:Minutes).
A time calendar appears.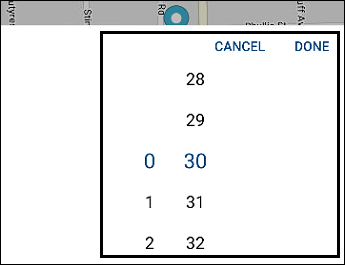
-
Make changes as needed.
To close this calendar without saving your changes, tap Cancel. -
Tap Done.
-
-
Tap ADD STOP.
The Trip Planning screen updates and displays your new rest stop.
Using your GPS location for the rest stop
-
Tap GPS Location.
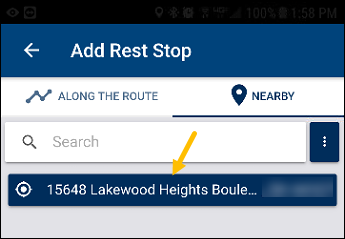
The Stop Detail screen opens.
-
If needed, change the Break Duration.
-
Tap Break Duration (Hours:Minutes).
A time calendar appears. -
Make changes as needed.
To close this calendar without saving your changes, tap Cancel. -
Tap Done.
-
-
Tap ADD STOP.
The Trip Planning screen updates and displays your new rest stop.