Photos or attachments
If your company wants you to take or attach pictures, they will set up forms to include the Photo button or the Attachment button.
These buttons may appear when you:
-
Reply to a trip-based message
-
Open a form that has the button
-
Update a schedule using the Schedules page
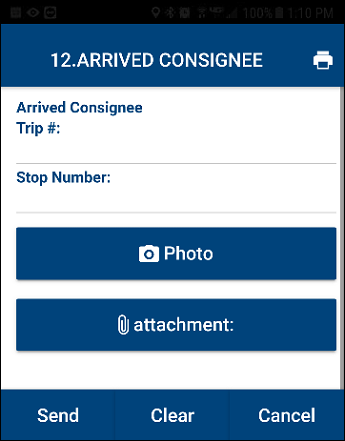
This picture shows a form with the Photo and attachment buttons.
Take a picture
To take a picture:
-
Tap Photo.
The device’s default camera app opens.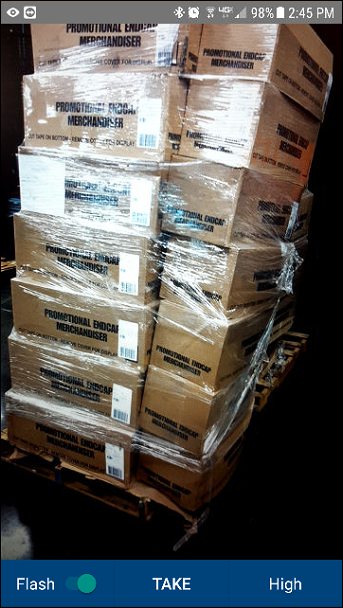
Note: This page may look different based on your device and camera app.
-
If needed, tap to turn the Flash option on or off.
-
Specify the image resolution.
-
In the lower-right corner of the screen, tap Resolution.
A menu appears.Note: This displays the last resolution used. Options are Low, Medium, and High.
-
Tap the resolution (picture quality) you want.
-
-
Tap TAKE.
The picture appears under the Photo button.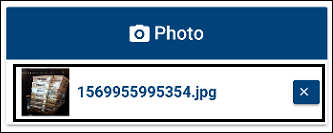
-
You can do one of the following:
-
View the picture.
Tap on the thumbnail. The Preview page opens. Tap Close when you are done.
-
Remove the picture.
Tap
 next to the picture that you want to remove.
 -
Take more pictures.
Follow Steps 1-5.
-
Attach a picture
To attach a picture:
-
Tap Attachment.
The device’s default file app opens. -
Search for the picture to attach.
-
Tap the picture.
The picture appears under the Attachment button.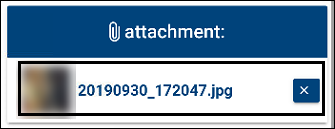
-
You can do one of the following:
-
View the picture.
Tap on the thumbnail. The Preview page opens. Tap Close when you are done.
-
Remove the picture.
Tap
next to the picture that you want to remove. -
Take more pictures.
Follow Steps 1-4.
-