Setting up Card Management for use with real-time fuel vendors
Currently, Card Management supports the following real-time fuel vendors:
-
Comdata
-
Fleet One
-
T-Chek
-
TCH
To use Card Management with these vendors, you must perform a series of setup procedures, as described in this set of topics.
Set up real-time services in Windows
Before you can use Card Management with real-time fuel vendors, you must configure your server’s operating system to recognize the application and allow communication between it and the vendor.
These instructions apply to both Windows 10 and Windows 11.
Install the Card Management COM+ application
-
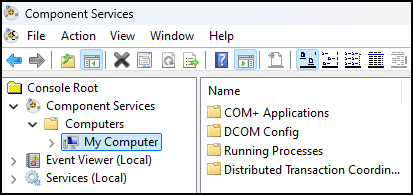
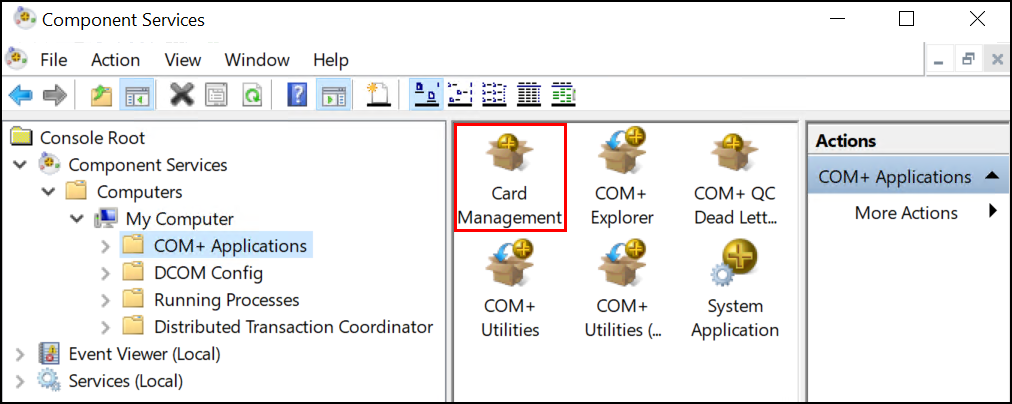
In Windows, open the Component Services window. This feature is available in the Administrative Tools group in Control Panel.
-
In the leftmost navigation pane, go to Component Services > Computers > My Computer.
-
Right-click COM+ Applications and go to New > Application. The COM+ Application Install Wizard opens.
-
Select Next. The Install or Create a New Application window opens.
-
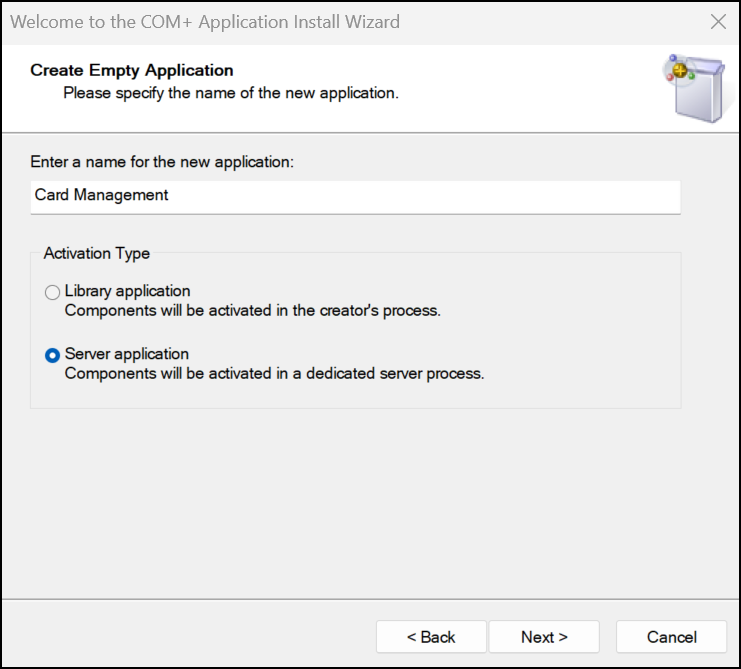
Select Create an empty application.The Create Empty Application window opens.
-
In the Enter a name for the new application field, enter Card Management.
-
On the Activation Type pane, check that that Server application is selected.
-
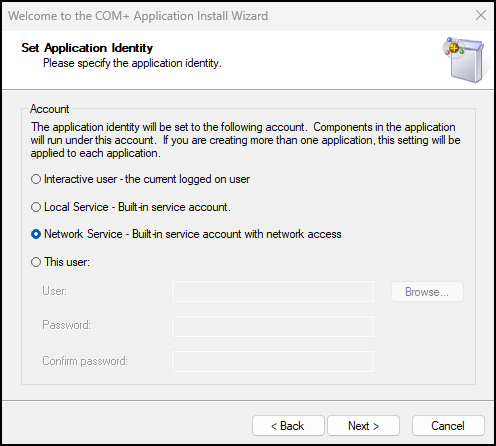
Select Next. The Set Application Identity window opens.
-
Select Network Service.
-
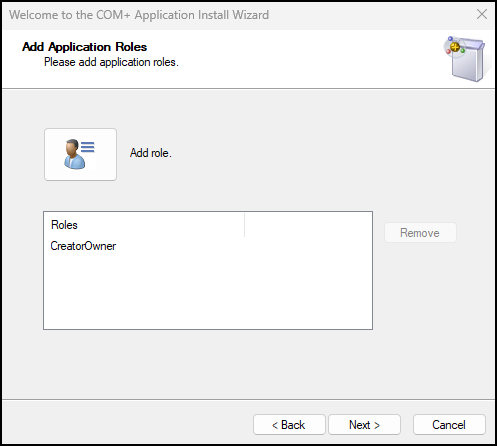
Select Next. The Add Application Roles window opens.
-
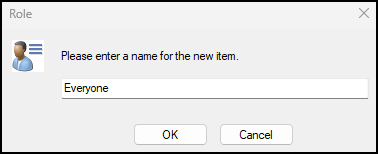
Select Add role. The Role window opens.
-
In the field provided, enter Everyone.
-
Select OK.
-
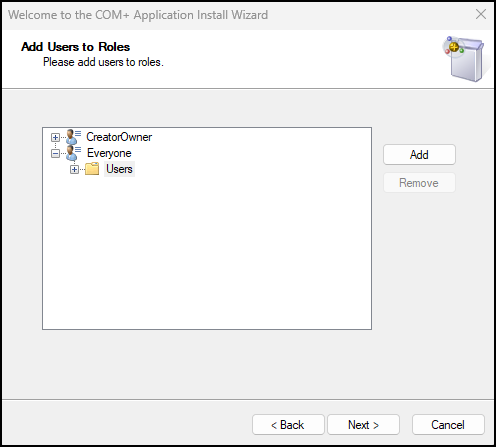
In the Add Application Roles window, select Next. The Add Users to Roles window opens.
-
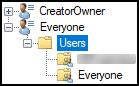
Go to Everyone > Users.
-
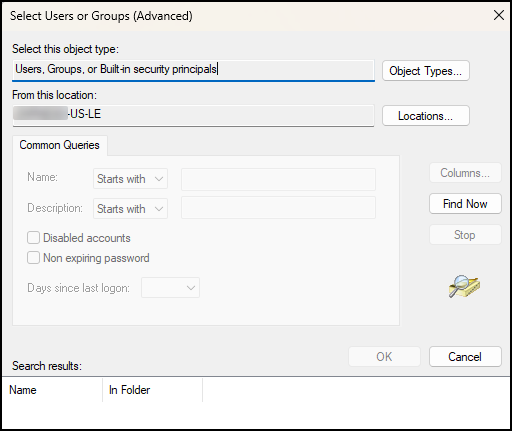
Select Add. The Select Users or Groups window opens.

-
Select Advanced. Another Select Users or Groups window opens.
-
Select Find Now.
-
On the Search results grid, locate and select Everyone.
-
Select OK.
-
In the first Select Users or Groups window, select OK.
The Add Users to Roles window should resemble the one shown in the illustration.
-
Select Next.
-
In the window that opens, select Finish.
-
In the Component Services window, double-click COM+ Applications. The Card Management application displays on the middle pane.
Configure the Card Management DLL
After you have installed the Card Management COM+ application, follow these steps.
-
Double-click Card Management on the middle pane.
-
Right-click Components and select New > Component. The COM+ Component Install Wizard opens.
-
Select Next. The Import or install a component window opens.

-
Select Install new component(s).
-
In the window that opens, go to your TruckMate install directory (normally C:\Program Files (x86)\TruckMate) and select CardMgmtServer.dll.
-
Select Open. The Install new components window opens.
-
Select Next.
-
In the window that opens, select Finish.
Configure the COM+ user group
After you have installed the Card Management COM+ application and configured the Card Management DLL, follow these steps.
-
Right-click Roles in the middle pane and go to New > Role. The Role window opens.
-
In the field provided, enter Card Management.
-
Select OK.
-
In the Component Services window, double-click Roles.
-
Double-click Card Management.
-
Right-click Users and go to New > User. The Select Users or Groups window opens.
-
Add all users that will need access to this service. For more information, see Assigning a User Account or Group to a Role.
-
When you have finished adding users, select OK and close the Component Services window.
-
Open the Computer Management window. This feature is available in the Administrative Tools group in Control Panel.
-
Go to Local Users and Groups > Groups.
-
Right-click in the middle pane and select New Group. The New Group window opens.
-
In the Group name field, enter Distributed COM Users.
-
Add all the users that you added to the Card Management role in Step 7.
-
When finished, select Close in the New Group window.
-
Close the Computer Management window.
Enter general real-time fuel vendor information
-
In the Card Management application, go to Setup > Vendors.
-
Select your fuel vendor in the database.
-
Select
 Find. The Select Card Vendor window opens.
 -
Locate and select your fuel vendor.
Currently, TruckMate supports these real-time fuel vendors:
-
Comdata
-
Fleet One
-
TCH
-
T-Chek
-
-
Select OK. The Vendors header displays your vendor’s information. The Real-Time option should be selected. If it is not, select it.
-
-
In the header, make entries in the fields provided.
Required field: *
Field Definition Active
When selected, this vendor is available for use in the system.
Note: You must select this option if you are working with parent and child accounts.
Default
When selected, this vendor is the default vendor for your company.
Note: You must select this option if you are working with parent and child accounts.
TM Vendor ID *
TruckMate vendor ID to associate with the fuel vendor. If you want, select
 Pick List to search for and select a TruckMate vendor ID. To view the vendor’s profile, select
  Vendor Profile.
 -
On the Real-Time > General tab, make entries in the fields provided.
Required field: *
Field Definition Local (COM+) Server *
Name of the COM+ server. Do one of the following:
-
If you are performing the setup on the server, select Me. This sends the server’s IP address to your fuel vendor.
-
If you are performing the setup on a local machine, enter the name of the server in the field provided. To test the connection, select Test Connection.
The system determines whether the version of Card Management matches the version of the Card Management DLL file (cardmgmtserver.dll). If they match, a window opens indicating that the connection is successful. If they do not match, contact Trimble Transportation Support.
Set TruckMate Currency Codes at Level *
Available for Comdata only
The level at which a user can select specific TruckMate currency codes.
-
Account
Can select currency codes at the fuel purchase level as defined on the Accounts tab. -
Group
Can select currency codes at a specific group level as defined on the Groups tab.
Card Updates (send/rcv)
When selected, the system can exchange fuel card updates (such as PIN resets) with the real-time server.
Dispatch Assigns (send)
When selected, the system can send dispatch assignment updates (such as driver or power unit assignments to trips) to the real-time server.
If you want to ensure that a cardholder can only use a card when they are on a trip, you may want to select this option and deselect Dispatch Unassigns (send).
Dispatch Unassigns (send)
When selected, the system can send dispatch unassignment updates (such as driver or power unit unassignments from trips) to the real-time server.
If you want to ensure that a cardholder can only use a card when they are on a trip, you may want to deselect this option and select Dispatch Assigns (send).
POS Info (receive)
When selected, the system can receive point of sale (POS) updates (such as driver purchases) from the real-time server.
Note: You must select this option if you are working with parent and child accounts.
E-Checks (send/rcv)
When selected, the system can exchange electronic checks (such as driver pay) with the real-time server.
Note: You must select this option if you are working with parent and child accounts.
Group Updates (send/rcv)
Available for TCH only
When selected, the system can exchange group-related information with the real-time server.
Child Updates (receive)
Available for TCH only
When selected, the system can receive child account updates from the real-time server.
Note: You must select this option if you are working with parent and child accounts.
-
-
When you have finished entering data, select
 Post.
Post.
Enter communication information
The steps you follow to establish communication between your system and the vendor differ slightly depending on the vendor.
-
In Card Management, go to Setup > Vendors.
-
Make entries on the appropriate tab:
-
When you have finished entering data, select
Post.
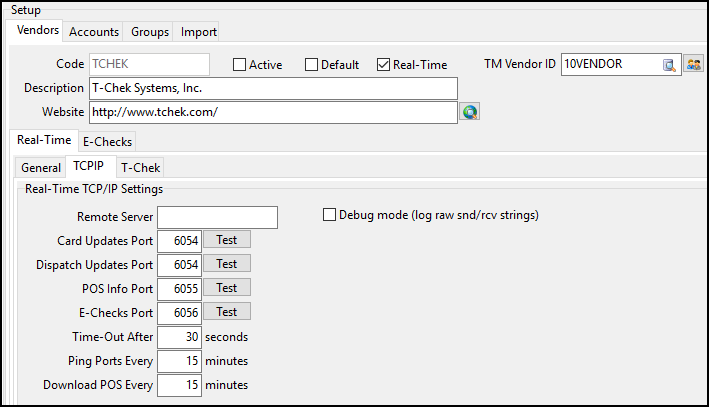
TCPIP (Comdata, T-Chek)
Required field: *
| Field | Definition |
|---|---|
Remote Server * |
Remote server address as provided to you by the fuel vendor |
Card Updates Port * |
Port number used to transfer fuel card updates. To test the connection, select Test. |
Dispatch Updates Port |
Port number used to transfer dispatch updates. Enter a value in this field if you want Card Management to be able to communicate with Dispatch. To test the connection, select Test. |
POS Info Port |
Port number used to transfer POS updates. Enter a value in this field if you are retrieving POS information. To test the connection, select Test. |
E-Checks Port |
Port number used to transfer e-check updates. Enter a value in this field if the system is sending and retrieving e-check information. To test the connection, select Test. |
Time-Out After |
Number of seconds that can elapse without a response from the remote server before communication is stopped. The default value is 30 seconds. |
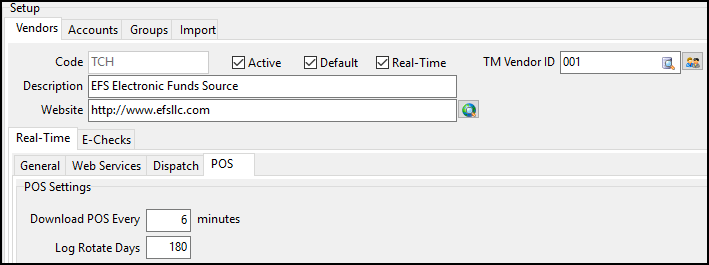
Ping Ports Every |
Available for T-Chek only Number of minutes that can elapse before the system sends a ping request |
Download POS Every |
Available for T-Chek only Number of minutes that can elapse before the real-time server can download new POS transactions to the system |
Debug mode (log raw snd/rcv strings) |
Trimble recommends selecting this option. It allows you to use SQL Execute to see the data exchanged between your server and the fuel vendor server. This can be useful when troubleshooting. |
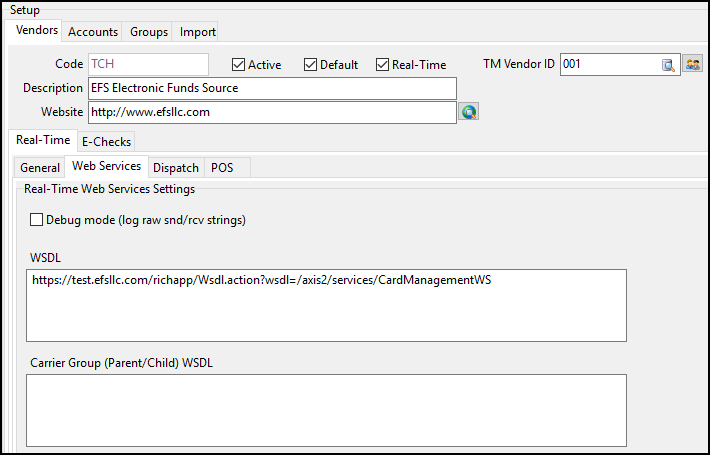
Web Services (Fleet One, TCH)
| Field | Definition |
|---|---|
Debug mode (log raw snd/rcv strings) |
Trimble recommends selecting this option. It allows you to use SQL Execute to see the data exchanged between your server and the fuel vendor server. This can be useful when troubleshooting. |
WSDL |
The WSDL path as supplied to you by your fuel vendor. |
Carrier Group (Parent/Child) WSDL |
Available for TCH only The WSDL path for the parent/child web service as supplied to you by EFS. Note: You must enter a value in this field if you are working with parent and child accounts. |
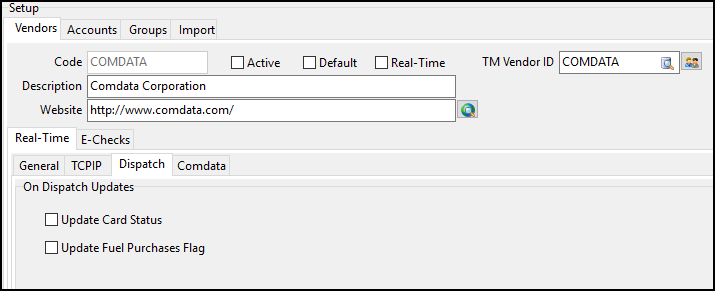
Enter dispatch information (Comdata, TCH)
-
In Card Management, go to the Vendors > Real-Time > Dispatch tab.
-
If you want, select one or more of the options on the Real-Time > Dispatch tab.
Option Definition Update Card Status
When selected, the system will update the card status when there is an update in Dispatch.
Update Fuel Purchases Flag
Available for Comdata only
When selected, the system will instruct the real-time server to turn off fuel purchases when a trip change takes place.
-
When you have finished entering data, select
Post.
Enter additional vendor-specific information in the Real-Time tab
-
In Card Management, be sure the Setup window is displayed.
-
Select the Vendors tab if it is not already selected.
-
Make entries on the appropriate tab:
-
When you have finished entering data, select
Post.
Fleetone tab (Fleet One, TCH)
| Field | Definition |
|---|---|
Download POS Every |
Interval (in minutes) for downloading POS information Note: You must enter a value in this field if you are working with parent and child accounts. |
Log Rotate Days |
Number of days after which the system will delete the POS log file. |
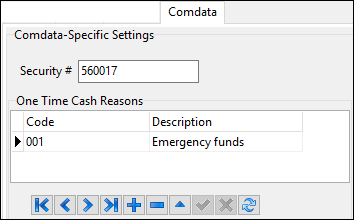
Comdata tab
-
In the Security # field, enter your Comdata security number.
-
If you want, specify reasons that a user can select when assigning a one-time cash amount to a card. For each reason, follow these steps:
-
On the One-Time Cash Reasons pane, select
 Insert Record. A blank record appears on the grid.
 -
In the Code column, enter an alphanumeric value.
-
In the Description column, enter a description of the reason.
-
Select
 Post.
Post.
-
Enter e-check information
-
In Card Management, go to Setup > Vendors > E-Checks.
-
Make entries on each tab:
-
When you have finished entering data, select
Post.
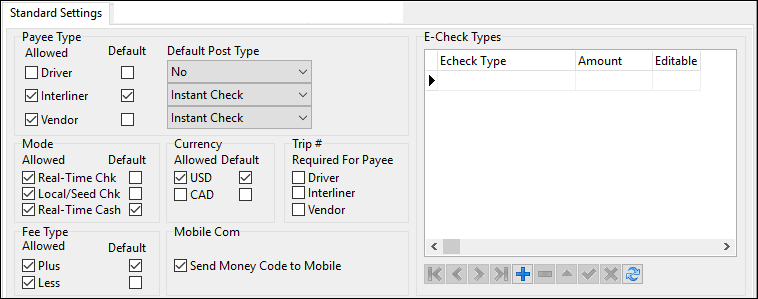
Standard Settings
| Field | Definition |
|---|---|
Payee Type |
Payee types to which the user can issue e-checks. Options are:
Select Default next to the type that will appear by default when creating an e-check. |
Post Type |
Posting methods available when creating an e-check. Options are:
|
Mode |
Method by which an e-check is created and handled. Options are:
Select Default next to the mode that the system will use by default. |
Currency |
Currencies that can be used to create e-checks. Options are:
Select Default next to the currency that the system will use by default. |
Trip # |
Sets whether a trip number is required when an e-check is created for a particular payee type. |
Fee Type |
Available for Comdata, T-Chek, and TCH only Determines how the system will handle fees. Options are:
Select Default next to the fee type that the system will use by default. Note: For Fleet One, these fields are read-only. |
Send Money Code to Mobile |
Available for TCH only When selected, the Sent via Mobile-Comm option in the E-Checks window is selected by default. |
E-Check Types |
Types of e-checks available to the user. For each type, you can specify a default fee amount and whether the user can edit the amount in the E-Checks window. Select |
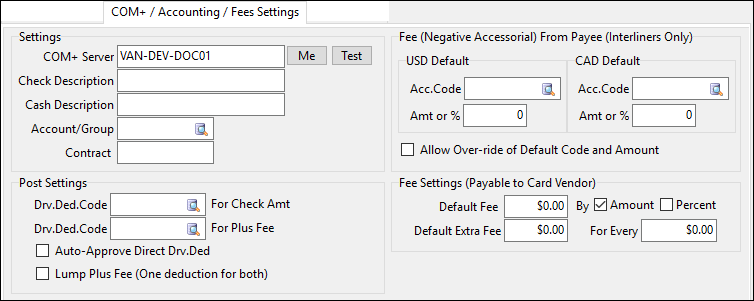
COM+/Accounting/Fees Settings
Required field: *
| Field | Definition |
|---|---|
COM+ Server * |
Machine name of the e-check service. If you are configuring Card Management on the server itself, use Me to enter the service’s name automatically. When you are ready to test the connection, select Test. |
Check Description |
The default description attached to each e-check. |
Cash Description |
Available for Comdata and TCH only The default description attached to each one-time cash transaction. |
Account/Group |
The default account or group to be charged by the amount of e-checks. If you want, select |
Contract |
Available for TCH only Contract to which you want to apply an e-check. If you want, select Note: You import contracts on the Accounts tab. |
Drv. Ded. Code For Check Amt |
The default driver deduction code used for charging the e-check amount. |
Drv. Ded. Code For Plus Fee |
The default driver deduction code used for charging plus-type e-check fees. |
Auto-Approve Direct Drv. Ded. |
When selected, the system approves direct driver deductions automatically. |
Lump Plus Fee (One deduction for both) |
When selected, the default fee type is set to Plus for all Comdata e-checks. |
Fee (Negative Accessorial) From Payee (Interliners Only) |
If the payee type is Interliner, enter the following information to create a negative accessorial:
You can specify default negative accessorial information for US dollars (USD Default) and Canadian dollars (CAD Default). |
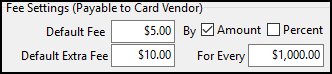
Fee Settings (Payable to Card Vendor) |
Enter the following information in this section:
An e-check for $3,000 created with the settings in this illustration would incur a total fee of $35.
|
Child Settings
For more information on parent and child accounts, see Working with parent and child accounts.

Read-only field: §
| Field | Definition |
|---|---|
Automatic Driver Deduction |
When selected, the system creates a driver deduction for every advance automatically. |
Auto-Approve Direct Drv.Ded |
When selected, the system approves the driver deduction automatically. |
Drv.Ded.Code For Advance Amount |
The deduction code used for driver deductions. |
AP Invoice Line Item |
When selected, the system creates an AP invoice line item for every advance automatically. |
Auto-Hold AP Invoice |
When selected, the system puts the AP invoice on payment hold automatically. |
AP GL Acct For Advance Amount |
The GL expense account number. |
AP Expense/Driver Deduction |
If AP Invoice Line Item is selected, choose the type of line to create on the invoice. Options are:
|
Description |
Text to appear on the AP invoice next to the expense. When created, the system prefixes the freight bill number to this text automatically. |
Bill Number |
When selected, a freight bill number must be associated with the advance. |
Real-Time Cash[blue]§ |
The default value in the Mode field for e-checks created from child accounts. |
Default Fee |
Fee charged per advance. Select an option to determine the measurement:
|
Lump Plus Fee (One deduction for both) |
When selected, the system creates a single deduction that contains the advance and the fee. |
Drv.Ded.Code For Plus Fee |
Deduction code for the fee |
Lump Plus Fee (One AP GL Account for both) |
When selected, the system creates a single AP invoice line item that contains the advance and the fee. |
AP Fee GL Acct For Plus Fee |
The AP GL account number. |
Auto-Advance |
The status code (as set up in Codes Maintenance) to trigger an auto-advance in Customer Service. |
Successful Load of Funds |
The status code used with the freight bill upon a successful load of funds. |
Unsuccessful Load of Funds |
The status code used with the freight bill upon an unsuccessful load of funds. |
Successful Drv. Ded. Creation |
The status code used with the freight bill upon a successful driver deduction creation. |
Successful AP Invoice Creation |
The status code used with the freight bill upon a successful AP invoice creation. |
Enter account information
For each vendor, you can create multiple accounts. Each card must be assigned to an account.
| For information on parent and child accounts, see Working with parent and child accounts. |
-
In Card Management, be sure the Setup window is displayed.
-
Select the Accounts tab.
-
Make entries in the fields provided.
-
When you have finished entering data, select
Post.
Accounts header

Required field: *
| Field | Definition |
|---|---|
Code * |
Fuel vendor account code Note: If you are setting up a child account, enter the parent account code in this field as supplied to you by EFS. |
Active |
When selected, the account is available for use in the system. |
Vendor * |
Fuel vendor attached to the account. Select |
Description |
Account description |
CAD |
TruckMate currency code for Canadian dollars. Select Note: TCH does not accept Canadian dollars. |
USD |
TruckMate currency code for American dollars. Select |
Dual |
When selected, the account can accept both Canadian and American funds. |
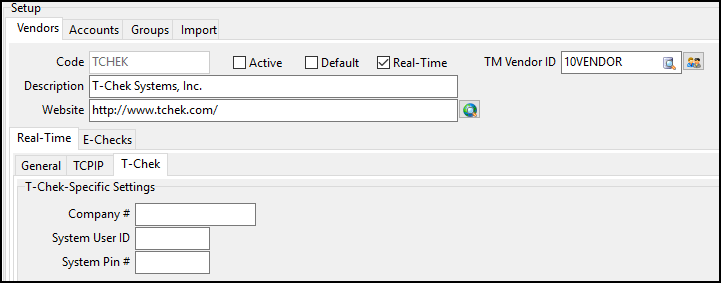
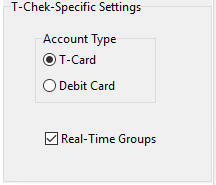
T-Chek-Specific Settings
Required field: *
| Field | Definition |
|---|---|
Account Type * |
Determines the types of purchase options allowed for cards on this account. Options are:
|
Real-Time Groups |
On the T-Chek server, groups are optional and available purely for informational purposes. If you choose to set up identical groups in your system (recommended) and on the T-Chek server, select this option to ensure that both locations reflect card updates accurately. |
TCH-Specific Settings (card-based account)
If you are setting up a card-based account, do not select Parent/Child Account. Make entries in the fields provided.
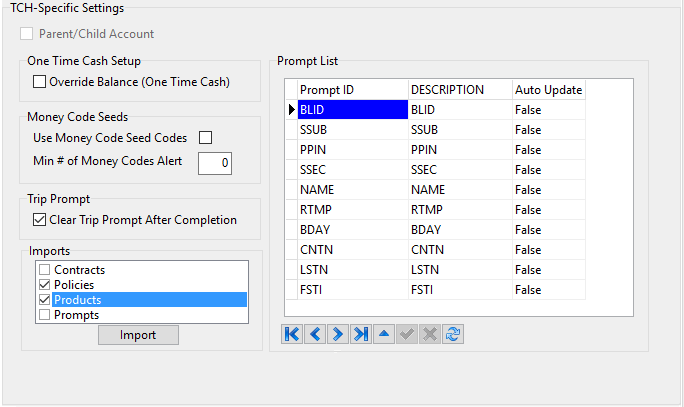
The following fields are available for card-based accounts.
| Field | Definition |
|---|---|
Override Balance (One Time Cash) |
For a one-time cash load, select this option if you want to override the current card balance with the new cash amount. If you do not select this option, the system adds the cash amount to the current card balance. |
Use Money Code Seed Codes |
Select this option if you are using seed codes to generate money codes. |
Min # of Money Codes Alert |
Enter the minimum number of seed codes a user must enter when creating an e-check. |
Clear Trip Prompt After Completion |
When selected, the system clears the trip number after the trip completes. |
Imports |
The following items are available from the TCH web service. Select one or more to import them.
|
If you are setting up a parent or child account, follow these steps.
-
Select the Parent/Child Account checkbox.
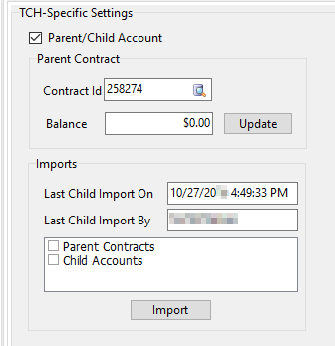
-
Select Parent Contracts.
-
Select Import. The system imports all parent contracts from the EFS server.
-
Select Update. If there is only one parent contract ID, it appears in the Contract Id field and the current balance appears in the Balance field.
If there is more than one parent contract ID, enter it in the Contract Id field or select
Pick List to search for and select a contract ID. Select Update again to retrieve the current balance. -
To import child accounts, select Child Accounts and select Import. You can view child account information on the Child tab.
Working with groups
For all real-time vendors except Fleet One, you can create optional groups to which you can assign multiple cards. All cards in a group share the same properties and options.
Types of groups you could create include:
-
Drivers and non-drivers (such as employees)
-
Canadian drivers and American drivers
Although it is optional, Trimble recommends using groups, as they can save you time when importing new cards.
-
In Card Management, be sure the Setup window is displayed.
-
Select the Groups tab.
-
Make entries in the appropriate location(s) (see below).
-
When you have finished entering data, select
Post.
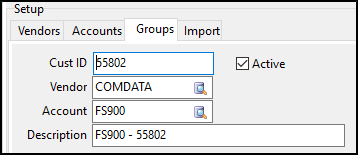
Groups header
Required field: *
| Field | Definition |
|---|---|
Cust ID/Group Number/Policy Number * |
Group code |
Active |
When selected, this group is available for use in the system. |
Vendor * |
Fuel vendor. If you want, select |
Account * |
Fuel vendor account. If you want, select |
Description |
Group description |
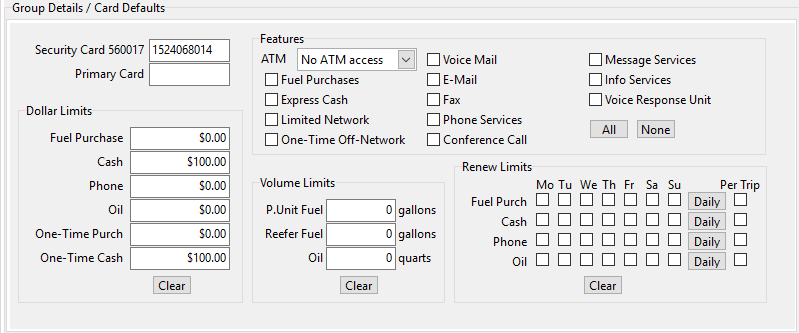
Comdata
| Field | Definition |
|---|---|
Security Card 560017 |
The unique 10-digit password used for all transactions across all of the Comdata accounts for a carrier as well as its associated companies. |
Primary Card |
Number of a card to which any number of secondary cards can be attached. |
Features |
Types of purchases for which a driver can use a fuel card. Select All or None to select or deselect all options. For the ATM field, options are:
|
Dollar Limits |
Maximum amount allowed towards certain types of purchases over the period defined in the Renew Limits section. Select Clear to reset all amounts to zero. |
Volume Limits |
Maximum amount allowed towards certain types of product over the period defined in the Renew Limits section. Select Clear to reset all amounts to zero. |
Renew Limits |
Time period(s) during which the values in the Dollar Limits and Volume Limits sections are refreshed. |
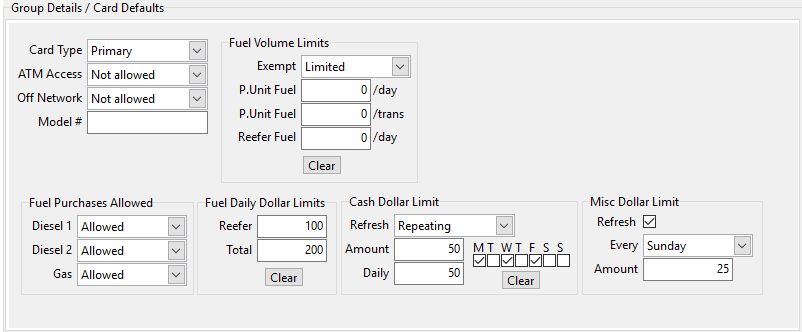
T-Chek
| Field | Definition |
|---|---|
Card Type |
Card type for the group. Options are:
|
ATM Access |
Level of ATM access allowed for fuel cards. Options are:
|
Off Network |
Level of off-network access allowed for fuel cards. Options are:
|
Model # |
The ID of the network of fueling stations that the cardholder can use depending on the value in the Off Network field. |
Fuel Volume Limits |
Limits the amount of fuel that can be purchased in a given period by a fuel card in this group. |
Fuel Purchases Allowed |
The types of fuel that can be purchased with a fuel card in this group. |
Fuel Daily Dollar Limits |
Determines how much can be spent on a card towards fuel. |
Cash Dollar Limit |
The amount of cash a driver or employee can withdraw at an ATM using a card in this group. |
Misc Dollar Limit |
The amount of miscellaneous cash available to a card in this group. |
TCH
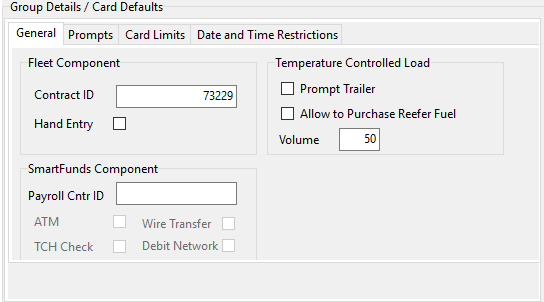
General
Required field: *
| Field | Definition |
|---|---|
Contract ID * |
The policy number as assigned by TCH. |
Hand Entry |
When selected, a card number can be entered by hand at POS locations. |
Payroll Cntr ID |
ID that links a SmartFunds card to the cardholder’s payroll record. When entered, these options are available:
|
Prompt Trailer |
When selected, the cardholder must enter trailer information when using a card at POS locations. |
Allow to Purchase Reefer Fuel |
When selected, the cardholder can purchase reefer fuel for temperature-controlled loads. |
Volume |
Maximum volume of reefer fuel that the cardholder can purchase on a card if Allow to Purchase Reefer Fuel is selected. |
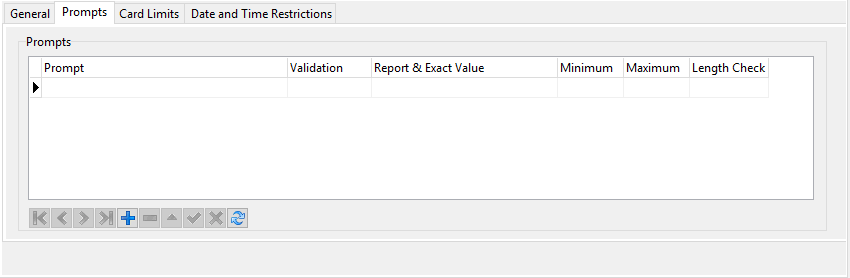
Prompts
Specify prompts that the cardholder must provide when using a card at POS locations.
| Field | Definition |
|---|---|
Prompt |
Prompt name |
Validation |
Validation to be used with a selected prompt. If the entry does not meet the validation requirement, the cardholder cannot use the card. Options are:
|
Report & Exact Value |
Entry required in the following validation cases:
|
Minimum |
Minimum number of characters required for ALPHA, ALPHANUMERIC, and NUMERIC entries |
Maximum |
Maximum number of characters required for ALPHA, ALPHANUMERIC, and NUMERIC entries |
Length Check |
Options are:
|
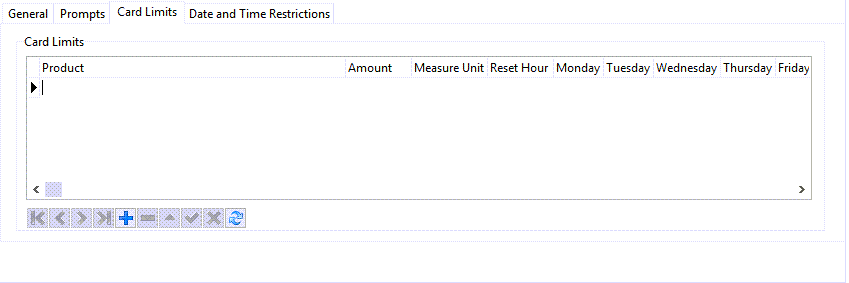
Card Limits
On this tab, you can restrict card usage to specific products and apply amount and time limits for each product.
|Field |Definition
Product |
Product name |
Amount |
The maximum amount of the product that can be purchased within a given time period. |
Measure Unit |
The measurement unit used with the value in the Amount column. |
Reset Hour |
Number of hours that must elapse before the system will reset the amount of product that can be purchased. Alternately, enter 0 in this column and, in each of the day columns (Monday through Sunday), select True or False to determine whether the system will reset the amount on that day. |
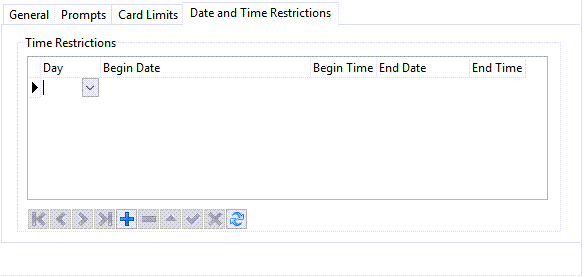
Date and Time Restrictions
Use this tab to restrict card usage to specific dates and times.
| Field | Definition |
|---|---|
Day |
The day of the week on which card usage is restricted. |
Begin Date |
The date on which the card usage restriction period begins. |
Begin Time |
The time at which the card usage restriction period begins. |
End Date |
The date on which the card usage restriction ends. |
End Time |
The time at which the card usage restriction ends. |
Importing card data
If your fuel vendor is Comdata, T-Chek, or TCH, you cannot create fuel cards manually. You must import card data provided to you by your vendor.
If your fuel vendor is Fleet One, you must import card data the first time you use Card Management. Afterward, you can create new cards manually.

-
In Card Management, be sure the Setup window is displayed.
-
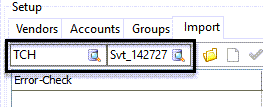
Select the Import tab.
-
Enter or select the vendor in the first field, and the account ID in the second field.
-
If you have previously imported card data from a specific file, and you want to import data using a newer version for that file, select Load only new cards. When you load the file, the grid will display only new card data records.
-
If you want the card’s properties to be updated each time the user interacts with the card in Card Management, select Real-time update.
-
If you want to import only those cards with power units that correspond to power units in the TruckMate database, select Match By Power Unit.
Note: If you do not select this option, the system will import only those cards with drivers that correspond to drivers in the database.
-
Select
 Load a Card File. A calendar control opens.
 -
Select the date and time from which to load card data.
-
Select OK. If the import is successful, the Import grid populates with card data that matches the date and time criteria you selected.
With this information, you can do any of the following:
Action Toolbar icon Keyboard shortcut Description Clear All Rows

CTRL+ALT+N
Clears all data in the grid.
Check All Error-Free Rows for Import

CTRL+A
Validates each record and selects all error-free detail rows in the grid.
If a record contains an error, a description of the error appears in the Error-Check column.
Uncheck All Rows

CTRL+N
Deselects all selected detail rows in the grid.
Retest/Error Check

CTRL+R
Retests all records against any new information entered elsewhere on the Setup tab.
If the record does not contain any errors, the detail row is selected.
If a record contains an error, a description of the error appears in the Error-Check column.
Assign TruckMate Driver ID

CTRL+D
Displays a window in which you can select a TruckMate driver ID to match with the cardholder ID for a selected detail row.
Assign TruckMate Employee ID

CTRL+E
Displays a window in which you can select a TruckMate employee ID to match with the cardholder ID for a selected detail row.
Assign TruckMate Power Unit ID

n/a
Displays a window in which you can select a TruckMate power unit ID to match with the cardholder ID for a selected detail row.
Overwrite Name/License in TruckMate

CTRL+O
For a selected detail row, overwrites the value in the TruckMate ID column with the value in the Holder ID column. Applies to driver and employee records only.
-
When you are ready to import the card data into your system, do one of the following:
-
Select
 Import Checked Rows into TruckMate.
 -
Press CTRL+ENTER.
Card data in the selected detail rows is imported.
-
You can now configure options for individual cards.