Validating ACI messages
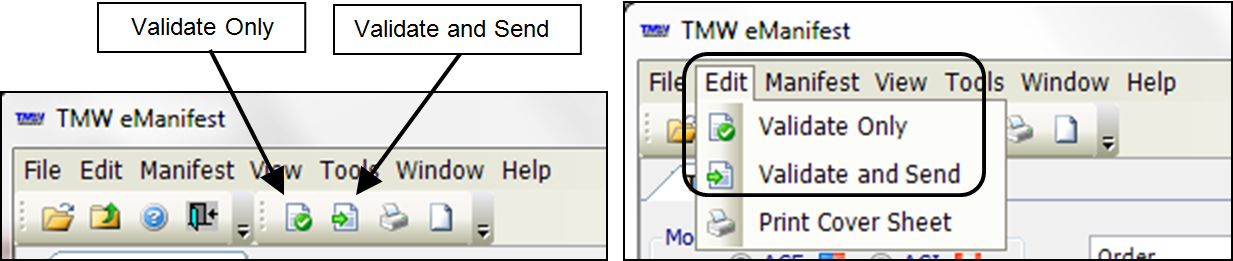
When you send an eManifest message to the border protection agency, the agency checks the message for syntactical errors, and for completeness and correctness of information. eManifest contains two functions to help you prepare error-free messages before you send them. These functions are available as buttons, and as options under the Edit menu:
-
Validate Only
Validate Only checks for missing or outdated information, and displays a report in the Validation Results window. The purpose of the report is to direct you to the appropriate order or trip data so you can make corrections.
You should repeat the process of validation and correction until the Validation Results window does not report any errors. Validation may report information items; these are not errors, but you should still investigate and correct them as needed.
-
Validate and Send
The main purpose of Validate and Send is to transmit eManifest messages to the border protection agency. Validate and Send begins by checking for errors, but the check serves more as a final confirmation.
Note that some items are time-critical, so a trip that passed validation a day or two before can generate an error later. For example, validating a trip that begins a few days late can cause an error because the truck misses the scheduled arrival for the border crossing.
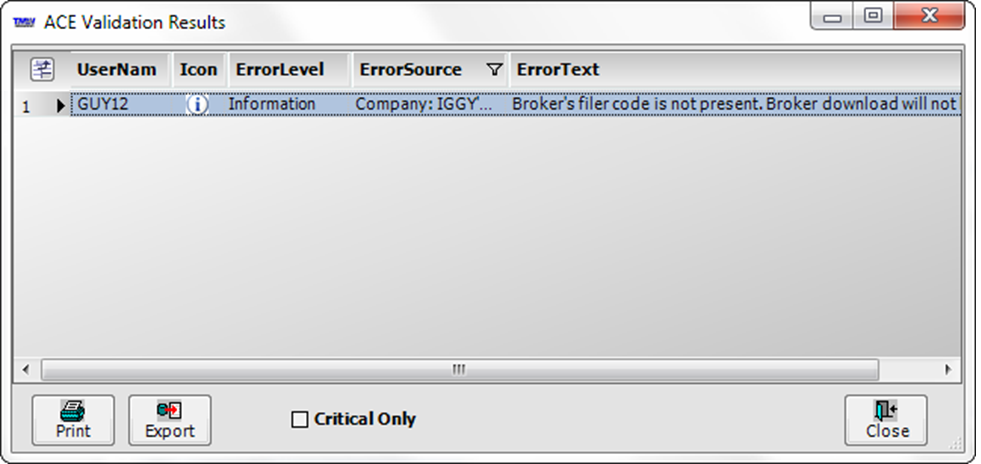
The ACI Validation Results window
The Validation Results window displays the results of a Validate Only or Validate and Send operation.
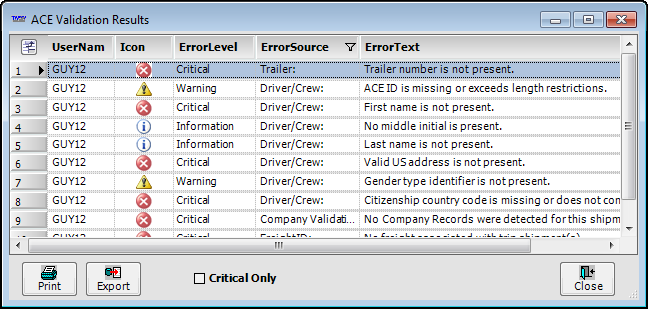
Fields in this window are read-only.
| Field | Definition |
|---|---|
UserName |
The ID of the user logged in to eManifest |
Ico |
An icon representing the error level.
|
ErrorLevel |
A description of the severity of the error
|
ErrorSource |
The Message data (freight, driver, etc.) where the error exists. For most errors, you can select a Message data section and inspect the field in question. You can then decide whether to correct the error in the order (preferred), or in the eManifest window. |
ErrorText |
A detailed description of the error. This information is usually sufficient to pinpoint the field responsible for the error. |
Critical Only |
Select this checkbox to limit the validation results to warnings and critical errors. |
To simplify making corrections, the Validation Results window contains Export and Print buttons. Use these to make an electronic or print copy of the validation results for reference.
-
Print
Sends the report to your default Windows printer. -
Export
Saves the report as a Microsoft Excel file.
Validating an ACI message without sending
When you are ready to validate a message, perform these steps:
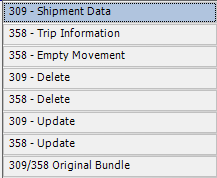
| If you validate a 309 Complete or 309 Preliminary message, where the truck enters the US empty, errors will result, even though all required ACE information is recorded. Use a 358 Trip Info message or 358 Update message instead. |
-
With an order loaded into eManifest, select the type of message you want to validate. This selection determines the types of information the system validates, and what types of information it ignores.
-
Click Validate Only or select Edit > Validate Only.
The Validation Results window opens.
-
If there are no critical errors, warnings, or information items, the Validation Results window is blank.
If you want to send the message now, click Close, and continue with Validating and sending an ACI message.
Note: An informational item should not cause a transmitted message to be rejected.
-
If the window displays errors:
-
The Ico and ErrorLevel fields indicate the severity of the error (Critical, Warning, or Information).
-
The ErrorSource field indicates the part of the order or trip containing the error.
-
The ErrorText field describes the error.

-
-
-
Review the Validation Results window.
Notes:
-
To limit results to critical errors and warnings, select the Critical Only checkbox.
-
To record the window contents for reference, click Export or Print.
-
-
Click Close.
-
Correct errors by opening the order externally in your order entry or dispatch application, or by correcting them directly within the eManifest window.
-
To open an order externally, you do not need to close eManifest, but you will need to reload the modified order into eManifest.
-
If you edit a field in eManifest that also exists on an order, your changes will appear in transmitted messages, but will not automatically be written back to the order. Be sure to update the actual order as soon as possible.
-
-
Reload the order into eManifest if needed, and revalidate for the desired message type.
-
Repeat Steps 1-6 until the Validation Results window does not display any critical errors or warnings.
-
Continue with Validating and sending an ACI message.
Validating and sending an ACI message
When you are ready to transmit a message, perform these steps:
-
With a previously-validated, error-free order loaded into eManifest, select the type of message you want to send.
-
Click Validate and Send or go to Edit > Validate and Send.
The Validation Results window opens.
eManifest validates the message and displays the Validation Results window.
-
If there are no critical errors or warnings, click Close.
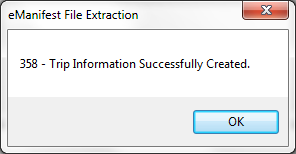
eManifest automatically transmits the message and displays a confirmation for the sent message type.
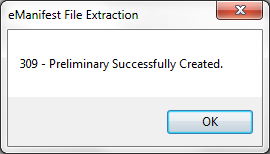
Click OK. You are finished sending the ACE message.
-
If the Validation Results window contains critical errors or warnings, click Print or Export to record the window contents for reference.

-
-
Click Close.
The system displays a message noting that errors and warnings exist, and asks whether you want to continue sending the message:
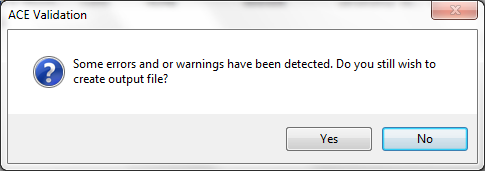
Do one of the following:
-
It is strongly recommended you click No; correct critical errors and warnings, and revalidate the message. See Validating an ACI message without sending.
-
To transmit the message anyway, click Yes. The system transmits the message as-is, and displays a confirmation message.
Click OK.
Notes:
-
Sending a message containing critical errors or warnings can result in the message being rejected, or can cause delays or other problems when the truck reaches the border crossing location.
-
An information item will not cause a message to be rejected.
-
The confirmation may indicate the message was "successfully created." This does not confirm correctness or acceptance of the message contents.
-
-