Create a road call shop plan or repair order
After you create a new road call, you can create a new shop plan or shop repair order for it. You can also add a shop plan or shop repair order to an existing road call.
-
Open the page by going to Menu > Activities > Road Calls > Road Calls. The road call page opens.
-
Select + Shop Plan/RO to open the Create Plan/RO window.

-
Complete these fields:
Required field: *
Field Definition Shop ID*
The program completes this field for you based on your selected shop.
Date*
The program completes this field for you based on the date you create the shop plan, repair order, or both.
Select a creation option:
Create Repair Order and Plan
Select this option to create both a repair order and shop plan. The Manage Form window opens with the Repair Order window first. Once you save the RO, the Shop Planner window opens in the Manage Form window. When you save the shop plan, the Manage Form window closes, and the program saves the information to the road call.
-
To review the steps for creating a repair order, see Create repair orders.
-
To review the steps for creating a shop plan, see Create a shop plan.
Create Plan only
Select this option to create a Shop Plan only. The Manage Form window opens. See Create a shop plan.
Create Repair Order
Select this option to create an RO only. The Manage Form window opens with the Repair Order window inside it. For more information, see Create repair orders.
Note: If you add a unit on the fly when creating an RO, you can search for units by Vehicle Identification Number (VIN) or Department of Transportation (DOT) number. See Application Options: Invoicing for more information.
-
-
Select Ok to proceed.
The next sections describe how to create a shop plan and various types of ROs.
Create a shop plan
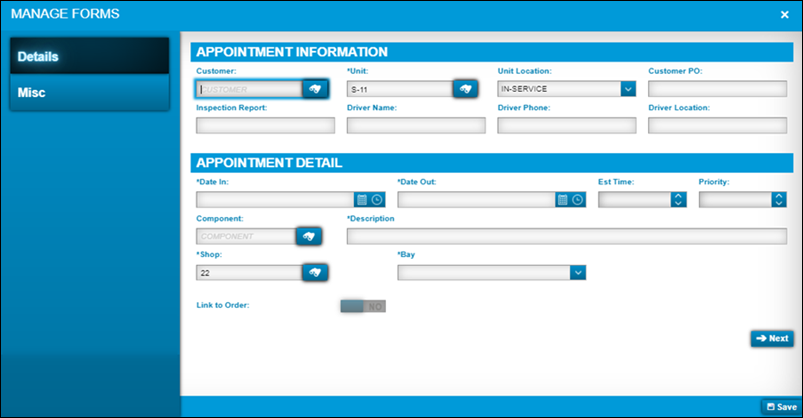
When you open the Managed Forms pane (by selecting Create Plan), the Details tab is open. This tan has the Appointment Information and Appointment Details sections.
-
Enter the appointment information by completing these fields:
Required field: *
Field Definition Customer
Customer ID
Unit *
Unit ID
Unit Location
Location of the unit
Options include:
-
At-Plant
-
At-Vendor
-
Deadline
-
In-Bound
-
In-Service
-
In-Shop
-
Loaned Out
-
Out-Service
-
Ticketed
-
Yard
Customer PO
Customer’s purchase order number
Inspection Report
Report with details of an inspection
Driver Name
Driver of the unit that needs repairs
Driver Phone
Phone number of driver
Driver Location
Enter the driver’s location.
Note: The Appointment Detail section will be completed by the shop when the unit arrives for service.
-
-
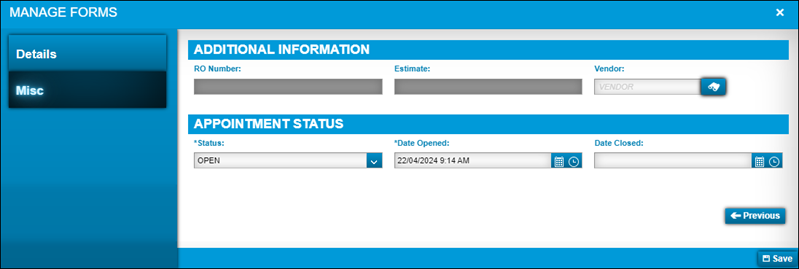
Select Next to proceed to the Misc tab that opens the Additional Information and Appointment Status sections.
-
Complete these fields:
Required field: *
Read-only field: §Field Definition RO Number §
The program completes this information for you.
Estimate §
The program completes this information for you.
Vendor
Enter the vendor. You can also search for the unit number by selecting
 Search.
Status *
Select OPEN from the dropdown list.
Date Opened *
The program automatically enters the current date and time, but you can edit this as needed.
Date Closed
Leave this field blank until the shop plan is closed.
-
Select Save.
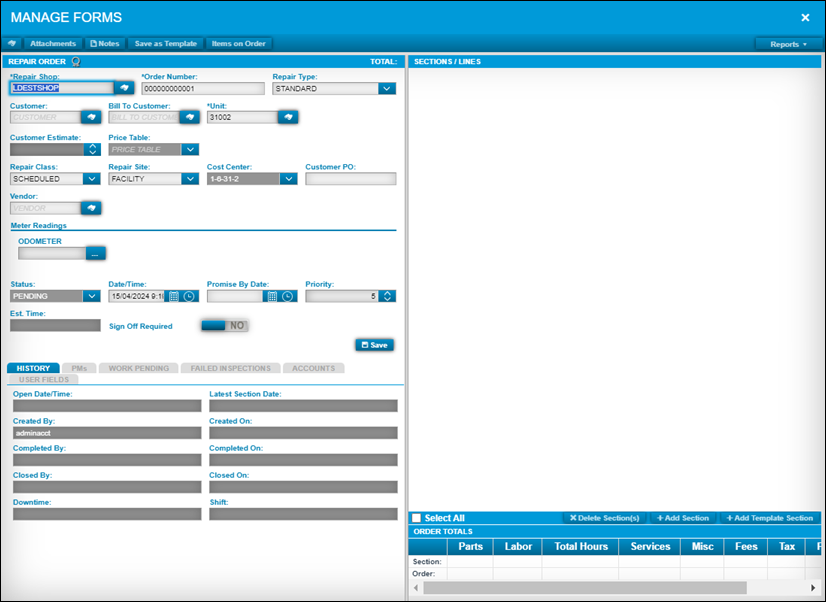
Create a Work Pending repair order
You can create a new Work Pending Repair Order after you create a new road call. Or you can add a Work Pending Repair Order to an existing road call.
To create a new Work Pending Repair Order while creating a new road call, open the page by going to Menu > Activities > Road Calls > Road Calls. The road call page opens.
-
Select + Work Pending to open the Repair Order page.
Note: The Status field is PENDING.
-
From the Repair Order page, you can add order information, including sections and lines. You can also view related information, such as the Repair Order history and preventive maintenance (PMs). For more information, see Add pending activities.
Create a vendor repair order (VRO)
You can create a new Vendor Repair Order after you create a new road call. Or you can add a Vendor Repair Order to an existing road call.
To create a new Vendor Repair Order while creating a new road call, open the page by going to Menu > Activities > Road Calls > Road Calls. The road call page opens.
-
Select + Vendor RO to open the Repair Order page in the Managed Forms pane.
Note: The Repair Type field shows VENDOR RO.
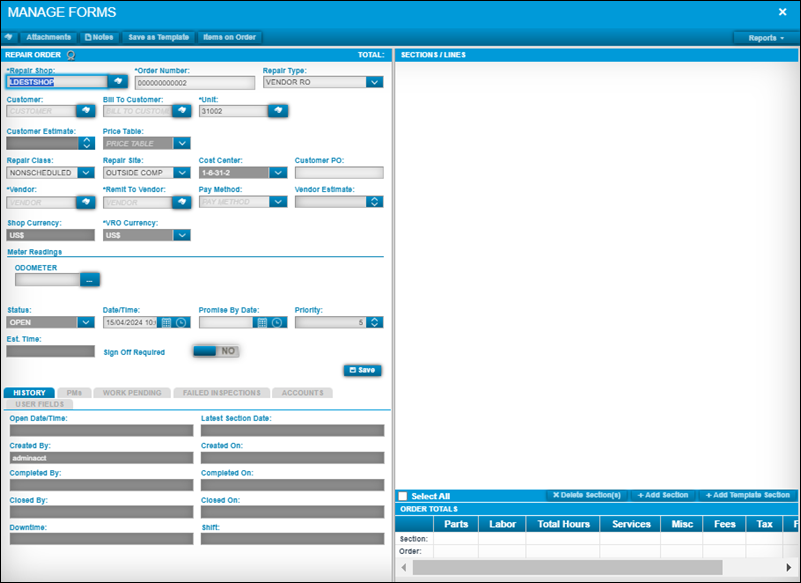
-
From the Repair Order page, you can add order information, including sections and lines. You can also view related information, such as the Repair Order history and preventive maintenance (PMs). See Repair Orders (ROs) for more information on vendor repair orders.
Road call repair order examples
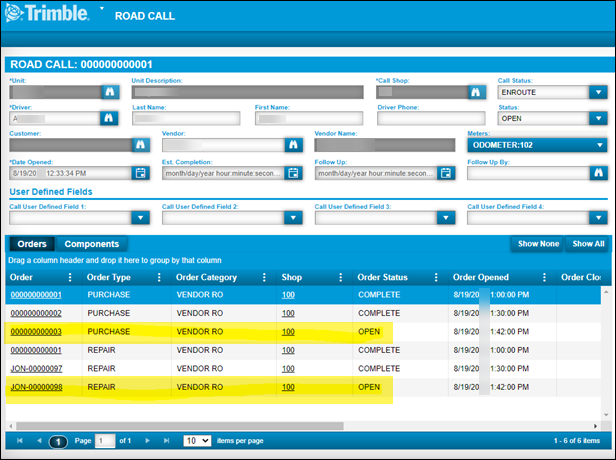
In the next illustration, you can see the unit has three purchase orders and three repair orders:
-
PO: 000000000001
-
PO: 000000000002
-
PO: 000000000003 (highlighted)
-
RO: 000000000001
-
RO: JON-00000097
-
RO: JON-00000098 (highlighted)
A new RO and PO was created for each vendor. The highlighted PO is matched to the highlighted RO. This lets users track each location where the unit went for repairs. When you send a unit to different vendors, the details of each repair are recorded on the same road call.
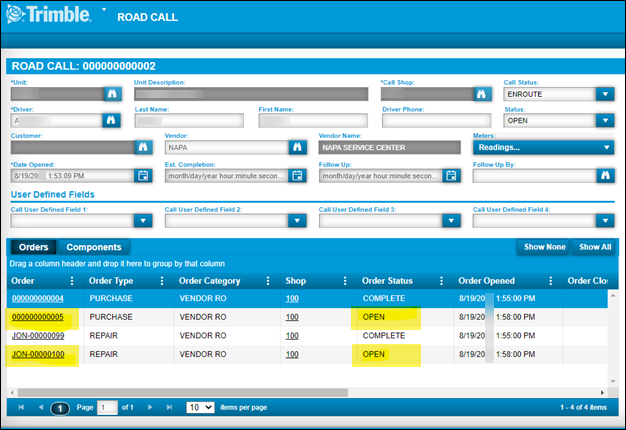
In the next illustration, the user sent the unit to the first highlighted location to purchase the part, then to second highlighted location for the actual repair, as demonstrated by the two different order types.
Road Call repair orders and Trimble Technician Portal (TTP)
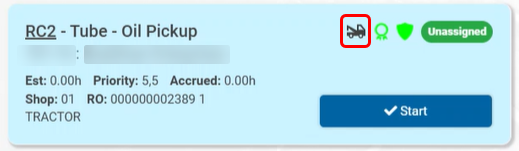
When an RO starts as a road call, the TTP job card displays a tow truck icon. Hovering over the icon or selecting it displays the road call number and shop: "Repair Order originated from Road Call number in Shop number." Hovering over the icon displays the message as a tooltip; selecting the icon opens a system message with the same details.
This illustration shows a TTP job card with the tow truck icon.