Trace
The Trace section enables you to configure the ways in which TM4Web users will use the Trace section of TM4Web. Trace is divided into three tabs: Trace Methods, Trace Results, and External Trace. The Trace Results tab has several sub-tabs where further details are configured.
| Trace information (as with all Client Features) is configurable based on Access Group. Select the Access Code you wish to configure. |
To access the Trace window, click Client Features and then click Trace.
Trace Methods tab
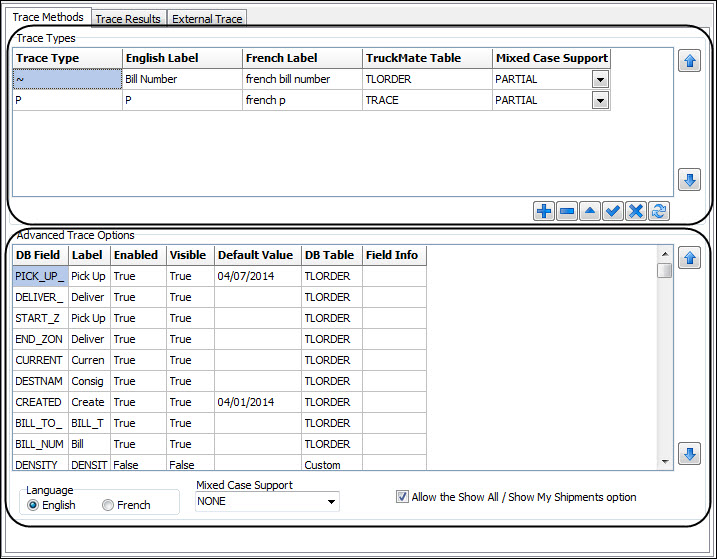
The Trace Methods tab enables you to configure the ways in which TM4Web users will be able to trace for orders. The Trace Methods tab is divided into two sections: Trace Types and Advanced Trace Options.
Setting Trace Types
You can add, delete or modify Trace Types by using the standard TruckMate navigation bar. You can then prioritize the order in which the Trace Types will appear to TM4Web users by using ![]() Up and
Up and ![]() Down.
Down.
Use this procedure to define the available Trace Types:
-
Click
 Add on the navigational bar to add a new Trace Type or double-click (or use the <Enter> key) an existing Trace Type to choose an alternative Trace Type character value to represent the selected Trace Type.
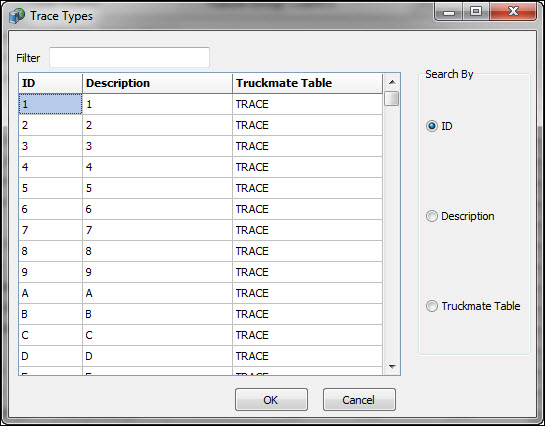
The Trace Types window opens.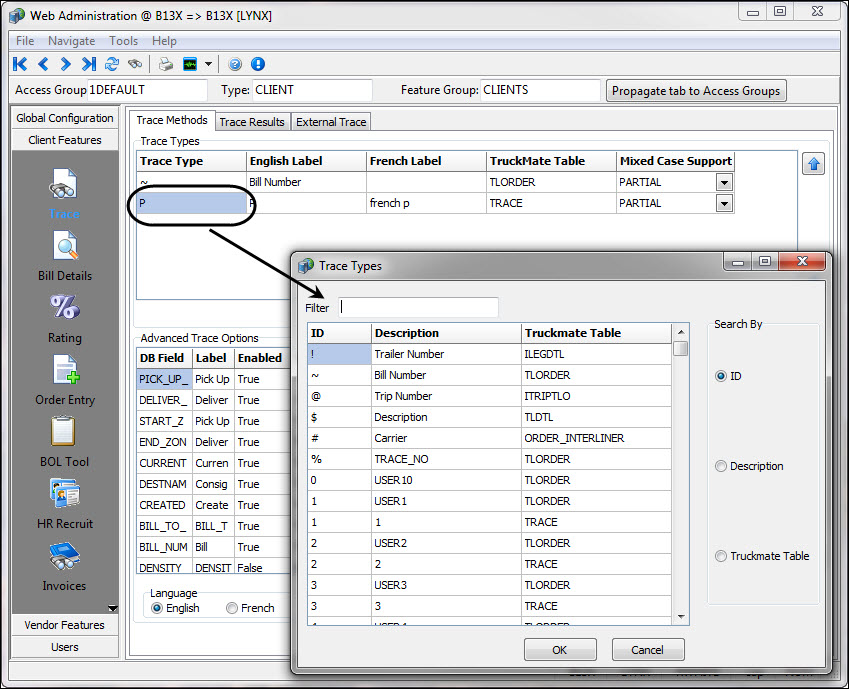
-
Select from the available Trace Types and click Ok.
Trace TypesCharacter Trace Type !
Trailer Number
~
Bill Number
@
Trip Number
$
Description
#
Carrier
%
TRACE_NO
Outside of the 6 special character types, which are available only for TM4Web, you can control which Trace Types (out of A-Z and 1-9) are available in this window (and their descriptions) via the Codes Maintenance program > Trace Number Types tab.
-
Click within the English or French label fields to change the label that will be displayed.
-
Select the desired Mixed Case Support option which affects the performance as follows:
-
Full - Full support for mixed case searches (i.e., case insensitive), but it has modest database performance.
-
Partial - Partial support for mixed case searches will compare the field value to the search value, the upper-case search value and the lower-case search value. This provides reasonable performance, although the query will not match well if the database values are mixed case.
-
None - No support for mixed case searches (i.e., case sensitive). This provides the best database performance.
-
-
Click
 Save.
Save. -
Repeat steps as necessary for each trace type record line.
Advanced Trace Options
The Advanced Trace Options section allows more detailed ways of refining a user’s trace results.
The fields displayed here are selected from the Trace Result Columns setup on the Trace Results tab. In order to add new fields here, the column must first be added to the Trace Results. The column can be setup as hidden in the Trace Results but visible in the Advanced Trace if needed.
Use this procedure to set Advanced Trace Options:
-
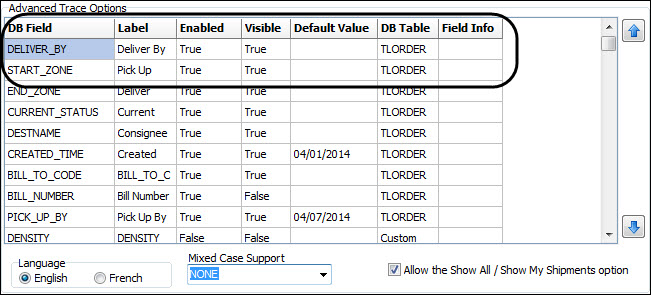
Double-click Enabled and Visible fields between True/False. Fields can be setup as Enabled and Visible so that a TM4Web user can input in their own search criteria.
Fields could be setup as Enabled but not Visible with a Default Value instead. This is useful for limiting what TM4Web user has access to. For example, the CREATED_TIME field is setup as hidden by default from the Advanced Trace Options that the TM4Web user will see, but set with a Default Value so that the records returned will be limited. This is helpful with database performance.
-
Click within the Default Value field to setup a default value. This will only be applied to the TM4Web Trace if the field is not visible, or if the TM4Web user selects to apply the Advanced Trace Method.
-
Select either English or French to modify the corresponding label.
-
Use
 Up and
  Down to modify the order in which the Advanced Trace Options will appear.
 -
Select the desired Mixed Case Support option which affects the performance as follows:
-
Full - Full support for mixed case searches (i.e., case insensitive), but it has modest database performance.
-
Partial - Partial support for mixed case searches will compare the field value to the search value, the upper-case search value and the lower-case search value. This provides reasonable performance, although the query will not match well if the database values are mixed case.
-
None - No support for mixed case searches (i.e., case sensitive). This provides the best database performance.
-
-
Select the Show All and Show My Shipments options if users are to access and work with the Notification Queue.
-
In the Advanced Trace Options grid, double-click the available field in each column and modify accordingly.
 Column definitions
All fields except DB Field are editable.
DB Field Displays the database field that can be used by the user to trace by. Label
Displays the text label that will be above the associated database field.
Enabled
Select either True or False; depending on if you want to enable this Advanced Trace field. If it is enabled but not visible, a default value is required.
Visible
Select either True or False; depending on if you want this Advanced Trace field to be visible to the TM4Web user.
Default Value
Enter the data to use as the Default Value. If the field is not visible to the TM4Web user this will be automatically applied to the Trace without the user knowing. If the field is visible, the data will be displayed but the field must also be selected by the user to be applied to their Trace.
DB Table
This column shows the TruckMate Database Table associated with the DB Field on the same detail line.
Field Info
This field is for informational purposes only. This will display additional details for some fields. When adding a POD column it is also required to select which TX Type will be used for selecting this data. The chosen TX Type will display in the Field Info column.
Trace Results tab
The Trace Results tab contains 4 sub-tabs under which you can configure and/or refine returned results when your TM4Web users are using the Trace functionality.
Trace Results Columns
The Trace Results Columns tab allows you to configure which columns will be displayed to the TM4Web user.
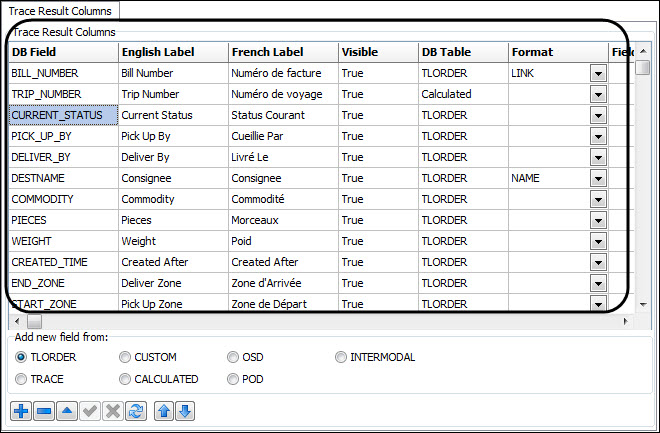
The detail lines entered in this section will make up the grid that appears whenever a TM4Web user successfully completes a trace.
Make the appropriate entries to the following fields:
All fields except DB Field are editable.
| DB Field | These values control where the Trace Result Columns gather data from your TruckMate database and cannot be modified. |
|---|---|
English Label |
Enter the label of the column to be displayed when viewing TM4Web in French. |
French Label |
Enter the label of the column to be displayed when viewing TM4Web in English. |
Visible |
Select either True or False; depending on if you want this column visible by your TM4Web users. DB Fields set to be not visible can be added to the Advanced Trace Options. |
DB Table |
This column shows the TruckMate database table associated with the DB Field on the same detail line. |
Format |
The options available in this column specify how the data displayed in this are formatted. The available options are:
|
Field Info |
This field is for informational purposes only. This will display additional details for some fields. When adding a POD column it is also required to select which TX Type will be used for selecting this data. The chosen TX Type will display in the Field Info column. |
Clicking ![]() Add on the TruckMate navigation bar enables you to choose fields from various areas of TruckMate that can be added into the Trace Results Columns section.
Add on the TruckMate navigation bar enables you to choose fields from various areas of TruckMate that can be added into the Trace Results Columns section.

-
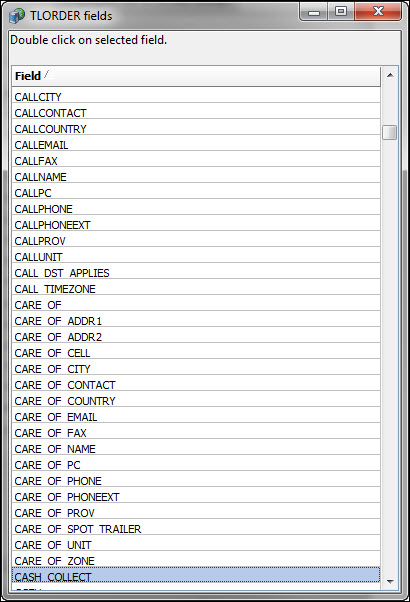
TLORDER - enables you to add fields from the TruckMate TLORDER Table.
-
TRACE - enables you to add fields from the TruckMate TRACE Table.
-
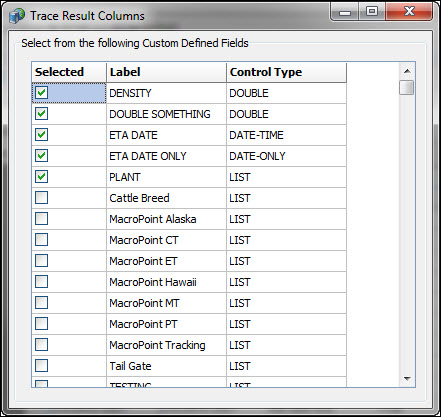
CUSTOM - enables you to enter Custom Defined fields into the Trace Results page. These fields are defined in the Codes Maintenance program > Custom Defined Fields tab for any custom field that is linked to the TLORDER table.
-
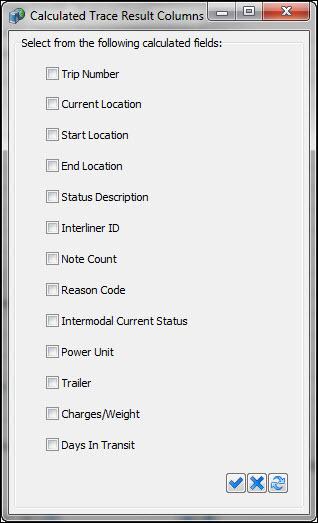
Calculated Fields - enables you to select one of the various Calculated Fields available for TM4Web.
-
OSD - enables you to add fields from the TruckMate OSD table.
-
POD - enables you to add fields from the TruckMate POD table.
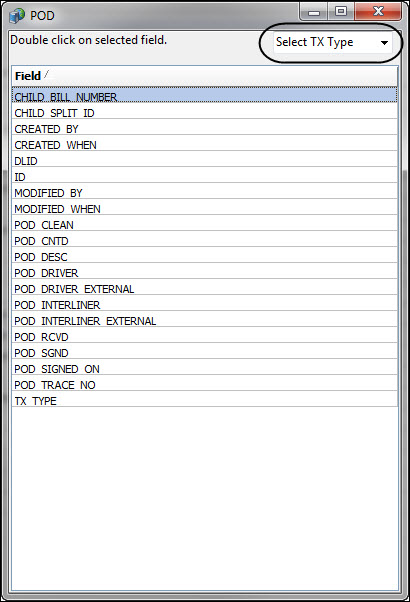
Note: When selecting the POD field, you must also select the associated TX Type.
-
INTERMODAL - enables you to add fields from the TruckMate CONTAINER_TLORDER table.
Options
The Trace Result > Options tab enables you to configure various options regarding Trace functionality.
-
The Return Records Where the Client is the options enable you to configure which records should be returned during a Trace, dependent on whether the TM4Web user is the Caller, Shipper, Bill To, Consignee, Other Client, or Rate To of the freight bill. This means that only orders where the clients within the configuring Access Group are set as the Caller, Shipper, Bill To, Consignee or Rate To will be returned to the TM4Web user for viewing.

-
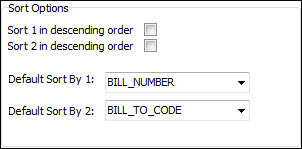
Trace results can be sorted 2 ways:
-
By default, records are returned sorted in ascending order. To reverse this ordering select the Sort 1/2 in descending order options.
-
Select the Default Sort By field. TM4Web will sort the records by the Default Sort By 1 value first, and then by the Default Sort By 2 value. The fields available are selected from the field’s setup in the Trace Results Columns. This will be used just as the initial default sort, after the results are returned the user can sort by any of the columns displayed.
-
-
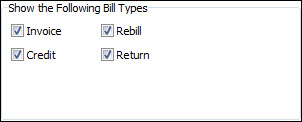
The Show the Following Bill Types options define what types of freight bill will be displayed in the Trace Results.
Make the appropriate selections to the following additional display options:
Additional Options Description Records returned in sets of
This value controls how many Trace Results are returned by a user’s trace at one time. The user can then scroll through the remaining results. Default is set at 30.
Automatically refresh results after
This value represents the time (in minutes) that will elapse before the Trace Results are automatically refreshed in order to gather new data. If set to 0 the Trace Results page will not refresh.
Rollup Intermodal Bills
When this option is selected, the Trace Results page in TM4Web will:
-
display intermodal records grouped into one row. Each column will display data from only the active bill, with the exception of Bill Number and Status where the values of each bill will be displayed.
-
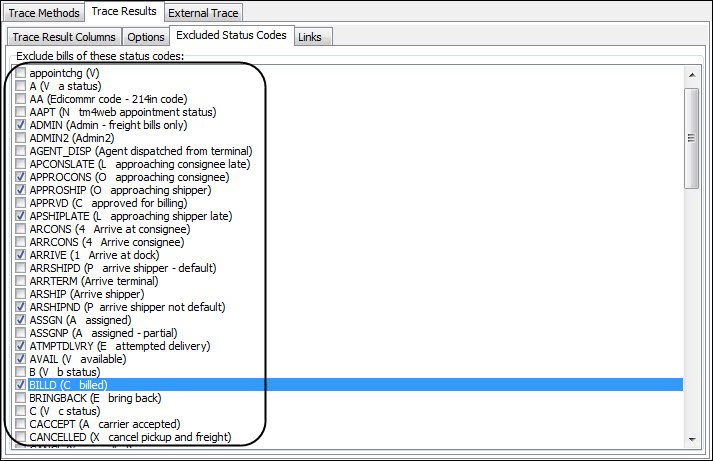
Excluded Status Codes
To exclude freight bills with certain status codes from your Trace Results, simply select the Status Code to exclude.
Links
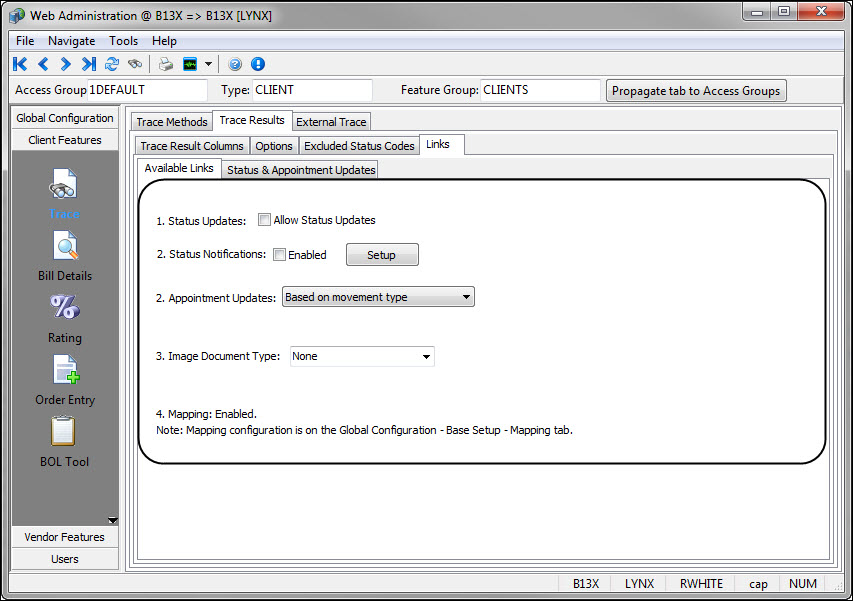
The Links tab enables you to configure 5 possible icon links to be displayed in the last column of the Trace Results, which allows the user access to specific functionality related to the particular record.
Available Links
The Available Links tab is used to configure which links display in the Links column after a TM4Web user completes a trace.
| Option | Definition |
|---|---|
Status Updates |
Selecting the Allow Status Updates option enables TM4Web users to make Status Updates to Freight Bills returned in the Trace Results page. A |
Status Notifications |
When enabled, this option displays an |
Appointment Updates |
This option enables you to specify whether or not TM4Web users have the ability to update an order’s Appointments from the Trace Results page. This will display the Use the menu to select the type of appointment updates. The options are:
For additional configuration options, see Status & Appointment Updates. |
Image Document Type |
This option allows you to setup a link, displayed as a |
Mapping Enabled |
This section of the Available Links tab simply notifies you if mapping has been enabled for the selected Access Group / Client ID on the Global Configuration > Base Setup > Mapping Tab. For details, see Base Setup > Mapping tab. |
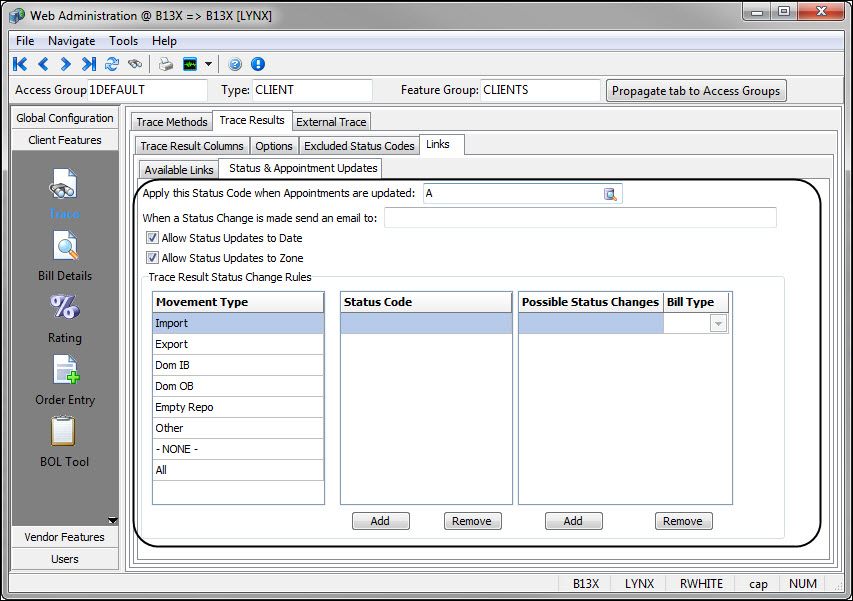
Status & Appointment Updates
From the Trace Results page, TM4Web users can make Status and Appointment updates by clicking corresponding ![]()
![]() icon links. These configuration settings define what options and Status Codes are available within the corresponding dialogs.
icon links. These configuration settings define what options and Status Codes are available within the corresponding dialogs.
The Status Appointment Updates tab is used to configure the Status Code updates that can be used after a TM4Web user gets Trace results.
| Option | Definition |
|---|---|
…when Appointments are updated: |
Specify a Status Code to apply when appointments are updated. Leave this field empty if Status records are not desired when Appointments are updated via the TM4Web Trace Results. |
…Send email to: |
Enter an email address in this field. When a Status Update is made by a user, an email will be sent to the entered email address. |
Allow Status Updates to Date |
Selecting this option allows users to enter a specific date to apply when making the Status Update on the Status Update screen. If not selected, the current date will be used. |
Allow Status Updates to Zone |
Selecting this option allows users to enter the zone to use when making the Status Update on the Status Update screen. If not enabled the Zone field will remain blank. |
Trace Results Status Change Rules |
|
Movement Type |
The options available in this column allow a different set of rules to be established for different Movement Types, or one set for All Movement Types. Click on the intermodal Movement Type that you wish to setup, add a Status Code, and then Add the Possible Status Changes which will be available for this configuration. |
Status Code |
Once you have selected an intermodal Movement Type, Add a Status Code. Freight Bills whose Current Status is one of these Status Codes will display the Status Change |
Possible Status Changes |
Once a Status Code is selected, you are prompted to select a Possible Status Change code that TM4Web users will be allowed to update the original Status to. |
Bill Type |
The Bill Type field has been added to the Trace Results Changes section due to the inclusion of Roll-up Intermodal Freight Bills (which can be assigned on the Trace Results tab). For details, see Options tab. You can set this option to Regular, Empty or Loaded (default is Regular). This value is used when making Status updates to Loaded Bills to determine which Freight Bill to apply the status update to. |
External Trace tab
The External Trace tab enables you to configure how external TM4Web users will use the Tracing functionality of TM4Web. The TM4Web External Trace form can be added to your corporate website, allowing users to trace and view freight bill details without logging into TM4Web. The WebAdmin External Trace tab is divided into two sections: Trace Types and Trace Result. Also see WebAdmin > Bill Details > External Viewing for configuring what external users will be allowed to see on the bill returned.
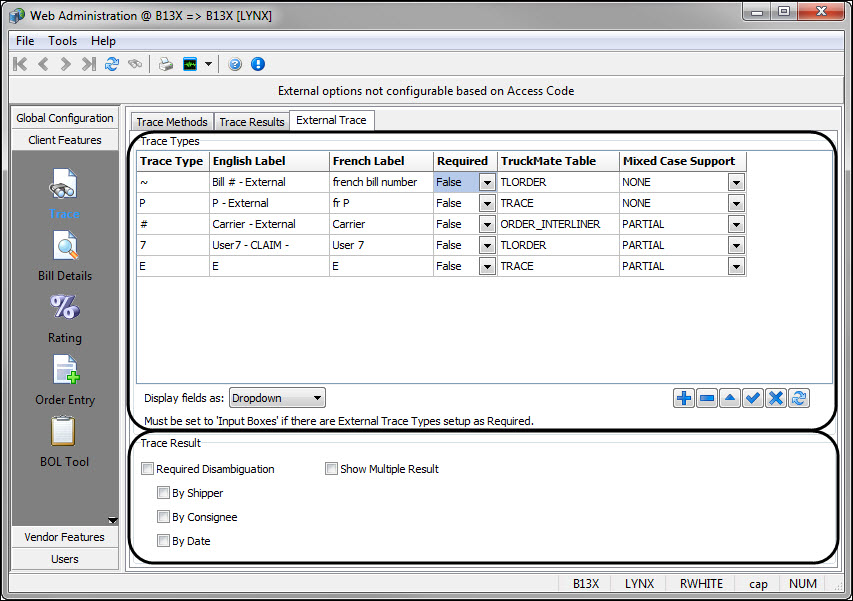
Setting External Trace Types
The External Trace Types section enables you to add, delete or modify Trace Types by using the standard TruckMate navigation bar. You can then prioritize the order in which the External Trace Types will appear to external TM4Web users.
Use this procedure to set External Trace Types:
-
Click
Add on the navigational bar to add a new Trace Type or double-click (or use the <Enter> key) to choose an alternative Trace Type.
The Trace Types window opens. -
Select from the available Trace Types and click Ok.
Character Trace Type !
Trailer Number
~
Bill Number
@
Trip Number
$
Description
#
Carrier
%
TRACE_NO
Outside of the 6 special character types, which are available only for TM4Web, you can control which Trace Types (out of A-Z and 1-9) are available in this window (and their descriptions) via the Codes Maintenance program > Trace Number Types tab.
-
Click within the English or French label fields to change the label that will be displayed.
-
Select either Required True or False; depending on if you want the Trace Type to be required when submitting a request. This allows defining multiple required Trace Types to be entered before the External TM4Web user can submit a trace request.
-
Select the desired Mixed Case Support option which affects the performance as follows:
-
Full - Full support for mixed case searches (i.e., case insensitive), but it has modest database performance.
-
Partial - Partial support for mixed case searches will compare the field value to the search value, the upper-case search value and the lower-case search value. This provides reasonable performance, although the query will not match well if the database values are mixed case.
-
None - No support for mixed case searches (i.e., case sensitive). This provides the best database performance.
-
-
Click
Save -
Repeat steps as necessary for each trace type record line.
Note: Select Display Fields as either Dropdown or Input Boxes to set how users will view the External Trace methods. If setting up multiple required Trace Types the fields must be displayed as Input Boxes so that the External Trace user can enter in the multiple values.
Setting External Trace Results
The Trace Result section allows you to configure how multiple returned results will be handled by the External Trace function. If neither of the options described below are selected, the Trace will simply return the first Freight Bill that matches the Trace criteria.
-
Required Disambiguation - If the Trace result returns more than 1 record, TM4Web prompts the user to narrow the search by Shipper, Consignee or Date (depending on selected options). This feature disallows users from viewing the entire list of Freight Bills tied to an entered Trace number, compelling the user to narrow-down the search. These options help avoid Customer A from viewing Customer B’s Freight Bills, for example.
-
Show Multiple Result - When enabled, if the Trace result returns more than 1 record, TM4Web will simply display the list of returned Freight Bills, then allow the user to select the bill they wish to view details for.
How to configure external trace functionality within a corporate website
TM4Web’s External Trace functionality allows configuring a Trace Lookup field onto a corporate website, where users can input specific trace data and, if found view the traced Freight Bill details without having to log into TM4Web.
TM4Web’s External Trace code is contained within the external.msw file, located in the htdocs\trace\ directory. This page displays an HTML form containing the fields configured in the Web Admin > Client Features > Trace > External Trace tab.
Use one of the two methods below to add the external.msw file to your own corporate website:
| The external.msw file cannot be directly edited. |
-
In an HTML table using PHP to include the external.msw file:
<table align="center" style="border: Silver 2px solid;"> <tr> <td bgcolor="#808080" colspan="3" style="font-size: medium; color: white">Track Your Shipments Here</td> </tr> <tr> <td colspan="3" style="height: 35px"><? require_once("trace/external.msw"); ?></td> </tr> </table> -
Using an HTML iframe to point to the external.msw file:
<iframe src="http://www.tm4web.com/trace/external.msw" frameborder="0" width="500" "500" />