Claims
The Claims wizard allows you to enter claims regarding OS&D (Over, Short and Damaged). An OS&D incident takes place when at the time of pickup, delivery or in between the commodity:
-
Is over the stated quantity.
-
Is less than the stated quantity.
-
Has partial or total damage.
The following figure illustrates the claims process to enter information related to an OS&D incident and submit the claim.

| Entered claims are saved in the Claims TruckMate application and will go through the normal business flow of handling claims. |
Processing Steps
-
You must enter a valid bill number and then select a claimant. The system validates the entered bill number in terms of existence and previous claims against the same bill number and aging.
-
The bill number is validated and additional claim details are requested.
-
You can upload multiple files to support the claim.
-
The user (claimant) agrees to the legal terms and conditions of the Claim service.
-
The system confirms the submission of the claim to the user and displays the details of the claim for verification.
Entering OS&D claims
Use this procedure to enter information related to an OS&D incident and submit a claim.
-
On the TM4Web menu, click More and then click Claims.
The Claims page opens. The Claims process has five steps: -
Provide entries on the Validate Bill Number screen, as indicated on screen and in the following table:
Note: You must enter a valid bill number and then select a claimant. The system validates the entered bill number in terms of existence and previous claims against the same bill number and aging.
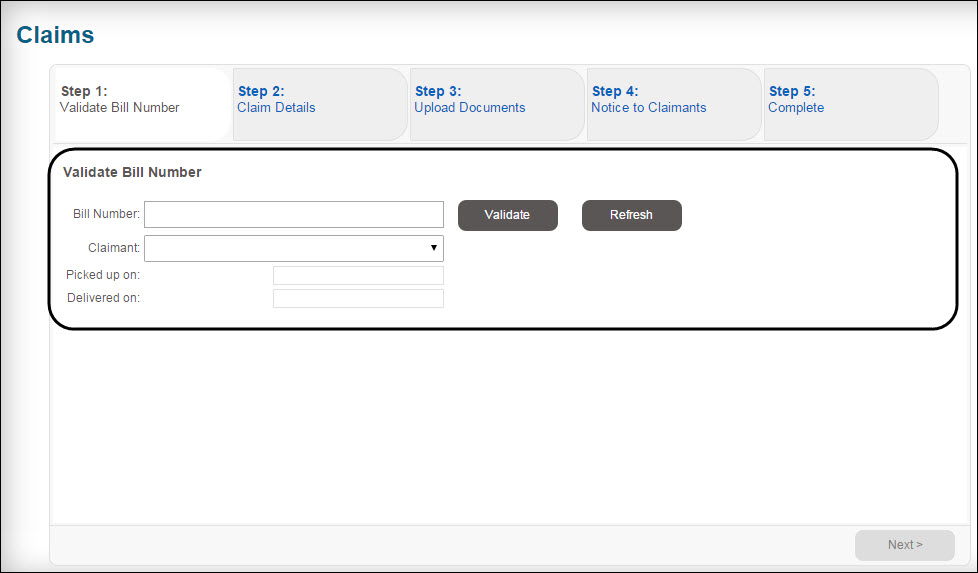
Field Description Bill Number
A valid bill number for an OS&D claim.
Notes:
-
If bill number does not exist in the system as an active bill number, the system generates a warning and prompts you to enter a valid bill number.
-
If the bill number has a previous claim assigned to it, the system generates a warning and sends e-mail to the claims department. You prompted to enter a different bill number for verification.
Claimant
Once a bill number is verified, you can select a claimant from the item list. The default claimant in TM4Web is the Client. The lists of available claimants are: Shipper, Consignee, Bill To, Rate By and any web linked customers' codes associated with the selected access code.
Picked up on
The system displays the Pickup By information of the verified bill number.
Delivered on
The system displays the Deliver By information of the verified bill number.
Note:
-
If the delivery date of the validated bill number is 9 months or older, the system generates a warning and does not allow you to proceed with the claim entry.
-
-
On the Validate Bill Number screen, enter a valid bill number.
-
Click Validate.
-
Select desired claimant from Claimant item list.
-
Click Next.
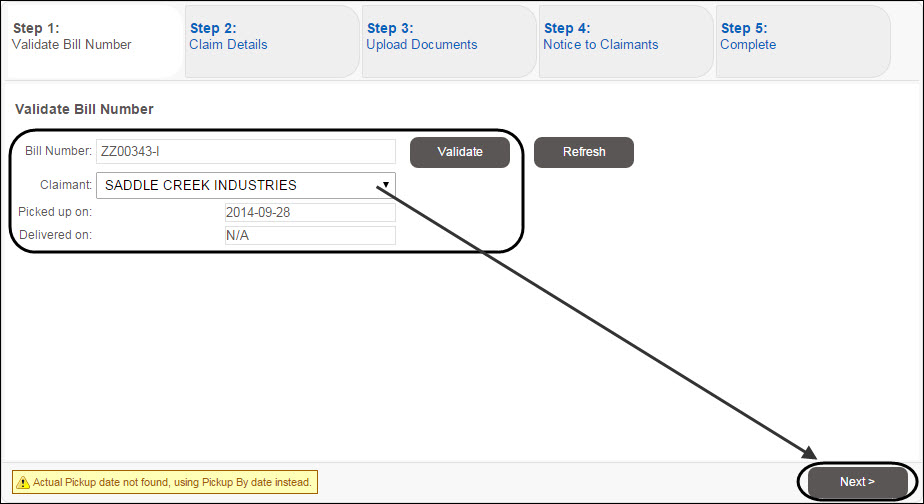
The Claim Details screen is displayed.
-
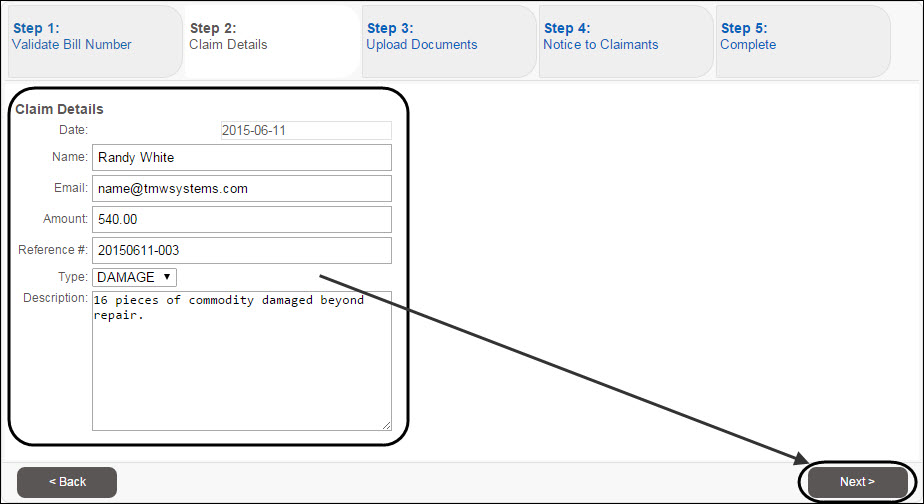
Provide entries on the Claim Details screen, as indicated on screen and in the following table:
The Claim Details step displays default values of the following read-only fields, Date (current date), Name (TM4Web username) and their associated Email (TM4Web e-mail address). Field Description (Claim) Amount
Enter a dollar amount of the claim in question.
Reference #
Enter a Reference Number (or Trace Number) to be used for internal tracking and referencing.
(Claim) Type
Select the claim type (Over, Short or Damaged) for the item list.
(Claim) Description
Enter a claim description. For example, Missing 50 units of commodity.
-
Click Next.
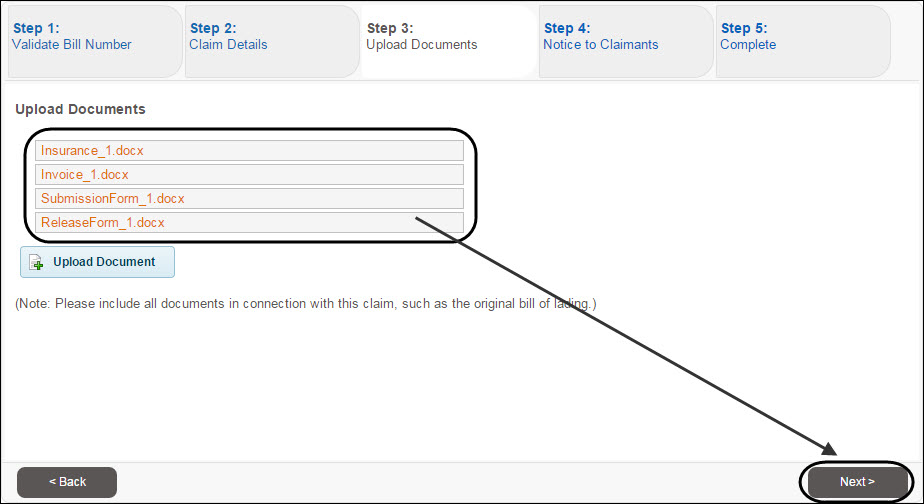
The Upload Documents screen is displayed.
-
On the Upload Documents screen, upload file(s) to support the claim.
-
Click Upload Document.
-
Click Select files and browse to the location of the files.
Note: Multiple files can be added at one time.
-
Click Close.
Uploaded documents are now listed. -
Click Next.
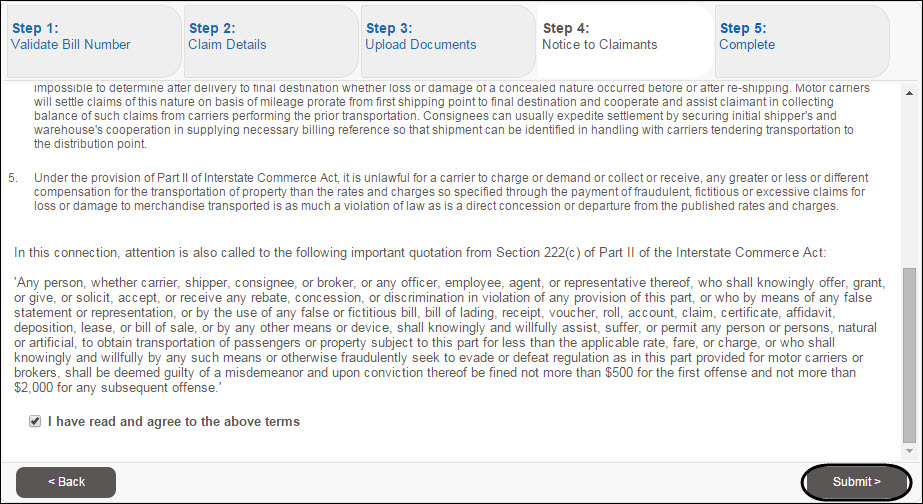
The Notice to Claimants screen is displayed.
-
You must read and select I have read and agree to the above terms option before proceeding with the claim submission.
Note: This step legalizes the process by having the user (claimant) agree to the legal terms and conditions of the Claim service.
-
Click Submit.
-
The system will confirm the submission of the claim to the user and display the details of the claim for verification, along with the Claim Number for follow up.
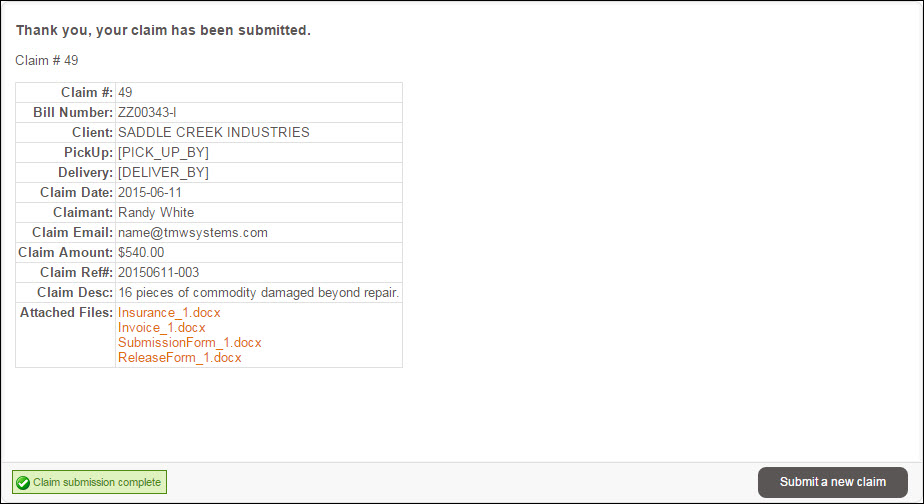
Note: An e-mail confirmation is sent to both the Claims Department and the TM4Web user submitting the claim. The confirmation also includes links to any attached documents where you can select the link to view the attached document.
-
To submit a new claim, click Submit a new claim.