Customizing menus
The default menu items or categories ordinarily provide access to all the commands needed to function in TMW Back Office. You might want to customize the menus to better meet your company’s organizational structure, role assignments, or general way of doing business.
The menus of TMW Back Office can be customized in any of the following ways:
-
Add, move, or remove menus and commands.
-
Define a custom menu command to open an executable file or a web page.
-
Configure the animation, keyboard shortcuts, and general behavior of the menus.
Adding existing commands to a menu
Use this procedure to add an existing command to the new menu, or any menu category in the menu bar. You can have multiple occurrences of the same command under different categories.
-
Right-click on the menu bar to customize.
-
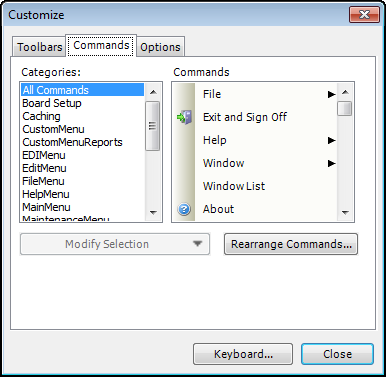
Click Customize to open the Customize dialog box.
-
Click the Commands tab.
-
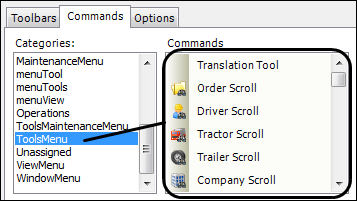
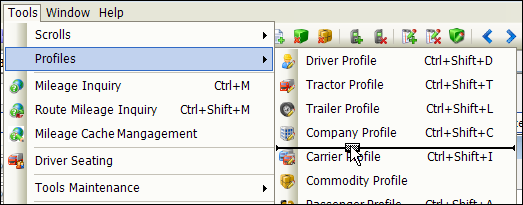
Under Categories, select the category that currently contains the command you want to add to the menu.
-
Existing commands are listed under the All Commands category, or you can limit your choices by selecting one of the Menu categories, such as ToolsMenu.
-
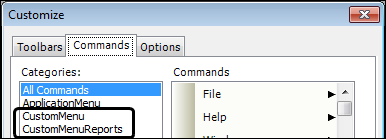
Custom menu commands are listed under the CustomMenu category.
-
Custom reports are listed under the CustomMenuReports category.
-
-
Under Commands, locate the command you want to add.
-
Click and drag the command to a spot on the current menu.
Add it to an existing menu:
Add it to a sub menu:
-
To continue adding commands to the menu, repeat steps 4 through 6.
-
When finished, on the Customize window, click Close.
Rearranging and formatting a menu category
When customizing a menu, you can rearrange the menu categories. Choose from any of the following options:
Rearranging a menu category
Use this procedure to rearrange the order of categories on the menu (e.g., File, Help, etc.)
-
Right-click on the menu bar and click Customize.
The Customize dialog box opens. -
Directly on the menu bar, click and drag the menu category to the new location.
Note: Position the
 -bar where you want the new location.
 -
On the Customize window, click Close.
Rearranging menu commands within a category
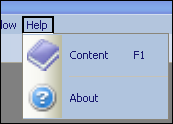
Use this procedure to rearrange the order of menu commands (e.g., Content, About) within each menu category.
-
Right-click on the menu bar and click Customize.
The Customize dialog box opens. -
Directly on the menu bar, click on the menu category.
The menu options are shown. -
Click and drag a command to the new location within the menu.
-
On the Customize window, click Close.
Removing a command from a menu category
Use this procedure to remove a command from a menu.
-
Right-click on the menu bar and click Customize.
The Customize dialog box opens. -
Directly on the menu bar, click on the menu that contains the command to remove.
-
Click and drag the command off the menu.
-
On the Customize window, click Close.
Removing a menu category
Use this procedure to remove a menu with all its commands.
-
Right-click on the menu bar and click Customize.
The Customize dialog box opens. -
Click on the menu that you want to remove.
-
Drag the menu option off the menu.
-
On the Customize window, click Close.
Resetting the main menu
Use this procedure to remove all menu customizations and return the menu to its original factory default settings.
| The main menu bar is a menu, and not a toolbar; however, changes are made to it from the Toolbar tab on the Customize dialog box. |
-
Right-click on the menu bar and click Customize.
The Customize dialog box opens. -
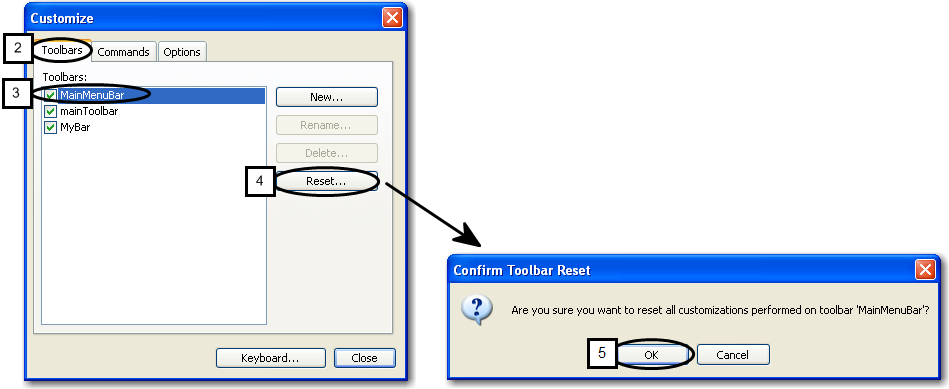
Select the Toolbars tab.
-
Select MainMenuBar.
-
Click Reset.
-
At the Confirm Toolbar Reset dialog box, click OK to confirm.
Note: If you change your mind and do not want to reset the MainMenuBar, click Cancel.
Rearranging and formatting a menu
When customizing a menu, you can rearrange the menu items and format the look and behavior of the menu. Choose from any of the following options:
Changing the name of a menu or command
Use this procedure to change the name of a menu or command.
-
Right-click on the menu bar and select Customize.
The Customize dialog box opens. -
Do one of the following to display the item’s properties:
-
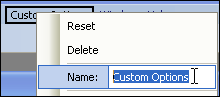
To change the name of a menu, right-click on the menu name.
-
To change the name of a command under a menu, click on the menu to display the options, and then right-click on the command name.
-
-
In the Name field, change the name.
If you want to create a keyboard shortcut for selecting the menu, add an ampersand (&) before the letter that will be the shortcut key.
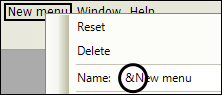
When the user presses ALT, the shortcut keys are underlined. In this example, the user can press N to open the New menu.
-
On the Customize window, click Close.
Beginning a group
If you want, you can group menu commands together within a category. Groups, identified by a separator bar, help you to locate a command. This is especially helpful if there is a long list of commands.
Follow these steps to add a separator bar:
-
Right-click on the menu bar and click Customize.
The Customize dialog box opens. -
Right-click on the menu item that will be below the separator bar.
-
From the short-cut menu, select Begin group.
Notes:
-
To add a group, at least two commands must be included in the Commands list.
-
You might want to rearrange the commands prior to specifying a group so that the commands are grouped according to your specific needs.
-
-
Click Modify Selection, and select Begin a Group.
A separator bar is inserted above the highlighted command.
Setting menu animation
Use this procedure to change the menu animation, or the way in which the menu commands are presented when selecting a menu category.
-
Right-click on the menu bar, and click Customize.
The Customize dialog box opens. -
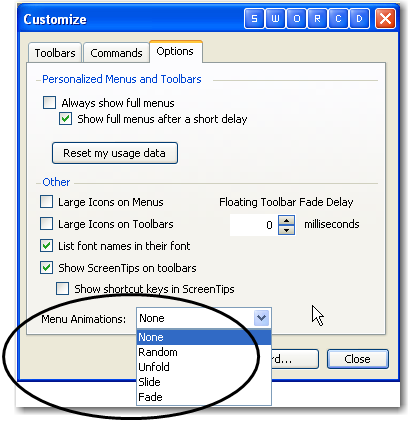
Select the Options tab.
-
In the Menu Animations list, select the desired menu animation option (e.g., None, Random, Unfold, Slide, or Fade).
-
Click Close.
Changing the viewing size of icons under menus
If you want, you can have the application use large icons when menu options are viewed.
Standard icons on menu
|
Large icons on menu
|

-
Right-click on the menu bar and click Customize.
The Customize dialog box opens. -
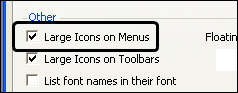
Select the Options tab.
-
Under Other, select the Large Icons on Menus checkbox.
Note: The icon can easily be returned to its default size by again selecting the appropriate checkbox.
-
Click Close.
Specifying a keyboard shortcut
Use this procedure to specify a keyboard shortcut, which reduces the number of keystrokes required to access a category and command.
-
Right-click on the menu bar and click Customize.
The Customize dialog box opens. -
Click Keyboard to open the Customize Keyboard dialog box; there are two sections on this dialog box: Categories and Commands.
-
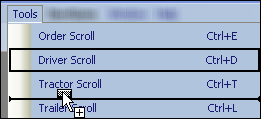
Select the category.
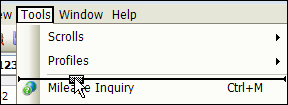
A category refers to a menu, which appears on the TMW Back Office menu bar. Categories can include FileMenu (File), ApplicationMenu (Application), and ToolsMenu (Tools). As shown in the illustration, each of these categories represents a menu on the TMW Back Office menu bar.

-
Select the command you want to associate with the category.
Within each category are one or more commands. A command refers to a menu option you access from a menu on the TMW Back Office menu bar.
-
At the Specify a Shortcut list, select the shortcut key(s) you want to assign to the category/command combination.
-
If the current category/command combination does not have an assignment, then None is listed as the shortcut.
-
If the current category/command combination has a previously assigned shortcut, then this shortcut key or key combination is listed.
-
If you select a shortcut already assigned to another category/command, then this shortcut is listed. A status message, "Currently assigned…" notes which command (menu option) possesses the shortcut assignment.

-
-
Click Assign.
-
Click Close.
Notes:
-
The next time you select the menu, the assigned shortcut will be listed following the command.
-
To remove a shortcut, click Remove.
-
To return the shortcuts to their original settings, click Reset All.
-