Finalizing pay for a single asset
The Final Settlements Folder allows you to finalize pay for a single asset. The procedure includes:
-
Running the Collect process
The Collect process has two main functions:-
It searches for and applies any regularly scheduled, pay-related items not tied to a trip. Examples include deductions and recurring pay (for example, holiday pay, or bonus pay). These items are applied on a schedule that you record for your resources.
-
It creates a pay header for each resource’s settlement. The pay header presents all pay details that have been released to a specific pay period for a particular resource. When you run the Collect process, the system assigns a unique pay header ID to those pay details.
-
-
Running the Close process
After you run the Collect process, you can run the Close Process. Closure is the final step of the settlement process prior to performing a transfer to accounting.
During the Close process, the status of pay details in the period is changed to Closed, making them ineligible for change. In addition, you can no longer add new pay details to the settlement. You should run the Close process only after you are sure no further settlement changes are needed for the pay period. At this point, the system considers the resource’s pay period final.
Selecting a pay period for processing
To finalize pay for a single asset, follow these steps
-
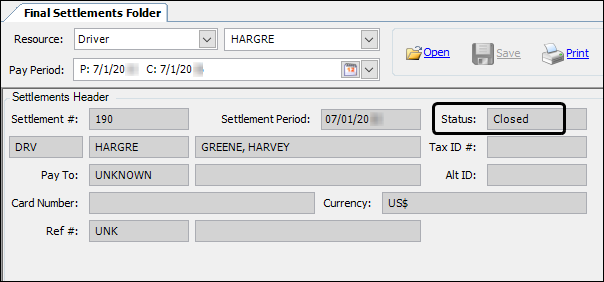
To open the Final Settlements Folder, go to Settlements > Final Settlements Folder.
The Final Settlements Folder opens. -
In the header area, enter the resource and pay period information for the asset for which you want to finalize pay.
Field Definition Resource
In the first field, select a resource type. Options include:
-
Carrier
-
Driver
-
PayTo
-
Tractor
-
Trailer
In the second field, enter the resource’s ID
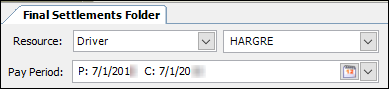
Pay Period
The system automatically displays the next open pay period that is set up for this resource.
To choose a different pay period, click the
 Down Arrow to display a list of pay periods. Then click the one you want.
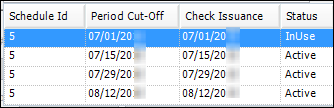
Note: If the pay period you want is not displayed in the list, you can have the system pull additional pay periods.
Follow these steps:-
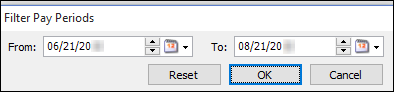
Click the
 Calendar icon to access a From and To date filter.
 -
Enter a range of dates that brackets the pay period you want.
-
Click OK.
-
Pick a pay period from the expanded list.
-
-
Click Open.
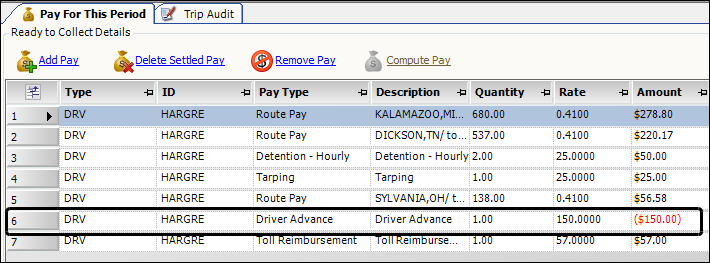
In the Ready to Collect Details section, the system displays the resource’s pay for the period. At this point, you can still add or delete pay details.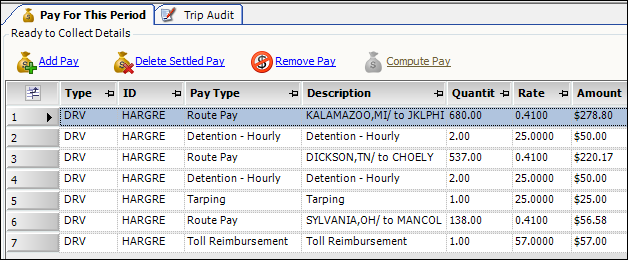
Note: The
 command sets the selected pay detail’s status to On Hold. This removes the pay detail from the pay period being settled and moves it to the Unsettled Details section.
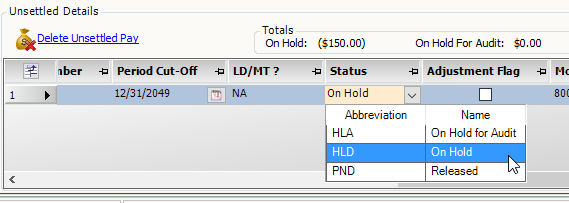
Adding or deleting unsettled pay details
The Unsettled Details section displays pay details that have a status of On Hold. By default, the system will not include these pay details in the pay period you are finalizing. However, you can add them to the pay period by setting the pay detail’s status to Released. Or, you can delete the pay detail if you do not plan to process the pay in the future.

Excluding manually added pay from the guaranteed pay calculation
Your company may have set up some drivers to receive guaranteed pay, if needed, you can exclude specific pay details from the calculation used to determine if the driver met the guaranteed pay threshold. Excluding such pay is done manually.
To manually exclude pay from the guaranteed pay calculation:
-
On the Pay for this Period tab, select the Exclude Guarantee Pay check box for the pay detail you want to exclude.
Notes:-
You may need to use Field Chooser to add the Exclude Guarantee Pay check box to your grid.
-
The Exclude Guarantee Pay check box applies to manually added pay details only. You cannot manually exclude pay that was automatically computed by the system.
-
-
Click
 Save.
Save.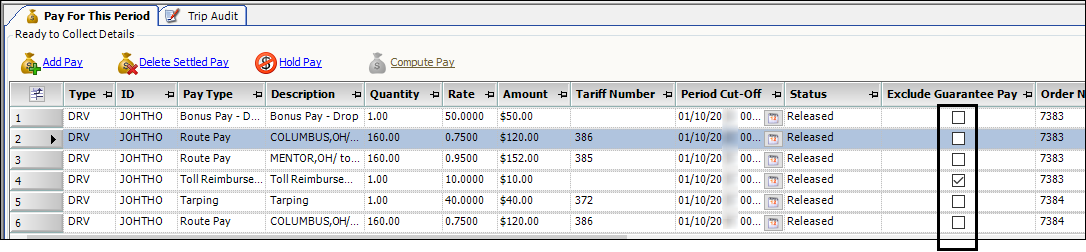
|
Running the Collect process
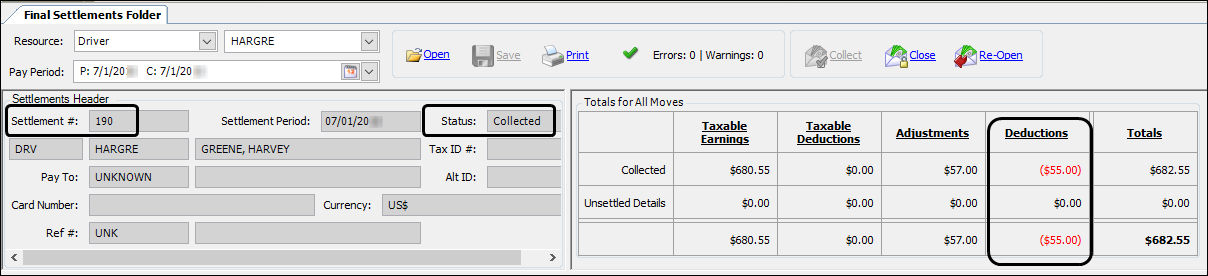
To run the Collect process for a single asset, click Collect. When the process completes, the settlement:
-
Shows a pay header ID
-
Has a status of Collected
-
Shows recurring deductions, if applicable

Running the Close process
To run the Close process for a single asset, follow these steps.
-
In the Final Settlements Folder, verify that the pay header status is set to Collected.
-
To run the Close process, click Close.
The system sets the record’s status to Closed. It is now ready for transfer to your accounting system.