Configuring invoice outputs
First available in TMW Back Office: V. 2019.1
In the Billing Output Configuration Folder, you set up the rules (configurations) that determine the type of output generated when you run the print function in invoicing. The output options are:
-
Send the invoice to the specified printer
-
Send the invoice electronically as an EDI 210
-
Do not output the invoice
In the Billing Output Configuration Folder, you can create multiple configurations. This allows you to have different rules for various Bill To companies and/or circumstances.
After you create your output configurations, you can assign them to one or more Bill To companies in the Billing Output Configuration Folder or in the company’s profile.
If you do not assign a configuration to a Bill To company, the system uses the default configuration and prints a paper invoice for all invoice types and all billing states.
How the system handles existing configurations
In previous versions, you set up invoice output configurations in the EDI 210 field or in the Advanced EDI Output Settings window in Company File Maintenance. Starting in V. 2019.1, those two locations are no longer available. Now, you set up invoice output configurations in the Billing Output Configuration Folder.
The system keeps all the invoice output configurations you previously set up for your Bill To companies. The only difference is your output configurations are now displayed in the Billing Output Configuration Folder. To access the folder, go to Tools > Setup > Billing Output Configuration.
The upgrade script for V. 2019.1 is designed to automatically import all the invoice output configurations you previously set up. You should not need to do any additional setup for your existing configurations. However, as with any major upgrade, we recommend that you verify the results after running the upgrade script.
You can view a list of all your invoice output configurations in the in the Billing Output Configuration Folder by selecting Tools > Setup > Billing Output Configuration.
For information about how to view a list of companies assigned to configurations and a list of configurations assigned to companies, see these topics:
Creating an output configuration
-
Go to Tools > Setup > Billing Output Configuration.
The Billing Output Configuration Folder opens. -
Click Add.
-
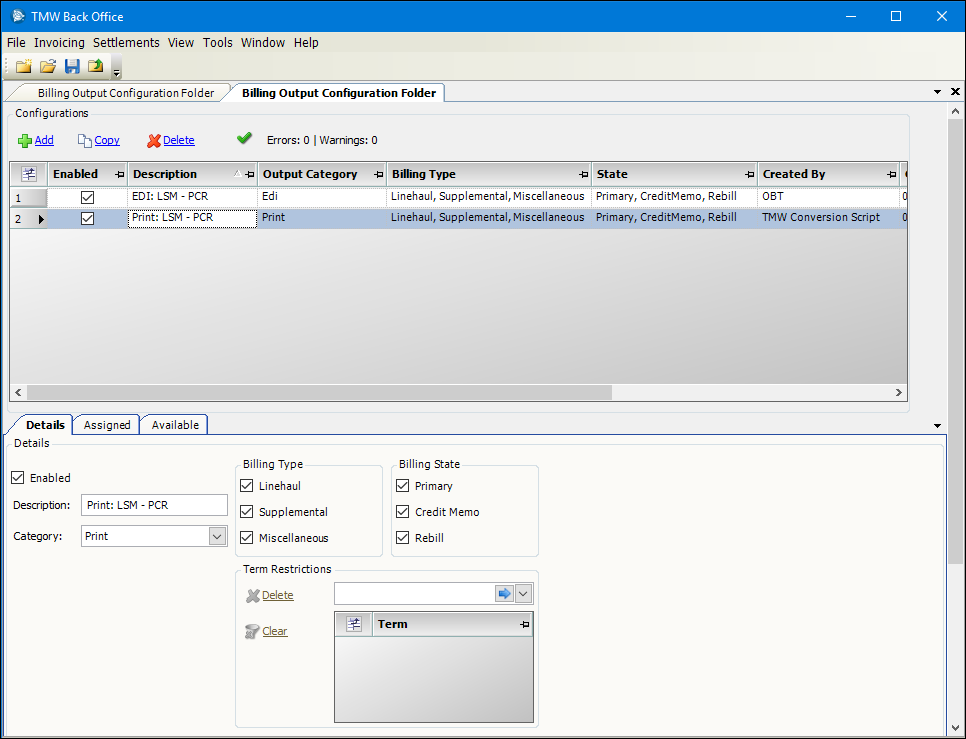
Define the new output configuration on the Details tab.
-
Make these entries in the Details section:
-
Enabled
Select the check box to make the configuration active. -
Description
Enter an informative description (required). -
Category
Select the output type for this configuration:-
Print
Invoices are printed. -
Edi
Invoices are sent as an EDI 210. -
No Output
Invoices are not printed or sent as an EDI 210.
-
-
-
In the Billing Type section, select the check box of the invoice type(s) you want to associate with this configuration.
-
Linehaul
The main invoice used to bill an order. -
Supplemental
An additional invoice for charges not billed on the order’s Linehaul invoice. -
Miscellaneous
A stand-alone invoice not directly related to an order.
-
-
In the Billing State section, select the check box of the billing state(s) you want to associate with this configuration.
-
Primary
The original invoice. -
Credit Memo
The invoice that reverses the charges from the original invoice. -
Rebill
The invoice that rebills the customer for the services rendered.
-
-
In the Term Restrictions section, select the billing terms from the drop-down field (optional).
-
-
Click
 Save.
Save.
Copying a configuration
-
Go to Tools > Setup > Billing Output Configuration.
The Billing Output Configuration Folder opens. -
Select the configuration you want to copy.
-
Click Copy.
The system creates a copy of the selected configuration. -
Add a unique name in the Description field.
Note: The copied configuration has the same name as the original. -
As needed, edit the configuration’s options on the Details tab.
-
Click
Save.
Deleting a configuration
-
Go to Tools > Setup > Billing Output Configuration.
The Billing Output Configuration Folder opens. -
Select the configuration you want to delete.
-
Click Delete.
The system removes the configuration row. -
Click
Save.
Assigning a configuration to a specific company
-
Go to Tools > Setup > Billing Output Configuration.
The Billing Output Configuration Folder opens. -
In the Configurations grid at the top of the window, select the configuration you want to assign.
-
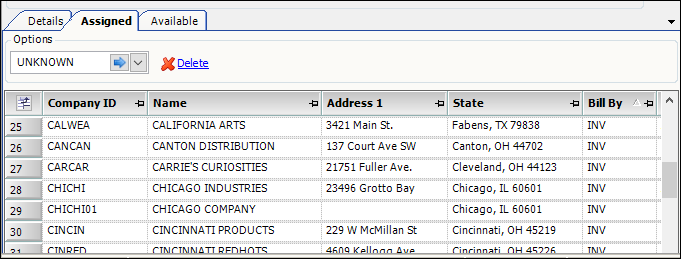
Select the Assigned tab.
-
Enter the company’s ID in the lookup field and click the blue arrow.
The system adds the company to the list displayed in the grid.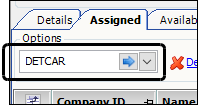
-
Click
Save.
Assigning a configuration to multiple companies
-
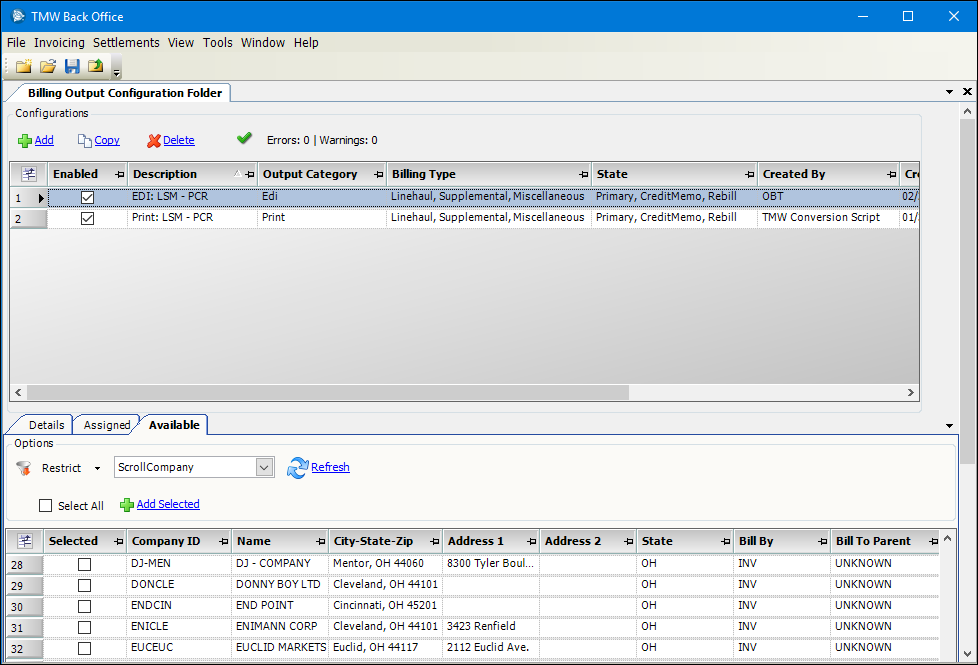
Go to Tools > Setup > Billing Output Configuration.
The Billing Output Configuration Folder opens. -
In the Configurations grid at the top of the window, select the configuration you want to assign.
The system loads that configuration in the form at the bottom of the window. -
Select the Available tab.
-
If needed, in the selection field at the top of the Available tab, select a custom company scroll view or use the default ScrollCompany view.
-
Filter the list:
-
Click Restrict.
The system displays a restriction window with a group of tabs. -
Enter restrictions on one or more tabs.
-
Click Close to close the restriction window.
-
-
Click Refresh.
The system retrieves a list of Bill To companies that meet your restrictions. -
On the Available tab, use the Selected column to assign companies to the invoice output configuration or use Select All.
-
Click Add Selected.
-
Click
Save.
Viewing all companies assigned to a configuration
-
Go to Tools > Setup > Billing Output Configuration.
The Billing Output Configuration Folder opens. -
In the Configurations grid at the top of the window, select the configuration you want to view.
-
Select the Assigned tab.
The system lists the assigned companies in the grid.
Viewing all configurations assigned to a company
-
Go to Tools > Profiles > Company Profiles.
The Company Profile window opens. -
Enter the company’s ID in the Company ID field, and press ENTER.
The company’s information populates the profile. -
Click the Distribution Info tab.
The assigned configurations display in the Distribution Method section.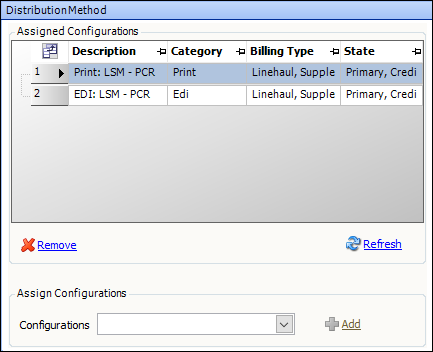
Note: From this window, you can also assign or remove invoice output configurations for the company.