Processing multiple orders and invoices
Several TMW Back Office features exist that allow you to process a group of orders or invoices quickly. In the Edit Invoice Folder, you use the Processing Queue to rate orders automatically and create invoices for those orders. You can also use this queue to change the status of a group of invoices from On Hold to Ready to Print or On Hold for Audit.
The Print Invoices window allows you to look up a group of invoices and print them in a batch.
Rating multiple orders
You use the Processing Queue tab to display the orders you want to invoice. If you want, you can set restrictions to limit the number of orders listed.
To rate multiple orders, follow these steps.
-
Go to Invoicing > Invoice Folder.
The Edit Invoice Folder opens. -
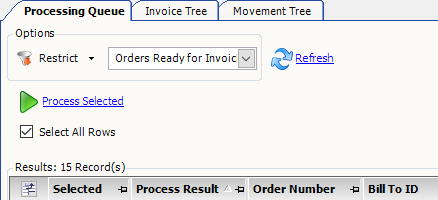
In the Processing Queue tab, select Orders Ready for Invoicing.
-
Click Refresh.
The grid lists all orders currently available for invoicing. The number of records available for processing appears at the top of the grid. -
To limit the list to specific orders, click Restrict.
The Quick Search tab is displayed.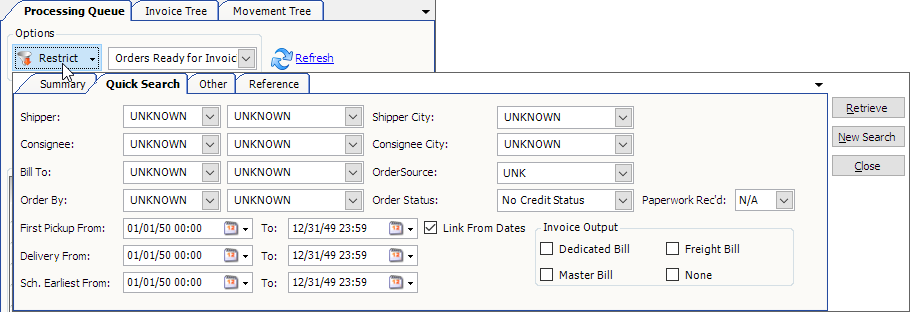
-
Set your restrictions in the Quick Search, Other, and Reference tabs.
For example, to limit the orders to a particular Bill To, enter the company ID in the Bill To field. -
Click Retrieve.
By default, all the records retrieved in the queue are selected for processing. To limit the orders, clear the Select All Rows check box, then select the check box for each order you want to process.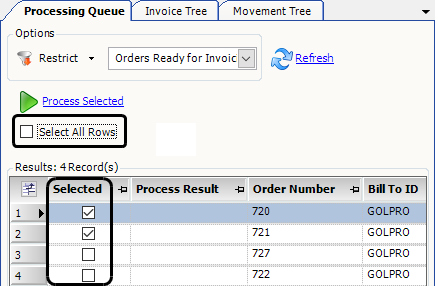
-
Click Process Selected.
The Batch Process Results window displays the processing result for each selected order.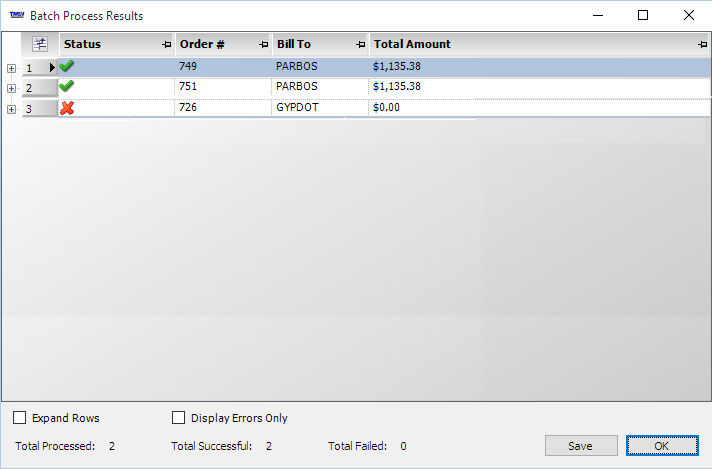
The Status field shows whether an invoice was created for each order.
-
The green check mark (
 ) indicates that an invoice was created for the order.
 -
The red X (
 ) indicates that an invoice was not created for the order.
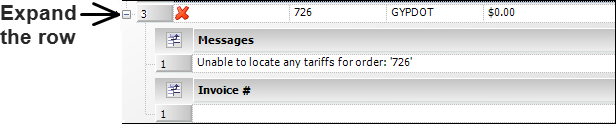
To display the reason the invoice was not created, expand the line item. In this illustration, no rates could be located for order #726.
-
-
Click OK to close the Batch Process Results window.
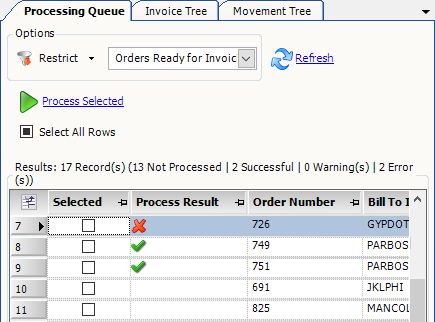
In the Processing Queue, the Process Result column indicates which invoices were and were not generated successfully.
-
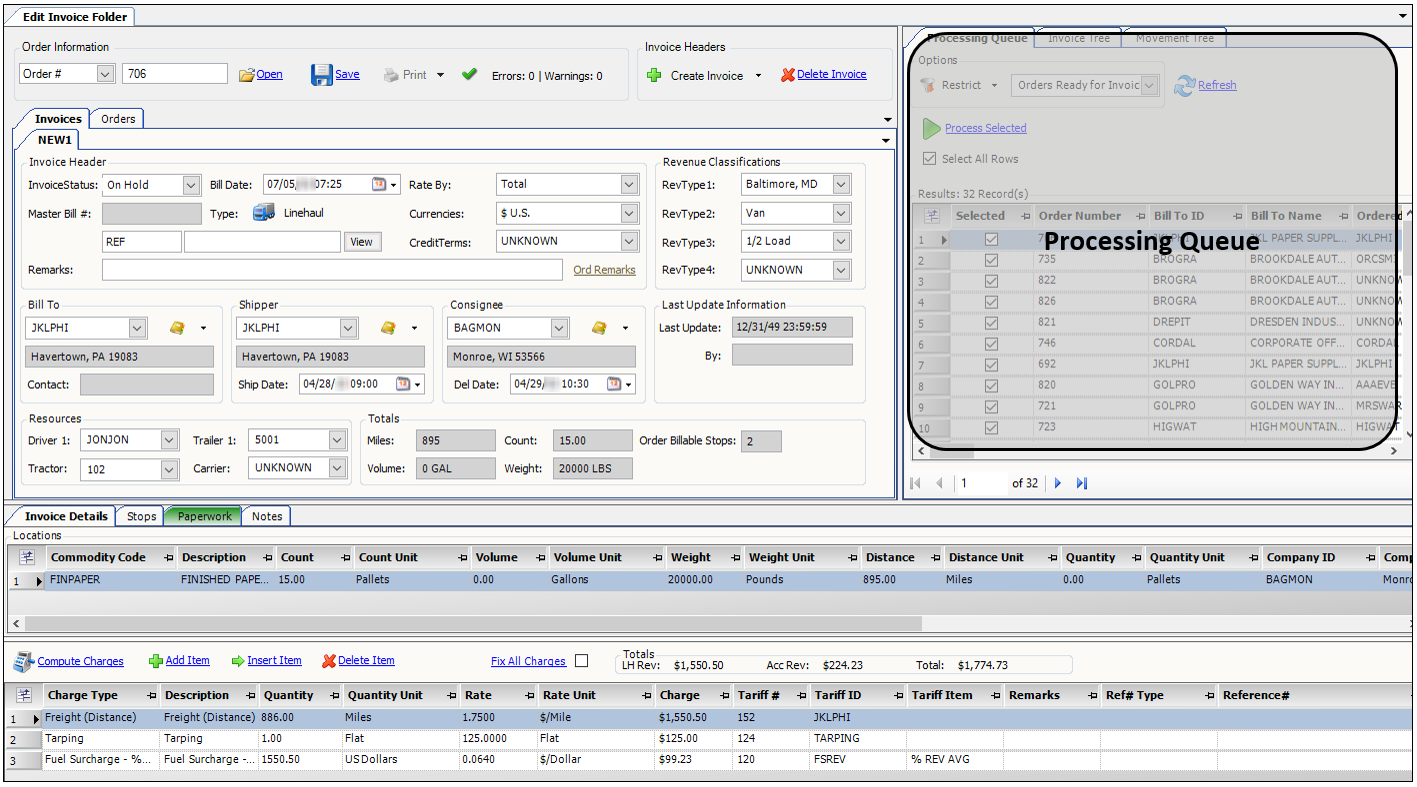
To display an invoice in the Edit Invoice Folder, double-click on the row in the Processing Queue.
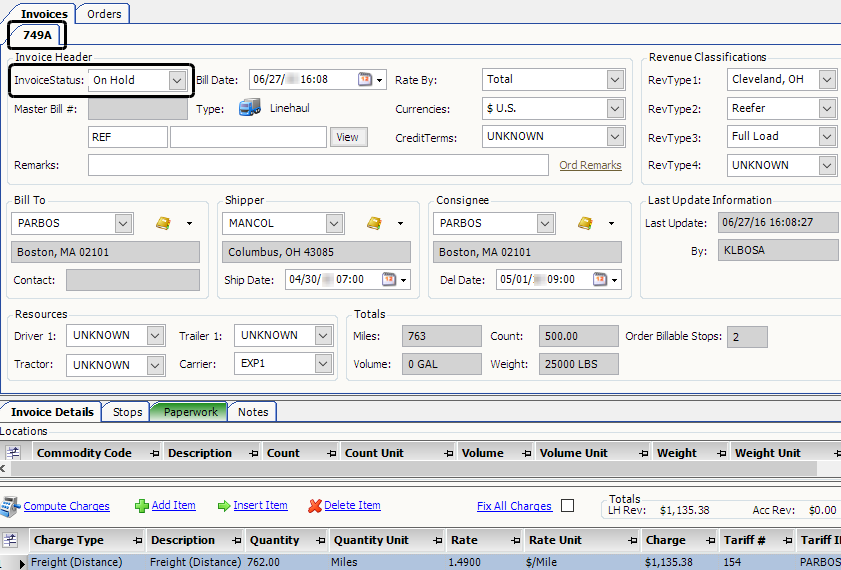
The invoice number appears at the top of the Invoices tab.This illustration shows that invoice #749A was created for order #749. The invoice status is On Hold.
Changing the status of multiple invoices
You use the Processing Queue tab to display invoices with a status of On Hold. You can then have the system change the status of these invoices to Ready to Print or On Hold for Audit. If you want, you can set restrictions to limit the number of invoices listed.
To change the status of one or more On Hold invoices, follow these steps.
-
Go to Invoicing > Invoice Folder.
The Edit Invoice Folder opens. -
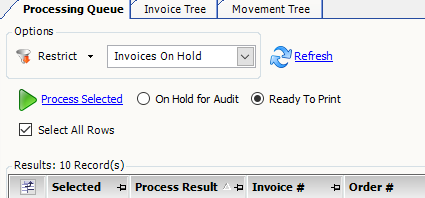
In the Processing Queue tab, select Invoices On Hold.
-
Click Refresh.
The grid lists all On Hold invoices currently available. The number of records available for processing appears at the top of the grid. -
To limit the list to specific orders, click Restrict.
The Quick Search tab is displayed.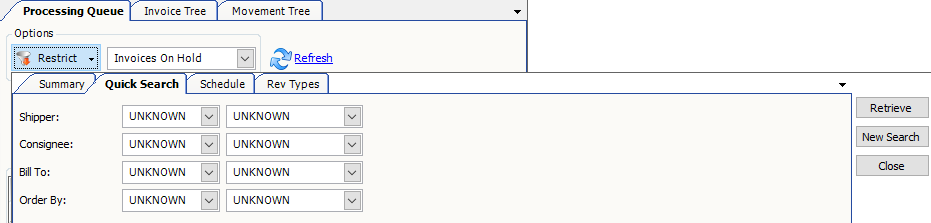
-
Set your restrictions in the Quick Search, Other, and Reference tabs.
For example, to limit the invoices to a particular Bill To, enter the company ID in the Bill To field. -
Click Retrieve.
By default, all the records retrieved in the queue are selected for processing. To limit the invoices, clear the Select All Rows check box, then select the check box for each invoice you want to process.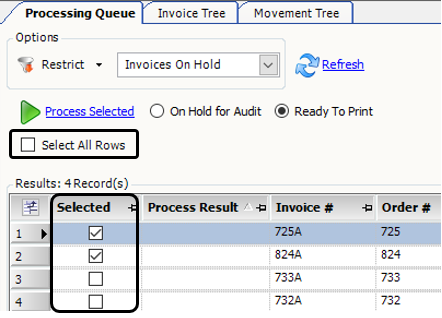
-
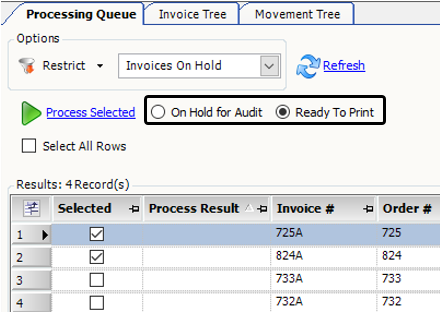
Select the new invoice status. By default, the Ready to Print radio button is selected.
-
Click Process Selected.
The Batch Process Results window displays the processing result for each selected invoice.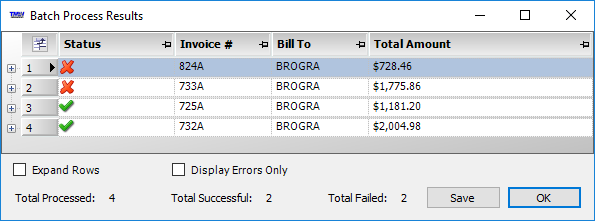
The Status field shows whether the invoice status was changed successfully.
-
The green check mark (
) indicates that the invoice status was changed. -
The red X (
) indicates that the invoice status was not changed.
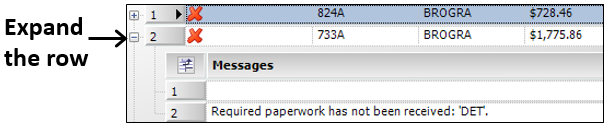
To display the reason the status was not changed, expand the line item. In this illustration, paperwork is missing for invoice #733A.
-
-
Click OK to close the Batch Process Results window.
In the Processing Queue tab, the Process Result column indicates which invoices' statuses were and were not changed successfully.

-
To display an invoice in the Edit Invoice Folder, double-click on the row in the Processing Queue.
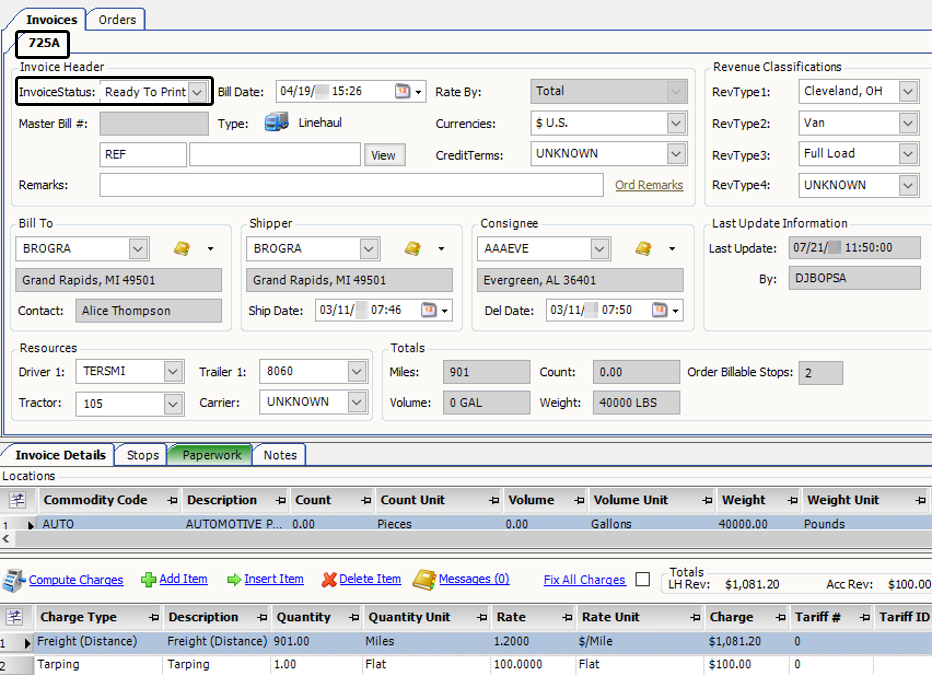
The invoice number appears at the top of the Invoices tab.This illustration shows that the status of invoice #725A is Ready to Print.
Printing multiple invoices
The Print Invoices feature allows you to look up and print a group of invoices to your default printer. You can also change the invoice status to Printed.
To retrieve and print a group of invoices, follow these steps.
-
Go to Invoicing > Print Invoices.
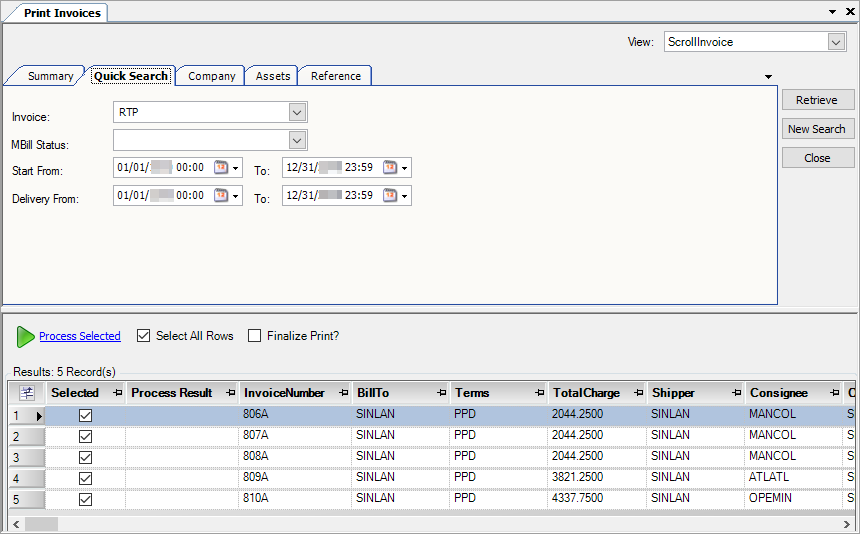
The Print Invoices window opens. -
Click Retrieve.
The grid lists all invoices with a status of Ready to Print. The number of records available for processing appears at the top of the grid. -
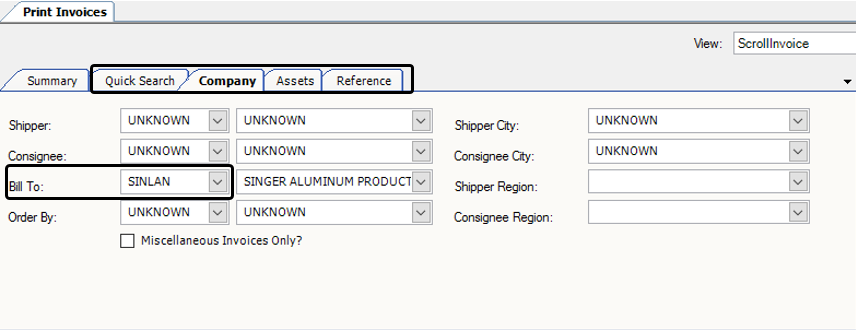
To limit the list to specific invoices, set your restrictions in the Quick Search, Company, Assets, and Reference tabs.
In this illustration, a company ID is entered in the Bill To field on the Company tab. The system will retrieve all records with this company ID.
-
Click Retrieve.
By default, all the records retrieved in the queue are selected for processing. To limit the invoices, clear the Select All Rows check box, then select the check box for each invoice you want to process.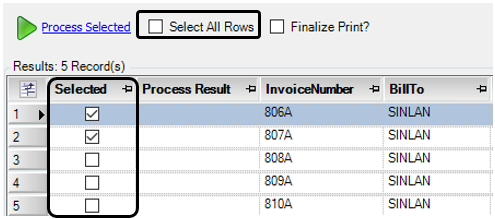
-
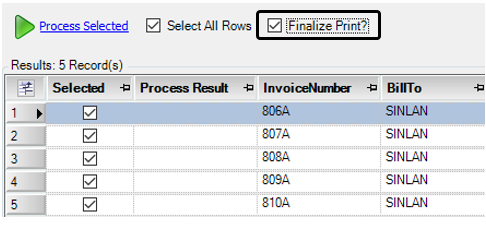
If, as part of the printing process, you want to change the invoice status to Printed, select the Finalize Print check box. By default, this check box is not selected.
-
Click Process Selected.
The Batch Process Results window displays the processing result for each selected invoice.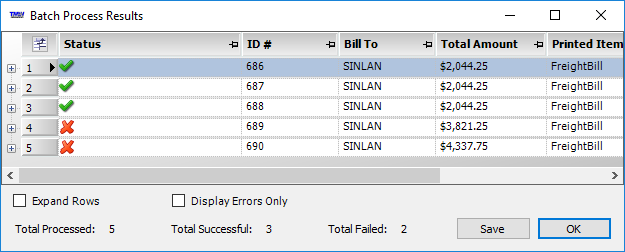
The Status field shows whether the invoice status was changed successfully.
-
The green check mark (
) indicates that the invoice status was changed to Printed. -
The red X (
) indicates that the invoice status was not changed.
To display the reason the status was not changed, expand the line item. In this illustration, no invoice format exists for this invoice.

-
-
Click OK to close the Batch Process Results window.
In the Processing Queue tab, the Process Result column indicates which invoices' statuses were and were not changed successfully.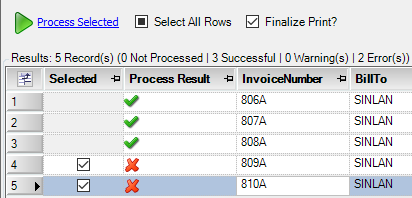
-
To display an invoice in the Edit Invoice Folder, double-click on the row in the Processing Queue.
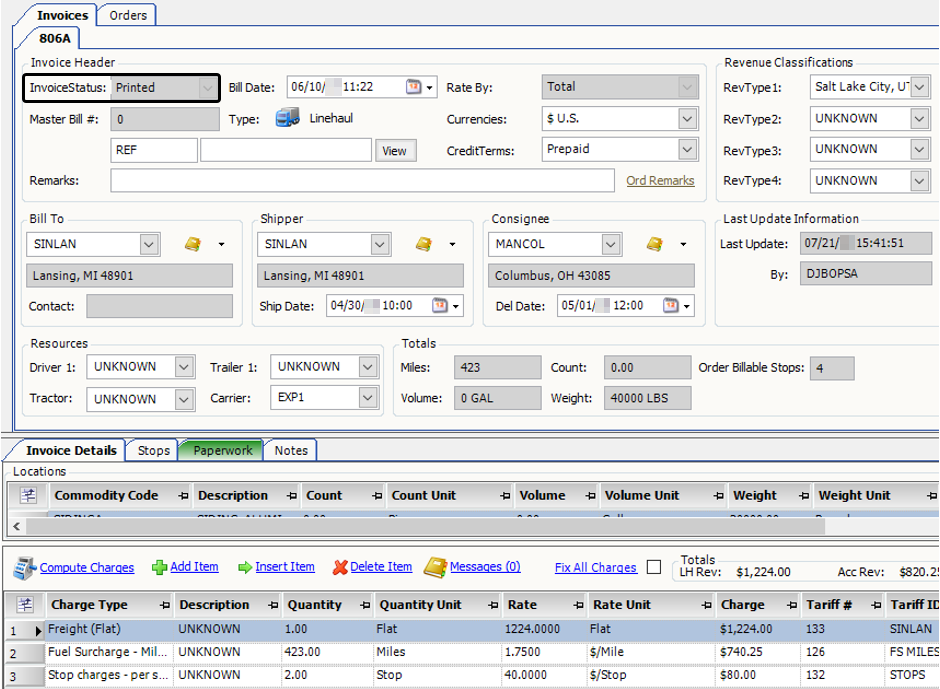
The invoice number appears at the top of the Invoices tab.This illustration shows that the status of invoice #806A is Printed. It can now be transferred to an accounting system.