Processing a single order or invoice
The invoicing process actually begins at the time an order is entered into the system. Changes to the original order, movements, and accessorial activities all may affect revenue and the charges for which the customer is billed. Each activity is tracked in detail for billing purposes.
You perform most invoicing functions in the Edit Invoice Folder. Invoice preparation generally involves these steps:
-
Review the orders ready to be invoiced.
You can review them one at a time, or you can list them in the Processing Queue. With this feature, you can restrict the list according to a variety of criteria, such as shipping date, delivery date, and Bill To company. -
Proceed through the orders, rating them, and making necessary adjustments and additions to the invoices.
The most efficient way to bill orders is to use the Compute Charges feature, which allows the system to apply contracted rates automatically. If contracted rates do not exist for a Bill To in the TMWSuite Rate Schedules application, you can create an invoice by entering charges manually. -
Print the invoices.
-
Post the invoices by transferring them to your accounting system.
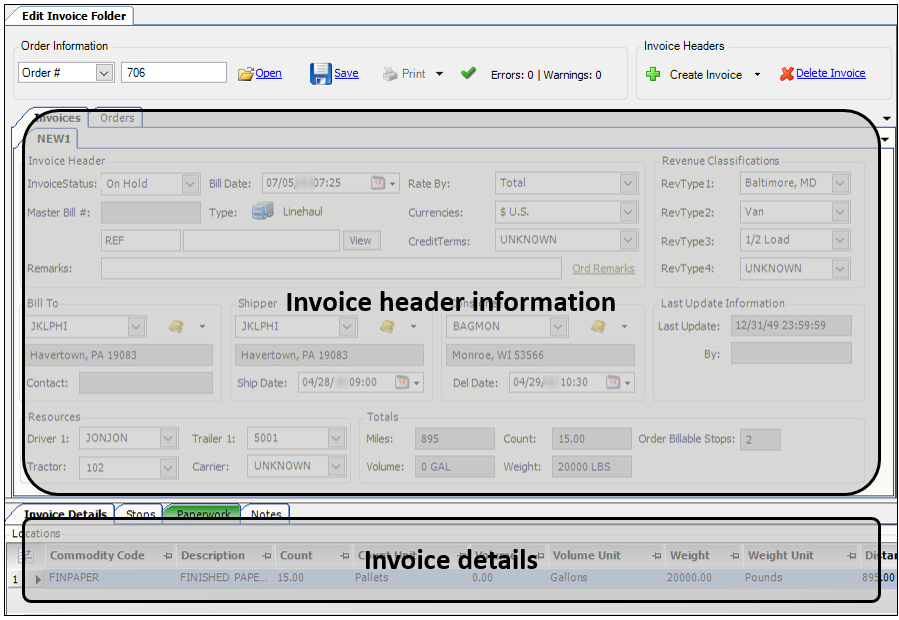
To access the Edit Invoice Folder, go to Invoicing > Invoice Folder.
The invoice header displays details about the order.
Commodity information and charges appear in the Invoice Details tab.
Rating a single order
In the Edit Invoice Folder, there are two ways to rate an order.
-
If contracted rates for a Bill To have been recorded in the Rate Schedules application, you can use Compute Charges to rate the order automatically.
-
If contracted rates do not exist, you can add line haul and accessorial charges to an order manually.
Rating an invoice automatically
The Compute Charges feature allows you to apply contracted rates automatically.
To rate an invoice, follow these steps.
-
Look up the order in the Edit Invoice Folder.
-
In the Invoice Details tab at the bottom of the window, click Compute Charges.
The Tariff # and Tariff ID fields show the rate number and ID applied to the order.
-
Click Save in the invoice header.
The invoice number appears below the Invoices tab.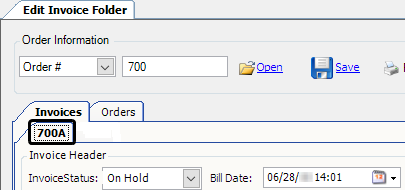
Rating an invoice manually
If rates do not exist for a Bill To in the Rate Schedules application, you can enter the charges manually.
To rate an invoice manually, follow these steps.
-
Look up the order in the Edit Invoice Folder.
If no rates exist for the order, a message window tells you that it is "Unable to locate any tariffs for order." Click OK to close the message. -
In the Invoice Details tab at the bottom of the Edit Invoice Folder, click Add Item.
-
In the Charge Type field, select a line haul or accessorial charge type.
-
In the Quantity field, enter the number of items.
-
In the Rate field, enter the amount charged per item.
-
Repeat Steps 2-5 for charge.
-
Click Save in the invoice header.
The Totals section at the top of the Invoice Details tab displays the line haul, accessorial, and total charges for the invoice. The invoice number appears at the top of the Invoices tab.
Printing a single invoice
To finish processing a single order, you can preview and prepare the invoice for transfer to your accounting department. If you discover that there is a missing charge from the invoice, you can add it at this time as well.
Depending on your setup, you can print hard copies of invoices, send them as email attachments to a Bill To, or create outbound EDI 210 files.
Previewing an invoice
Once you have generated an invoice for an order and the invoice is in On Hold status, you can preview the invoice in the Report Viewer prior to printing. Follow these steps.
-
Go to Print > Print Preview.
The Report Viewer window opens.

-
If you want to print the report as it currently appears, click
 Print.
The system sends a copy of the invoice to the printer. The status of the invoice changes from On Hold to Ready to Print.
Printing the invoice
If you are satisfied with the information provided on the invoice and are ready to send it to your accounting department, follow these steps.
-
In the Invoice Status field, select Ready To Print if it is not already selected.
-
Click Save.
-
Click Print.
A message appears. It states, "Do you want to mark Invoice XXXA as printed?" -
Click Yes.
The system sends a copy of the invoice to the printer. The status of the invoice changes to Printed.
Note: If your system is set up to allow emailing of invoices, the email is created only when the status of the invoice being printed changes from Ready to Print to Printed.
Editing an invoice after it has been printed
If you want, you can make changes to an invoice before transferring it to your accounting department. You can change header information, add/modify/delete charges, record paperwork, and add/modify/delete notes.
When you make a change to an invoice with a status of Printed, the following message displays:
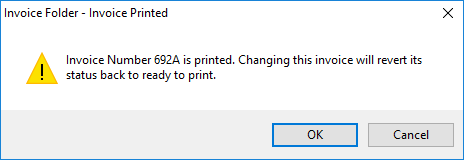
Click OK to change the status to Ready to Print, or Cancel to keep the status at Printed.
Note: If you want to make a change to an invoice after it has been transferred to your accounting department, you must first create a credit memo.