Working with company profiles
Before using TMW.Suite’s Microsoft Dynamics ™ GP Integration application, you must specify the appropriate accounting information for your Bill To companies and transfer your TMW.Suite company profile information to Dynamics GP customer cards.
Access the Company Profile window by selecting Tools > Profiles > Company Profiles.
Specifying accounting information for companies
You transfer data from company profiles to Dynamics GP. To ensure it transfers without errors, verify the accounting information is entered correctly.
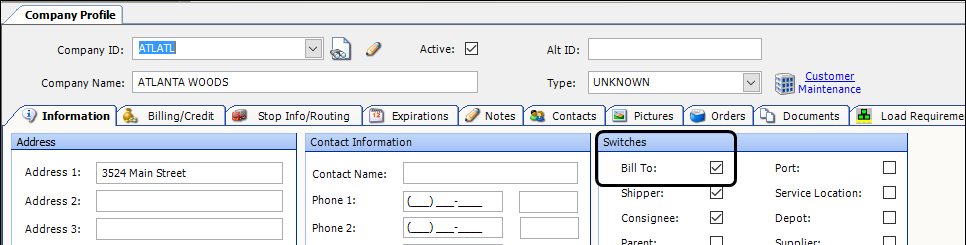
In TMW.Suite, a Bill To company is an accounts receivable entity. You identify a company as a Bill To in its profile. Select the Bill To check box in the Switches section of the Company Profile window.
Certain fields in the company profile are specific to Bill To companies. These fields provide accounting information and define how the company is billed for work performed. The fields are located on the various tabs in the profile window.
Company profile header
The header section contains information that identifies the company.

Review the information in these fields:
| Field | Description |
|---|---|
Company ID |
Identification code for the company in the TMW.Suite database The entry in this field populates the Customer ID field in the Dynamics GP Customer Maintenance window. |
Company Name |
Name of the company The entry in this field populates the Name field in the Dynamics GP Customer Maintenance window. |
Active |
The check box is selected for companies you are actively doing business with. |
Alt ID |
Company’s accounting ID code, as it appears in Dynamics GP. The entry in this field populates the Short Name field in the Dynamics GP Customer Maintenance window. |
Information tab
Review the entries in the fields listed here. They are required for the Bill To company’s Customer card in Dynamics GP.

| Field | Description |
|---|---|
Address section |
|
Address (Line 1) |
First of three lines used to record the company’s street address The entry in this field populates the first Address field in the Dynamics GP Customer Maintenance window. |
Address (Line 2) |
Second of three lines used to record the company’s street address The entry in this field populates the second Address field in the Dynamics GP Customer Maintenance window. |
Address (Line 3) |
Third of three lines used to record the company’s street address The entry in this field populates the third Address field in the Dynamics GP Customer Maintenance window. |
City, State |
City and state/province location of the company These entries populate the City and the State fields in the Dynamics GP Customer Maintenance window. |
Country |
Country in which the company is located The entry in this field populates the Country field in the Dynamics GP Customer Maintenance window. |
ZIP |
Five-digit or nine-digit ZIP Code The entry in this field populates the ZIP Code field in the Dynamics GP Customer Maintenance window. |
Contact Information section |
|
Phone 1 |
Primary telephone number The entry in this field populates the Phone 1 field in the Dynamics GP Customer Maintenance window. |
Phone 2 |
Alternate telephone number The entry in this field populates the Phone 2 field in the Dynamics GP Customer Maintenance window. |
Fax |
Fax number The entry in this field populates the Fax field in the Dynamics GP Customer Maintenance window. |
Switches section |
The switch is set to on when the check box is selected. |
Bill To |
You can bill the company when the check box is selected. This check box must be selected to transfer the company to the Dynamics GP Customer file. |
Other section |
|
Currencies |
The currency used to bill the company. The system code options are:
The value in this field relates to the Currency ID specified in the Dynamics GP Customer Card Maintenance window. |
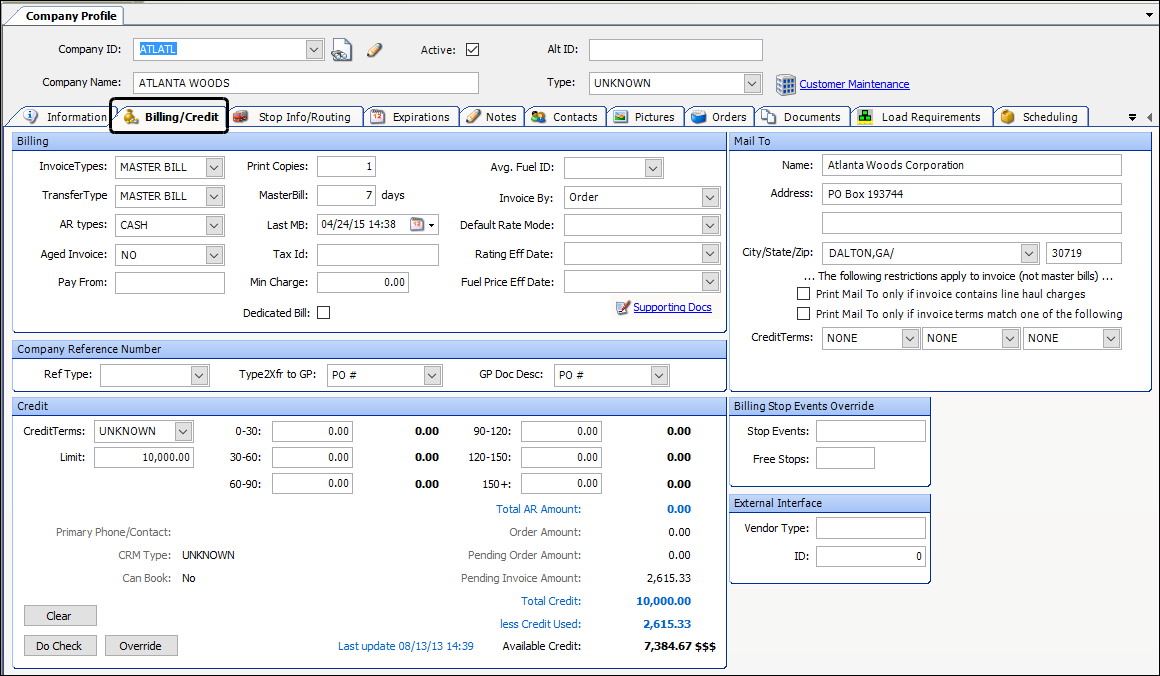
Billing/Credit tab
Review the entries in the fields listed here. They are required for the Bill To company’s Customer card in Dynamics GP.
| Table header | Table header |
|---|---|
Billing section |
|
InvoiceTypes |
Specifies how the system generates invoices and/or master bills for the company. The options are:
|
TransferTypes |
Specifies the format of the information transferred to Dynamics GP. The options are:
|
Mail To section |
|
Name Address City/State/Zip |
The address to which you mail invoices By default, the system uses the Bill To company’s address as the mailing address. However, in this section, you can specify that invoices be mailed to a different address instead, such as for a third party freight payment company. A Mail To address is deemed the Mailing address by Dynamics GP. The entry is added to the Dynamics GP Customer Address Maintenance window. You access it by clicking on the Statement To link in the Customer Maintenance window. |
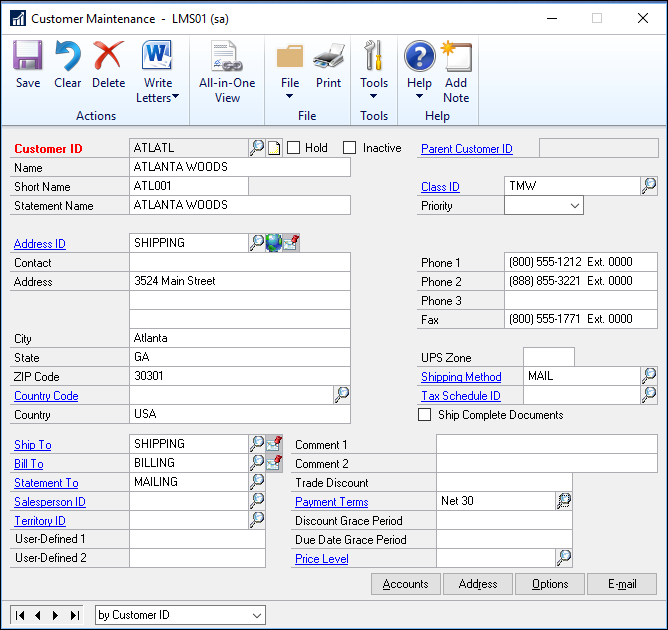
The Bill To company’s Dynamics GP Customer card
Note: For complete instructions on creating a Bill To profile, see the Company Profile chapter in the File Maintenance guide.
Specifying the reference number type passed as the PO number
You can specify the type of reference number the system uses as the PO number when it transfers receivables to the Receivables module in Dynamics GP.
Specify the type in the Type 2 Xfr to GP field. It is located in the Company Reference Number section on the profile window’s Billing/Credit tab.
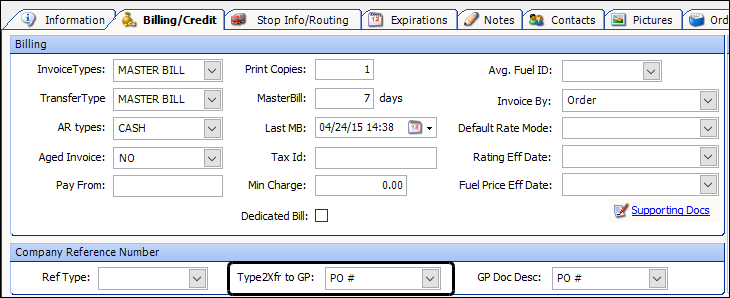
The system transfers the reference number on a company-by-company basis. It displays in the Dynamics GP Customer PO field.
-
If a reference number of the specified type exists in the order header, the system transfers that number.
-
If no reference number of the specified type exists in the order header, the system transfers the first reference number from the *invoice* header.
-
If there is no reference number in the invoice header, the system does not transfer a reference number.
Transferring companies as customers
The integration lets you transfer TMW.Suite company profiles to Dynamics GP customer cards. You use the Customer Export window to export batches of Bill To company profiles to Dynamics GP.
The export transfers only companies flagged as Bill To companies.
Accessing the Customer Export window
Use the Customer Export window to export batches of data to Dynamics GP and establish customer cards. You can access the window from TMW Back Office.
-
Go to Accounting > Customer Export.
The Customer Export window opens.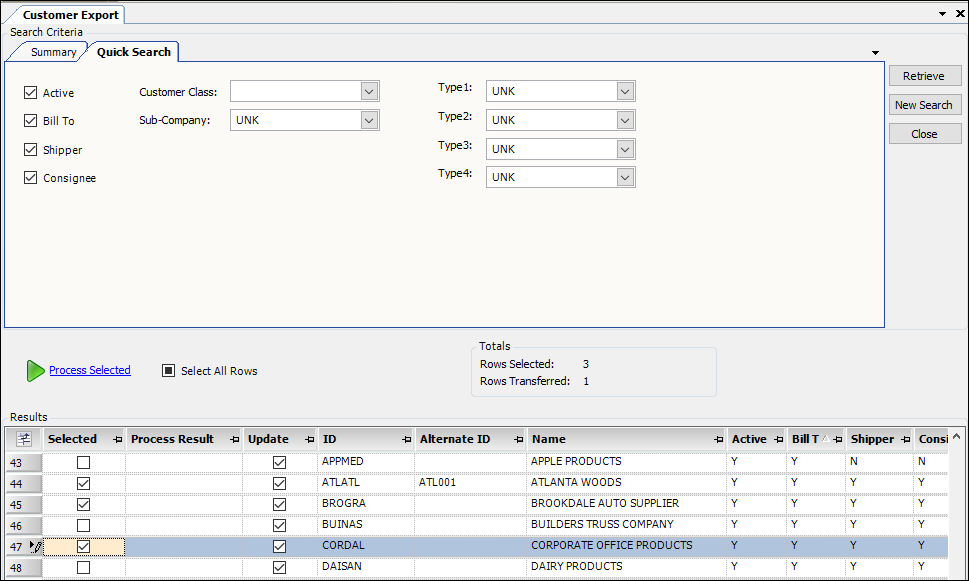
-
Set one or more filters to limit the retrieval.
Filter Description Active
Retrieve only active companies
Bill To
Retrieve Bill To companies
Shipper
Retrieve companies designated as shippers
Consignee
Retrieve companies designated as consignees
Customer Class
The field default is the word DEFAULT.
By default, this field is empty. This tells the system to use the default Class ID set up in Dynamics GP
-
Click Retrieve.
The system pulls a list of companies that match your restriction(s).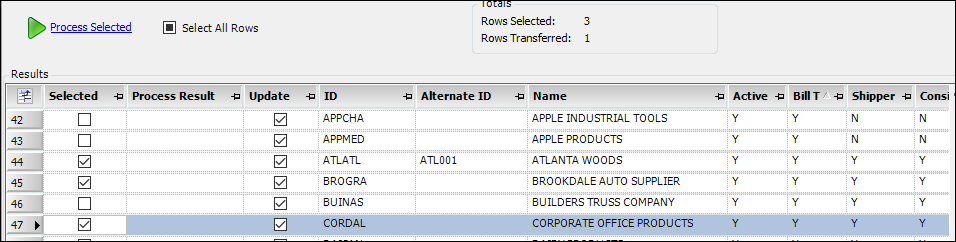
Note: You can sort the rows according to the entries in a particular column by double-clicking the column heading.

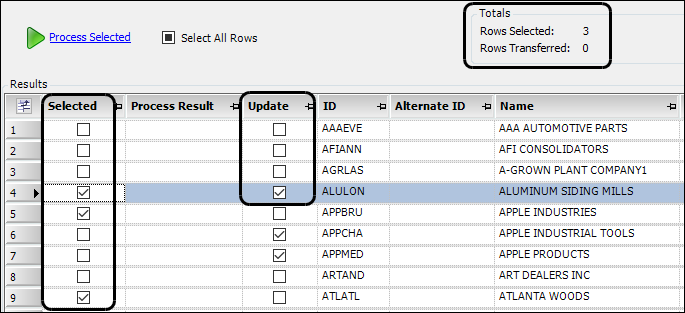
-
Select the company profiles you want to transfer to Dynamics GP.
By default, the Select All Rows check box is selected, but you can clear it.
The Update field is selected for customers that already exist in your Dynamics GP Database.
-
Click Process Selected to transfer the selected files to your Dynamics GP database.
The Batch Process Results window displays the status of each company transferred. At the bottom of the window, the system shows the Total Processed, Total Successful, and Total Failed for this batch.
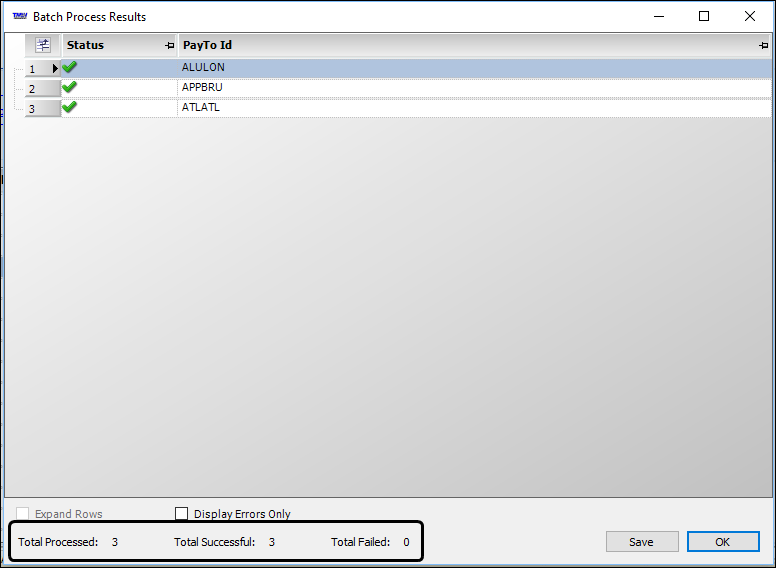
-
Do one of the following:
-
Click Save to save the results to a file.
-
Click OK to close the window without saving.
-
Viewing how data appears in Dynamics GP
The Customer Maintenance link on the Company Profile header allows you to see how Company Profile information appears on the Customer Card in Microsoft Dynamics GP.

Clicking the link opens a logon window asking you to log into your Dynamics GP database.
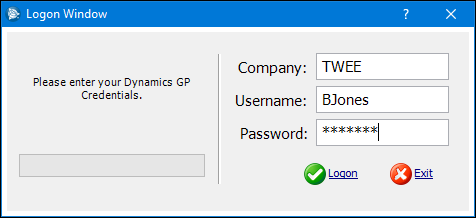
If your TMW login has access to the Dynamics GP database, you are not asked to enter your Dynamics GP Credentials in this window.
Once a connection is established, a read-only Customer Maintenance window opens. You can see where the profile data appears on the Customer Card.
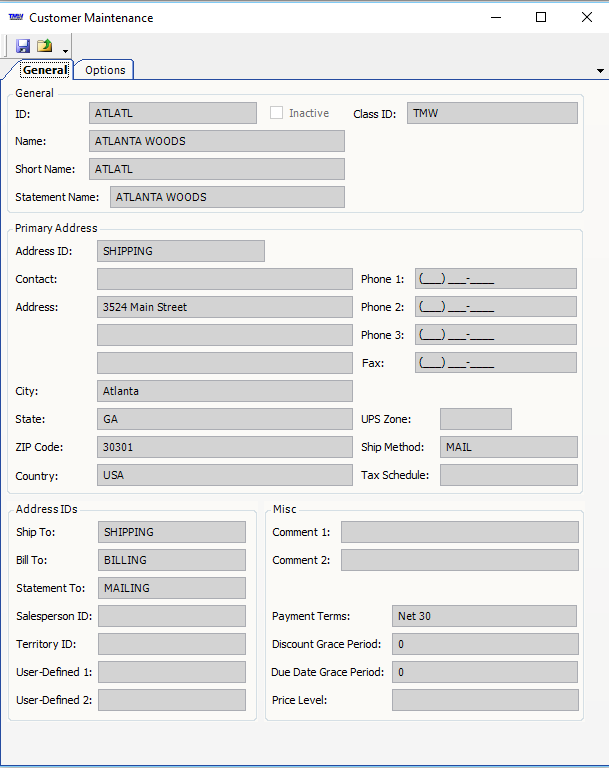
Understanding the field relationships Customer Maintenance and the TMW company profile
Much of the information in the Microsoft Dynamics GP Customer Maintenance window is easily identified in the company profile window.
Not all of the information in the company profile comes from or goes to the Customer Maintenance window. The data shown in the Customer Maintenance window fields is controlled by various setup windows:
-
Currency Setup
-
Customer Class Setup
Before you transfer data between the systems, you must set up matching values.
The system populates these when you transfer data.
| Dynamics GP field | Company File Maintenance field |
|---|---|
Customer ID/Customer Maintenance |
Company ID |
Name/Customer Maintenance |
Company Name |
Address/Customer Maintenance |
Address |
City/Customer Maintenance |
City, State |
State/Customer Maintenance |
City, State |
ZIP Code/Customer Maintenance |
Zip |
Class ID |
GP Class |
Phone 1/Customer Maintenance |
Phone 1 |
Phone 2/Customer Maintenance |
Phone 2 |
Fax/Customer Maintenance |
Fax |
StatementTo/Customer Maintenance |
Mail To section (on Billing/Credit tab) |