Setting up multi-currency features
Sometimes, the invoice or pay currency is not the same as the functional currency specified for the company in Microsoft Dynamics GP. In cases like this, you can transfer invoices and pay headers to Dynamics GP using the multi-currency functionality. You can use this functionality when transferring to:
-
Accounts Receivable
-
Accounts Payable
-
Payroll to General Ledger
During the transfer process, the system converts the transferred currency to the company’s functional currency.
Enabling multi-currency functionality
-
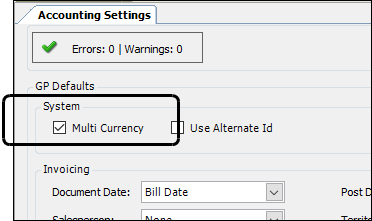
Go to Tools > Setup > Accounting > Accounting Settings.
The Accounting Settings tab opens. -
Select the Multi Currency check box.
-
Click
 Save.
Save. -
Click
 Close.
Setting up multi-currency for payroll drivers
If you plan to transfer pay for payroll drivers that are paid in a currency different from the functional currency of the Dynamics GP company, follow these steps.
-
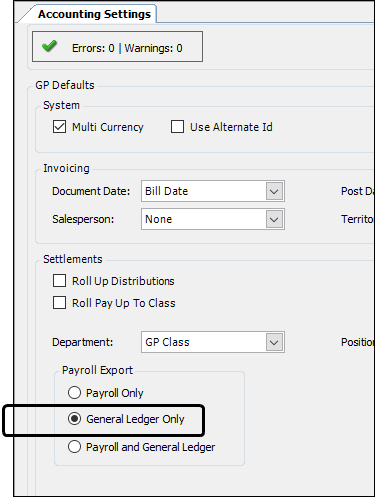
Go to Tools > Setup > Accounting > Accounting Settings.
The Accounting Settings tab opens. -
Select the General Ledger Only radio button.
-
Click
Save. -
Click
Close.
Setting up currency labels
The system is set up with standard options for US and Canadian currencies. Any other currency options must be set up.
-
Go to Tools > Setup > Edit User Definable Fields.
The Edit User Definable Fields tab opens. -
Select Currencies in the Field Name field.
-
Click Retrieve.
The system retrieves the currency options. -
Record additional currency options as needed.
-
If needed, you can edit the entry in the Description field of existing system code labels.

-
Click
Save. -
Click
Close.
Setting up currency defaults
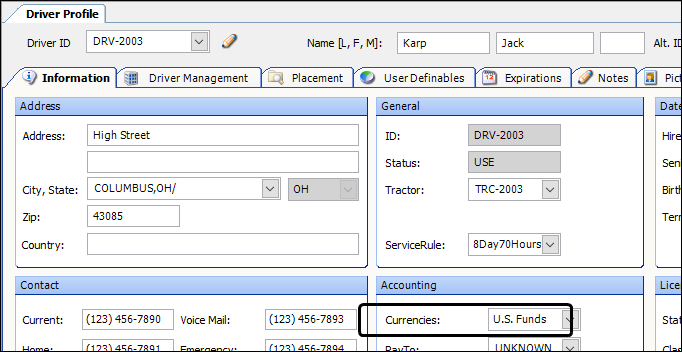
You can set up currency defaults in multiple places in the system, such as the TTS50, the company profile, the Pay To profile, the driver profile, and on the billing rate.
INI setting
The [Currency]Default setting determines the default currency for new orders created in Order Entry or Dispatch. The default is US$ for US funds. To specify a different currency, enter the Abbr field value recorded for it in the Currencies label.
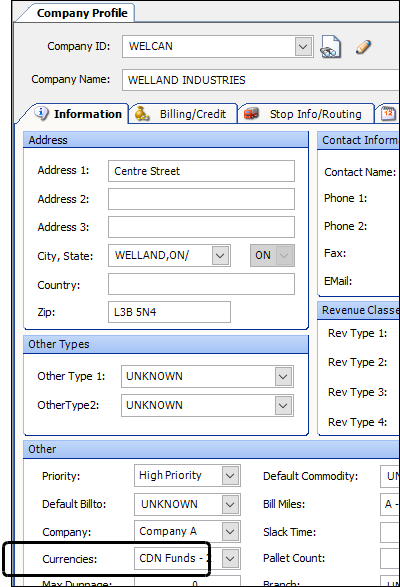
Company profile
You set a default currency for a Bill To company in its profile. You use the Currencies field, found in the Company Profile window’s Other section.
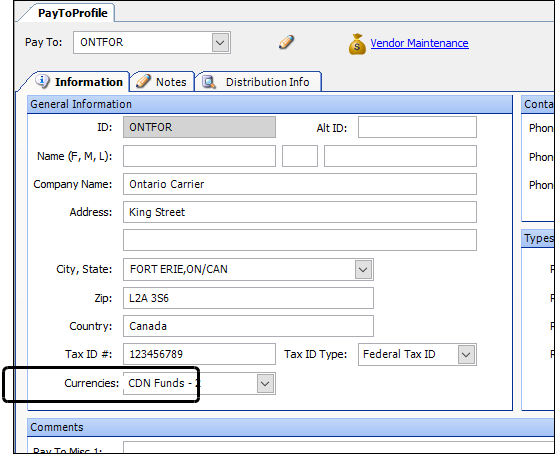
Pay To profile
You set a default currency for a Pay To company in its profile. You use the Currencies field, found in the Pay To Profile window’s General Information section.

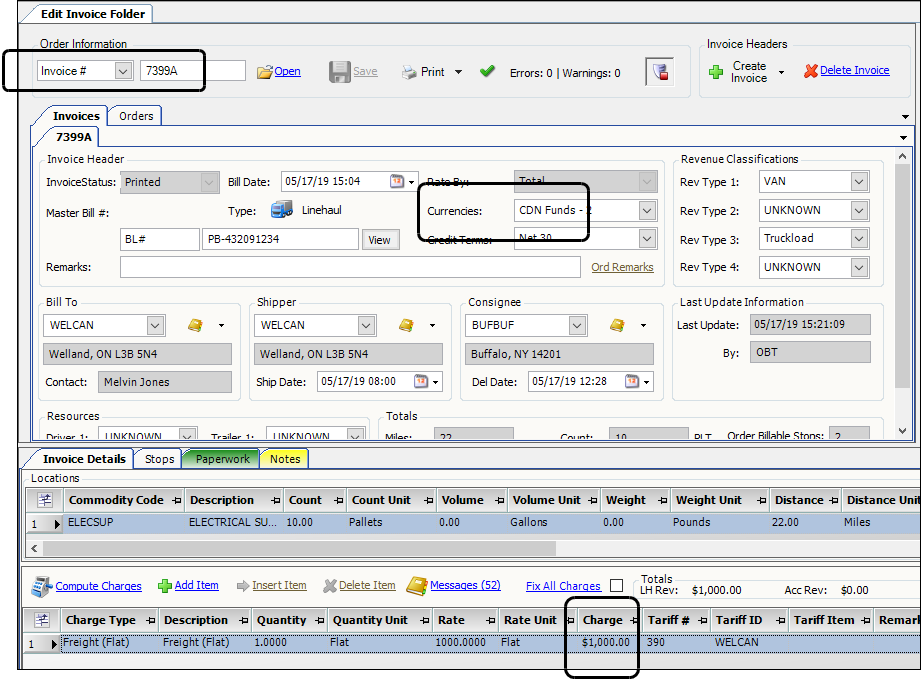
Transferring an invoice to Accounts Receivable
This example shows invoice 7393A that has $1,000 total charges and is set for Canadian currency. We will transfer this invoice to Dynamics GP using the AR Export window.
| For this example, the Dynamics GP company’s functional currency is set for US Funds. |
-
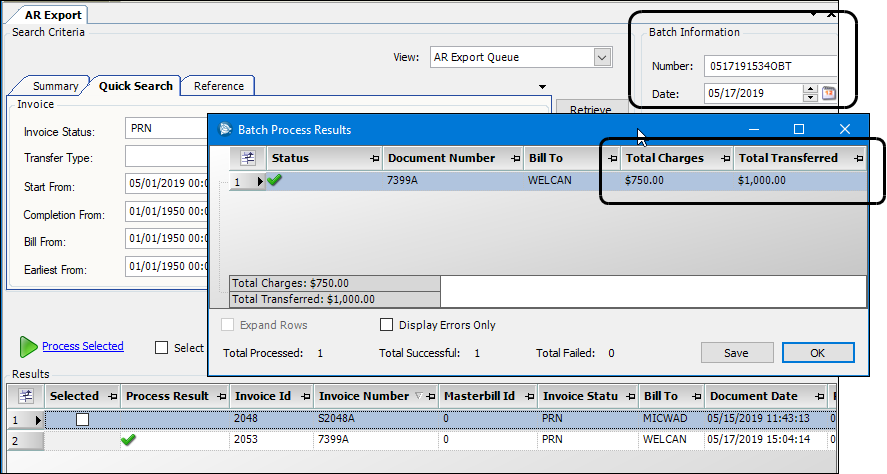
Select Accounting > Accounts Receivable > AR Export.
The AR Export window opens. -
Click Retrieve.
-
Select the invoice to transfer.
-
Click Process Selected.
In the Batch Process Results window, you can see that:
-
The Total Transferred is the originating amount from the invoice as transferred.
-
The Total Charges amount is the currency-converted amount on the A/R invoice.
Also, note the Batch Number if you want to retrieve the batch in Dynamics GP.
-
Viewing the A/R invoice in Dynamics GP
-
Select Transactions > Sales > Receivable Batches*.
The Receivable Batch Entry window opens. -
Select the batch in the Batch ID field.
Notice that the Batch Total is the amount converted to the functional currency of the Dynamics GP company.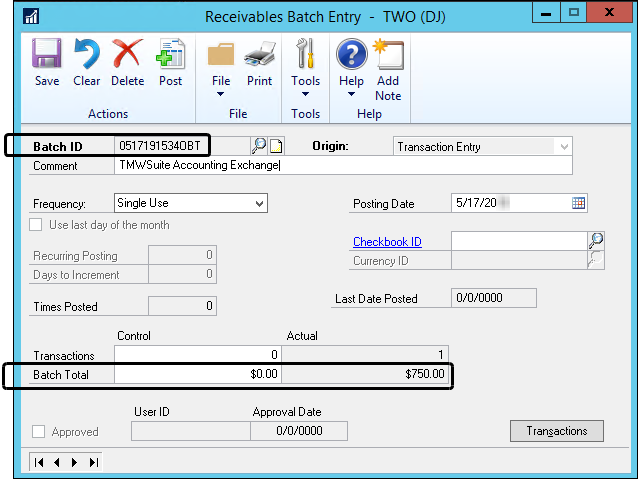
-
Click the Transactions button
The Receivables Transaction Entry window opens. -
Select the document (invoice) number in the Number field.
This window shows the amounts in the originating currency.

-
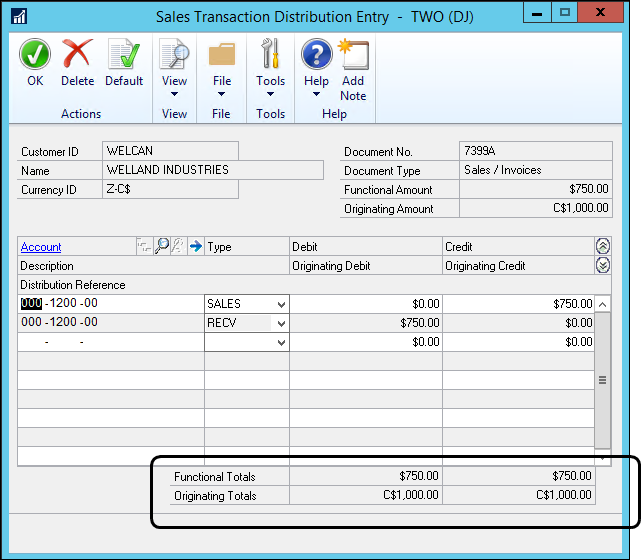
Click the Distribution button to view the A/R invoice’s details.
The Sales Transactions Distribution Entry window opens.This window shows the amount in the originating currency and the company’s functional currency.
Transferring a pay header to Accounts Payable
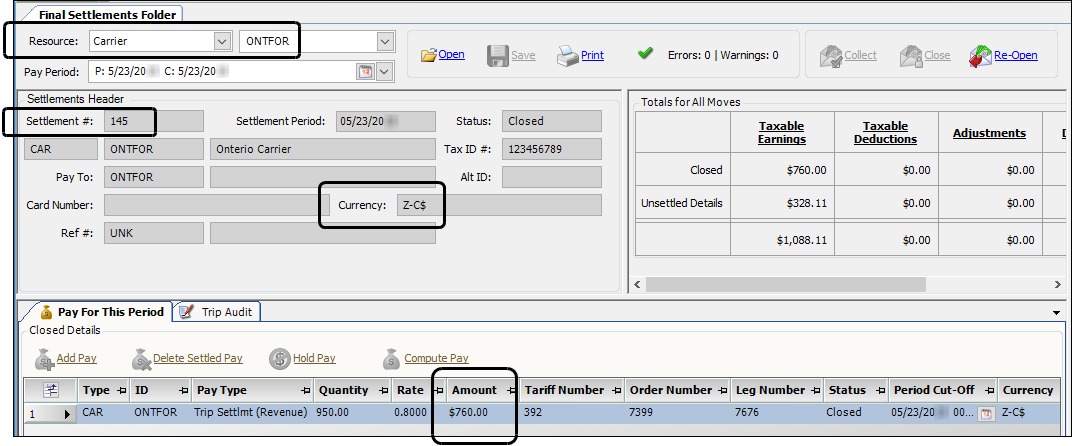
This example shows pay header 145 for the carrier ONTFOR that has a $760 pay detail and is set for Canadian currency. We will transfer this invoice to Dynamics GP using the AP Export window.
| For this example, the Dynamics GP company’s functional currency is set for US Funds. |
-
Select Accounting > Accounts Payable > AP Export.
The AP Export window opens. -
Select the pay period in the Pay Schedule section.
-
Click Add.
-
Make the appropriate entries in the Type, Name, and Pay Period Date fields.
-
Click Retrieve.
-
In the Results section, select the pay header to transfer.
-
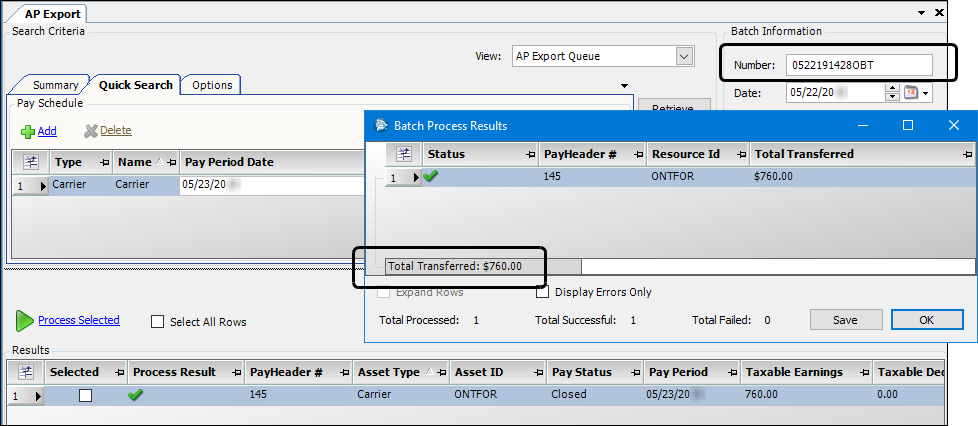
Click Process Selected.
In the Batch Process Results window, notice the Total Transferred amount. Also note the Batch Number if you want to retrieve the batch in Dynamics GP.
Viewing the A/P invoice in Dynamics GP
-
Select Transactions > Purchasing > Batches.
The Payables Batch Entry window opens. -
Select the batch in the Batch ID field.
Notice that the Batch Total is the transferred amount that has been converted to the functional currency of the Dynamics GP company.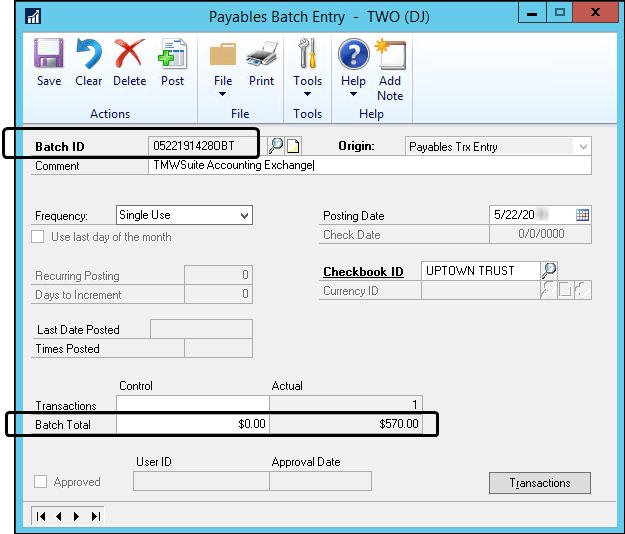
-
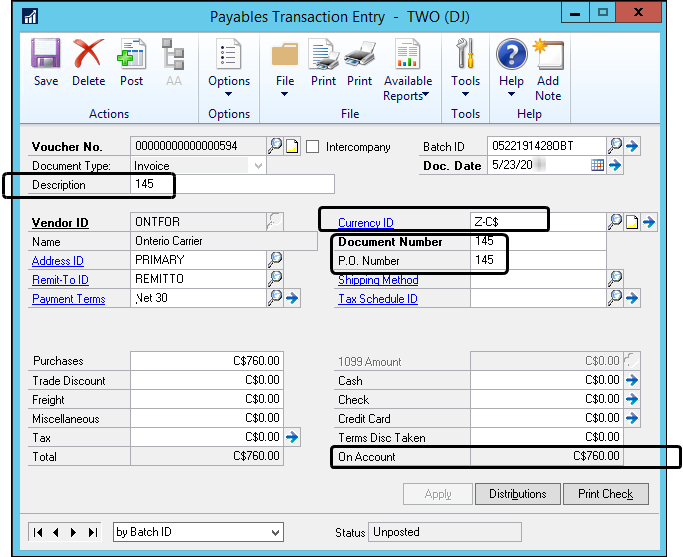
Click the Transactions button
The Payables Transaction Entry window opens. -
In the Voucher No. field, lookup the voucher ID that corresponds to the batch.
The originating currency type is shown in the Currency ID field.
The On Account field in this window shows the amount in the originating currency.
The pay header number is shown in the Description, Document Number, and P.O. Number fields.
-
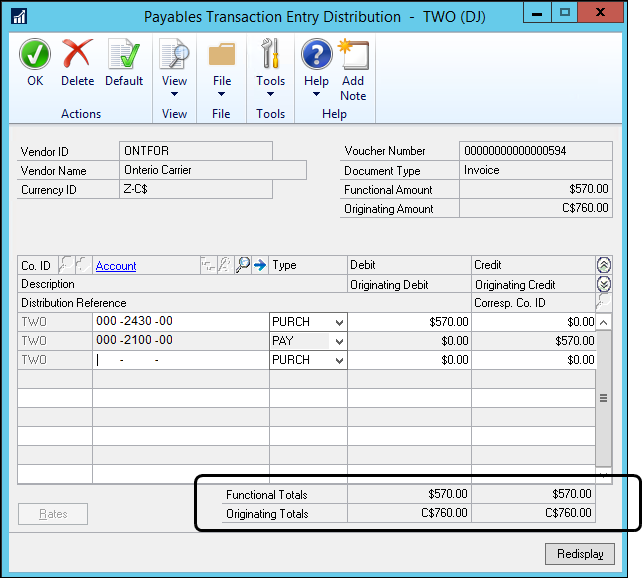
Click the Distribution button to view the A/P invoice’s details.
The Payables Transactions Entry Distribution window opens.This window shows the amount in the originating currency and the company’s functional currency.
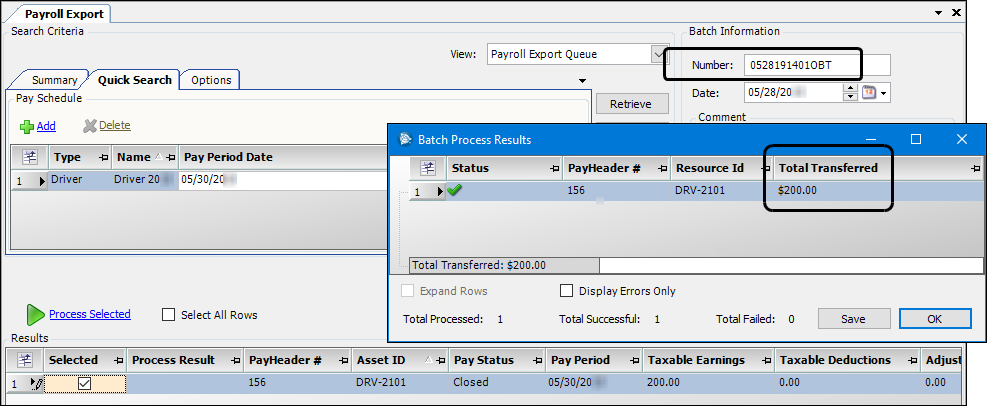
Transferring a payroll record as a General Ledger transaction
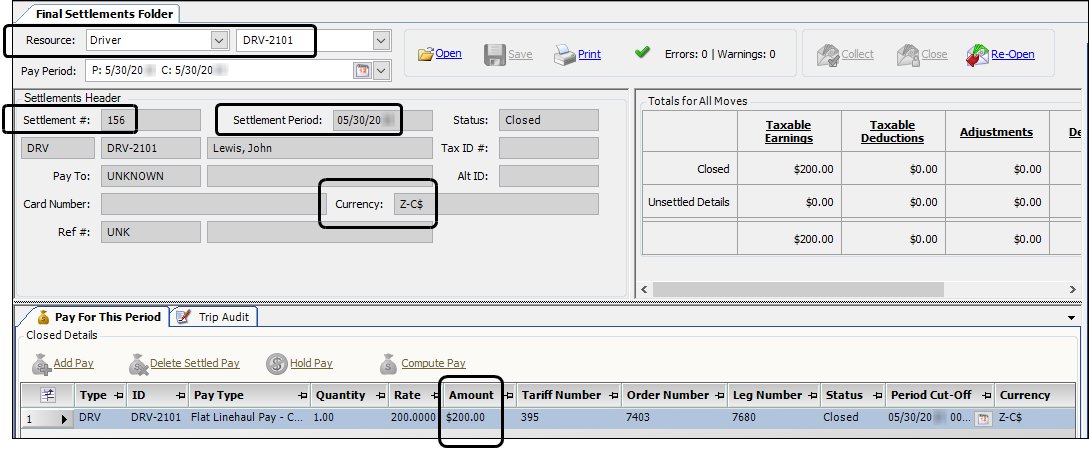
This example shows pay header #156 for DRIVER DRV-2101 that has a $200 pay detail and is set for Canadian currency. We will transfer this invoice to Dynamics GP using the Payroll Export window.
| For this example, the Dynamics GP company’s functional currency is set for US Funds. |
-
Select Accounting > Payroll > Payroll Export.
The Payroll Export window opens. -
Select the pay period in the Pay Schedule section.
-
Click Add.
-
Make the appropriate entries in the Type, Name, and Pay Period Date fields.
-
Click Retrieve.
-
-
Select the pay header to transfer.
-
Click Process Selected.
In the Batch Process Results window, the Total Transferred is the amount transferred from the pay header based on the currency recorded on the pay header. Also, note the Batch Number if you want to retrieve the batch in Dynamics GP.
Viewing the general ledger entries in the financial batch in Dynamics GP
-
Select Transactions > Financial > Batches.
The Batch Entry window opens. -
Select the batch in the Batch ID field.
Notice that the Batch Total is the transferred amount.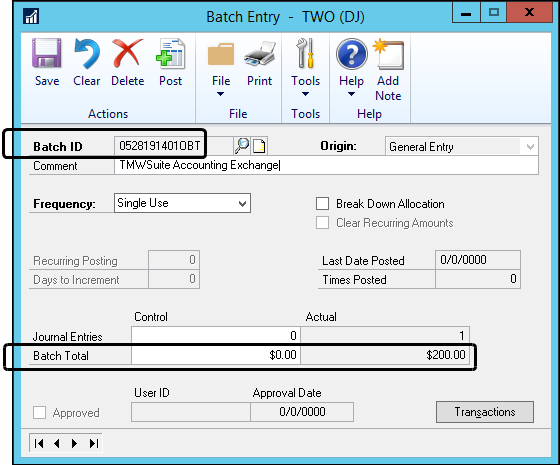
-
Click the Transactions button
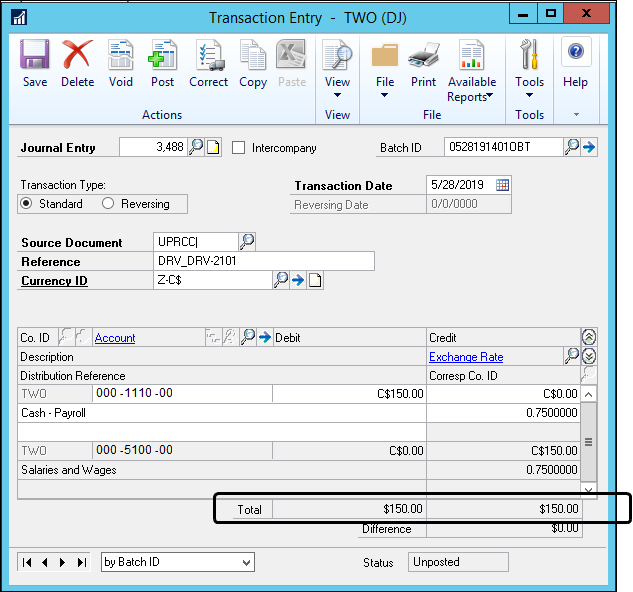
The Transaction Entry window opens. -
Select a journal entry to view using the batch and journal entry number.
The Total field shows the amount converted to the functional currency of the Dynamics GP company.