Correcting pay
Two situations can make it necessary for you to correct pay after the settlement is transferred:
-
The wrong rate, quantity, or pay item was applied.
-
A resource’s pay was based on an invoice that was billed incorrectly.
Note: Percent of revenue pay or pay having an Invoice Line Item basis are types of pay that are based on an invoice.
The Reverse Pay function makes it easy to correct pay. The feature allows you to select which pay details are reversed.
After you reverse pay, you can recompute pay for the individual trip, or you can use the Trips Ready to Settle queue to process the pay.
Correcting pay for a trip that was billed correctly
There may be times when you discover, after a settlement is transferred, that payment information for a trip is incorrect.
The Reverse Pay feature allows you to correct pay for a trip for which the wrong rate, quantity, or pay item was applied. The correction includes reversing the original pay details and then recomputing pay.
Note: For information about correcting pay due to a change in billed charges, see Correcting pay for a trip that was billed incorrectly.
Since the resource was already paid in a previous pay period, the reversal must be applied in an upcoming pay period. To correct the error, follow these steps:
-
In the Trip Settlements Folder, retrieve the trip.
Notice that the pay details have a status of Closed.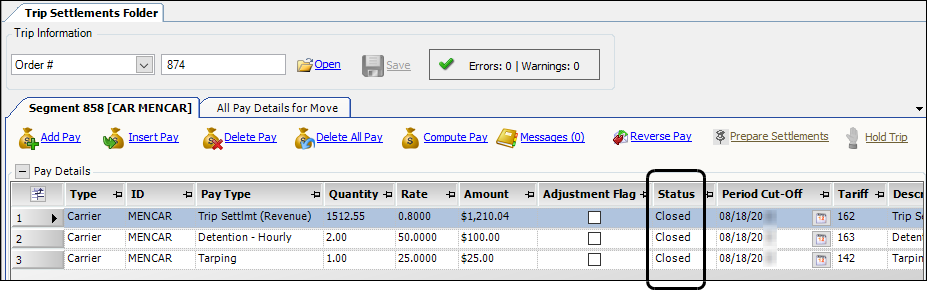
-
Select the pay detail you want to reverse.
Note: To select all pay details, right-click in the grid. Then select Select All Rows from the shortcut menu.
-
Click
 Reverse Pay.
The system:
-
Creates negative pay detail(s) to reverse the selected pay details
-
Releases the reversal pay details to the next available pay period for the resource
-
Selects the Adjustment Flag check box for each reversal

-
-
Repeat Steps 2 and 3 as needed.
-
Before reprocessing pay, adjust the applicable pay rate(s) if needed.
-
To recompute pay for the trip, do one of the following:
-
Use the Trips Ready To Settle queue
-
Click
 Compute Pay.
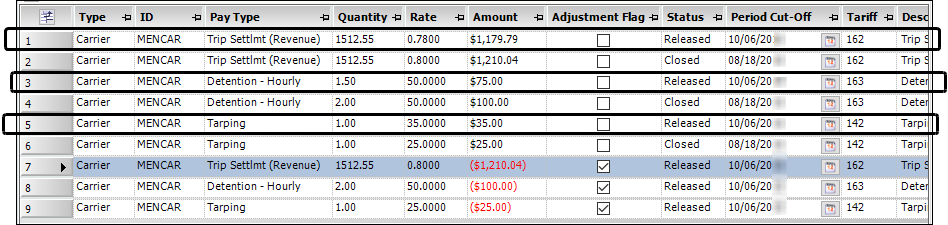
Notice that the new pay details have a status of Released.
-
-
Manually add additional pay details as needed.
-
Click
 Save.
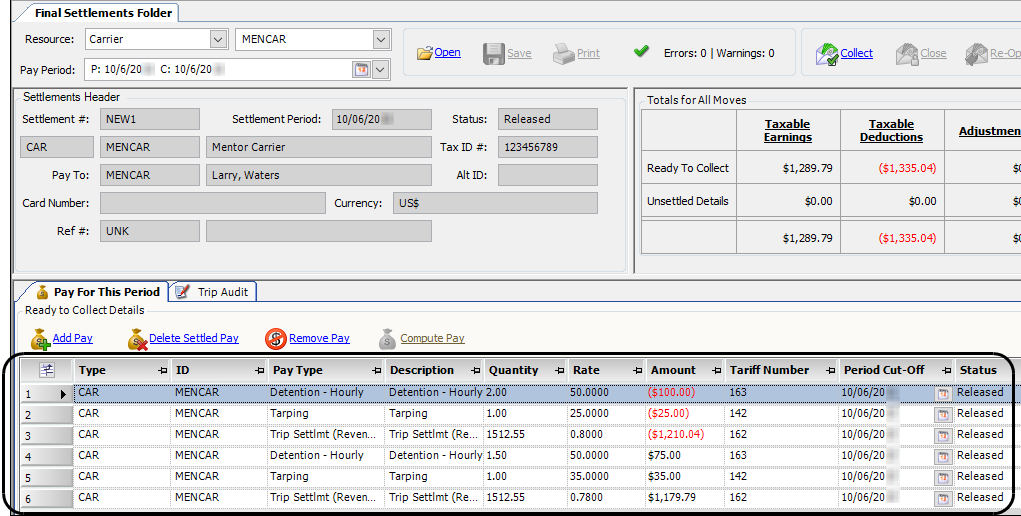
Save.When you look up the resource’s settlement record for the next pay period in the Final Settlements Folder, the system lists the reversed and recomputed pay details for the trip.
From this point forward, you process the reversed and recomputed pay details just as you would for any other pay details.
Correcting pay for a trip that was billed incorrectly
Occasionally, a change must be made to an invoice that has already been transferred to your accounting system. To do this, you must create a credit memo, which reverses all charges on the original invoice. After saving the credit memo, the system gives you the option to reverse pay details associated with the order. This could be important if you base the resource’s pay on the billed charges.
Note: After creating the credit memo, you must rebill the order before you can recalculate revenue-based pay for the resource in the Trip Settlement Folder.
Credit memos are created in the Edit Invoice Folder. After saving a credit memo, the system allows you to select the specific pay details to be reversed.
The following examples illustrate how the system handles pay details when you create a credit memo.
-
Retrieve the invoice in the Edit Invoice Folder.
-
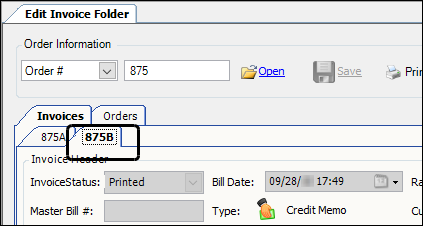
In the Invoice Headers section, go to Create Invoice > Credit Memo.
The system creates a new credit memo with a status of Printed. The system also displays the Pay Details tab with a list of all pay details associated with the order.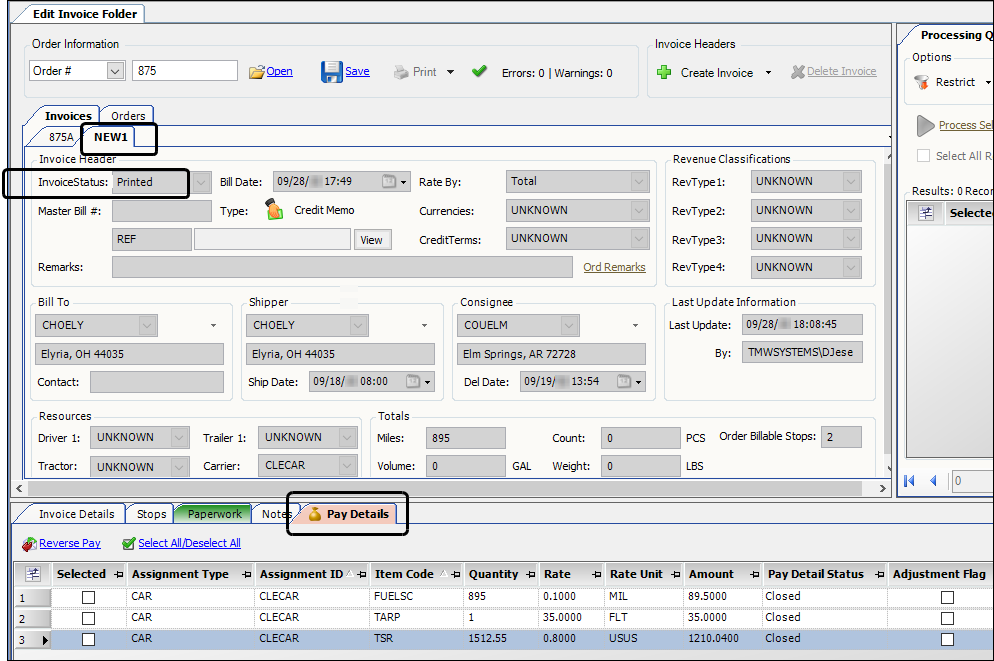
-
Click
 Save to save the credit memo.
The system assigns an invoice number to the credit memo. It has the same number as the original invoice, but a different suffix. -
Click
 Open to re-retrieve the invoice.
 -
Select the credit memo’s tab.
-
On the Pay Details tab, select the Selected check box for each pay detail you want to reverse.

-
Click
 Reverse Pay.
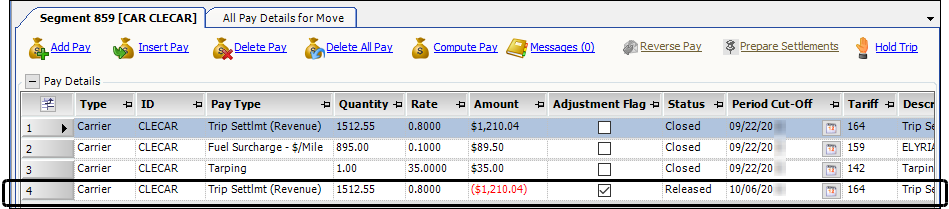
The system creates a negative pay detail to reverse the pay. The pay detail is automatically released to the resource’s next available pay period.
This illustration shows reversed pay as it appears in the Edit Invoice Folder.

-
If you are correcting revenue-based pay, you must create the rebill before continuing.
For more information, see Creating a rebill. -
Before reprocessing pay, adjust the applicable pay rate(s) if needed.
-
Retrieve the trip in the Trip Settlements Folder.
Notice that the system:-
Created a negative pay detail to reverse the selected pay detail
-
Released the reversal pay detail to the next available pay period for the resource
-
Selected the Adjustment Flag check box for the reversal
-
-
Do one of the following to recompute pay for the trip:
-
Use the Trips Ready To Settle queue.
-
Click
Compute Pay.
Note: The recomputed pay details are released to the next available pay period for the resource.
-
-
Manually add additional pay details as needed.
-
Click
Save.
When you look up the resource’s settlement record for the next pay period in the Final Settlements Folder, the system lists the reversed and recomputed pay details for the trip.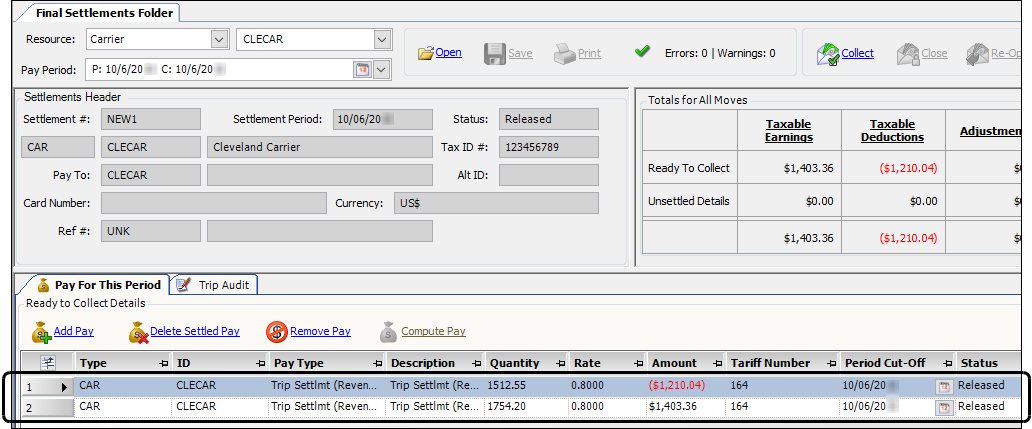
From this point forward, you process the reversed and recomputed pay details just as you would pay for any other trip.