Setting up a Pay To for a carrier
When setting up a carrier profile as an accounts payable resource, you must specify a Pay To for that resource.
| Carriers are accounts payable resources whether they are board carriers or non-board carriers. |
When Accts Payable is selected in the Acctg Type field of the Carrier File Maintenance window, you can access the Pay To File Maintenance window from any carrier profile by using the Add PayTo or Edit PayTo buttons.
The Add PayTo and Edit PayTo buttons will appear in the Carrier File Maintenance window when the [Misc]DisableAutoPayTo=N setting in your TTS50.
-
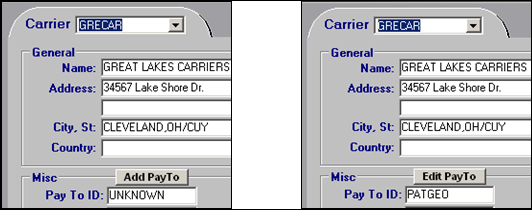
If a Pay To ID has not been specified for the resource, the Add PayTo button will appear.
-
If a Pay To ID has been specified for the resource, the Edit PayTo button will appear.
In the Carrier File Maintenance window, the buttons appear just above the Pay To ID field in the Misc section:
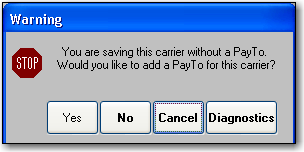
If Accts Payable is selected as the carrier’s accounting type but you have not specified a Pay To before saving the profile, a warning message is displayed:
-
If you click Yes, the Pay To File Maintenance window displays.
-
If you click No, the carrier profile will be saved without a designated Pay To. The value in the Pay To ID field for the resource will be UNKNOWN.
Note: This warning will appear each time the resource profile is saved until a Pay To is specified.
-
If you click Cancel, the resource profile will not be saved.
Creating a new Pay To profile for the carrier
If the Pay To ID field in the carrier profile is set to UNKNOWN, the Add PayTo button appears. To create a new Pay To profile for the carrier, perform the following steps:
-
Click Add PayTo. A blank Pay To File Maintenance window displays.
Notes:
-
When you click the Add PayTo button from the Carrier File Maintenance window, any information entered in the name, address, and phone number fields will be entered in the corresponding fields of the Pay To File Maintenance window.
-
When the Pay To File Maintenance window is accessed in this way, you cannot access the menu bar or the frame and sheet toolbars. Therefore, you will not have access to any additional functionality associated with the Pay To File Maintenance window.
-
-
Complete the required information for the Pay To.
-
When finished, click
 Save in the Pay To File Maintenance window.
 -
Close the Pay To File Maintenance window to return to the Carrier File Maintenance window.
Editing the carrier’s Pay To profile
If a Pay To profile has been selected in the Pay To ID field of the carrier profile, the Edit PayTo button is displayed. To edit the carrier’s Pay To profile, perform the following steps:
-
Click Edit PayTo. The Pay To File Maintenance window for the specified Pay To displays.
Note: When the Pay To File Maintenance window is accessed in this way, you will not have access to the menu bar or the frame and sheet toolbars. Therefore, you will not have access to any additional functionality associated with the Pay To File Maintenance window.
-
Edit the Pay To profile as necessary.
-
When finished, click
Save in the Pay To File Maintenance window. -
Close the Pay To File Maintenance window to return to the Carrier File Maintenance window.