Using Integrated Reporting for correspondence with past employers
The recruiting feature accepts employment verification forms based on SQL Server Reporting Services reports. If your staff has extensive reporting experience and an understanding of the TMWSuite database structure, your company can design its own formats. Alternatively, if you do not have the necessary resources, you can contact your TMW Support representative to request that a report be designed for you.
For more information on using the Integrated Reporting feature of TMWSuite, see the Integrated Reporting Guide.
Prerequisites
When creating the employment verification form using SQL Server Reporting Services, be aware that user logins cannot contain slashes, for example, TMW\user1. When employment verification forms based on SQL Reporting Services are printed, the print function stores temporary files with a slash preceding the user login. A slash in the login to separate the domain from the user ID will conflict with the print function.
To use SQL Server Reporting Services, you must have:
-
SQL Server
-
SQL Server Reporting Services
-
IIS
Not required for SSRS 2008. -
Business Intelligence Development Studio
Required for editing. -
TMWSuite V.2010.09_08.1208 or later
-
The TMWSuite Add-ins feature
You can install Add-ins when you use the TMWSuite Installer to update to a new release of TMWSuite. You activate the feature by setting[TmwSuiteAddins]EnableInterface=Yin your TTS50. -
The Integrated Reporting license
The license is available at no charge and can be obtained from your TMWSuite Support representative. -
A PDF viewer
The form is displayed in a PDF viewer when it is rendered in SQL Reporting Services. -
FAX e-mail address*
If you intend to FAX the forms, and you are using an e-mail integrated faxing system, see Setting up your system to use the employment verification form.
After developing the form, you must deploy it to your reporting server.
For assistance with prerequisite setup, contact TMW Support.
Adding your form to TMWSuite
After you create the verification form, do the following:
-
In System Administration, go to Edit > Integrated Report Setup > Original Integrated Report Setup.
-
Use System Administration’s Integrated Report Setup window to add the form to TMWSuite.
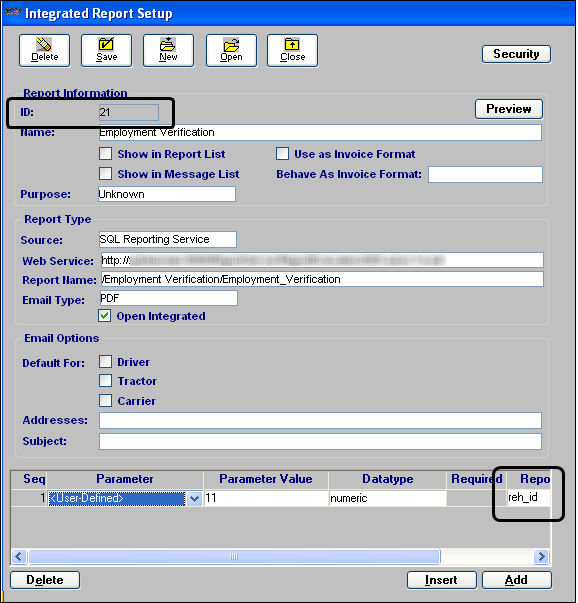
Sample report setup for ID 21: Employment Verification
When setting up the employment verification form, you must:
-
Specify the source as SQL reporting Services.
-
Indicate the full web site address.
-
Enter the report location and name.
-
Select an Email Type of PDF.
-
Identify the
reh_idreport parameter as the data retrieval argument for the report. -
Display a preview of the report to verify your settings.
Note: Under Email Options, the Addresses and Subject fields are not used for sending the employment verification form via e-mail.
-
-
Click Save.
The system automatically assigns a numeric ID to the report. -
Make a note of the report’s ID number so you can enter it into the
EmploymentVerifyGeneral Info Table setting’s Int2 field, which is discussed in the next section.
| For more information about Integrated Reporting, see the Integrated Reporting Guide. |
Setting up your system to use the employment verification form
After the form, based on SQL Server Reporting Services reports, is added to TMWSuite, you must also do the following:
-
If you intend to e-mail the employment verification form, configure the
EmploymentVerifyGeneral Info Table setting with e-mail information. -
If you intend to FAX the employment verification form and you are using an e-mail integrated faxing system, identify the e-mail extension in the
[Misc]CommunicationFaxEmailExtensionsetting in your TTS50.
Sending an employment verification form to past employers
Use this procedure to generate an employment verification form, based on SQL Server Reporting Services reports, to previous employers of recruits. The form is generated in PDF format. You can print the form, send it by e-mail, or send it by FAX.
| When sending by e-mail, the system uses the From address of the Microsoft Office Outlook’s login account on the computer processing the communication from the Employment History window. |
-
With the recruit’s profile opened, click Employment History.
The Employment History window opens.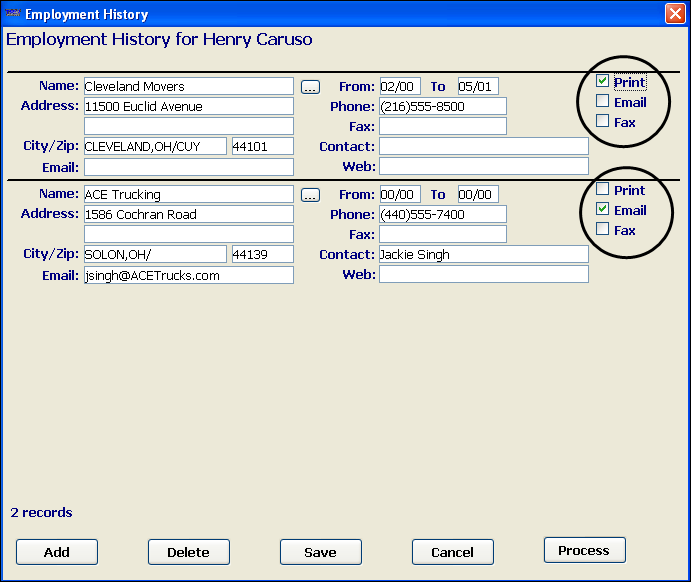
-
For each employer who is to receive a request for employment verification, select the appropriate check box to indicate the method of communication:
-
Print
Verify a valid mailing address is also entered in the Address and City/Zip fields. -
Email
Verify a valid e-mail address is also entered in the Email field. -
Fax
If you intend to FAX the forms and you are using an e-mail integrated faxing system, see Setting up your system to use the employment verification form.
-
-
Click Process.
-
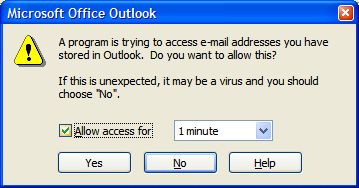
Respond to Microsoft Office Outlook’s security checks.
-
Select the Allow access for check box.
The system defaults to 1 minute. -
Click Yes.
Another security check window opens.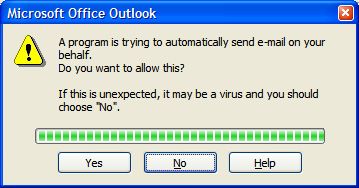
-
After a few moments, when the green bar indicates the system is ready to continue, click Yes.
-
-
Click Save to save the settings and close the Employment History window.