Recording information in the Additional Details window
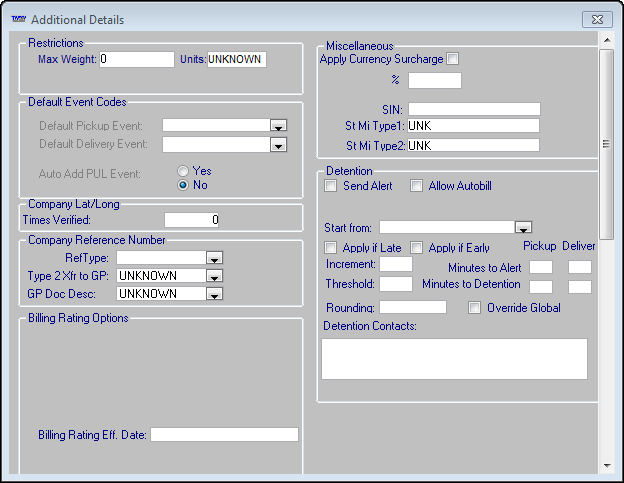
You can use the Additional Details window to record supplementary information for your customer. The Additional Details window is accessed by clicking on the Additional Details button, located in the lower right corner of the company’s profile.

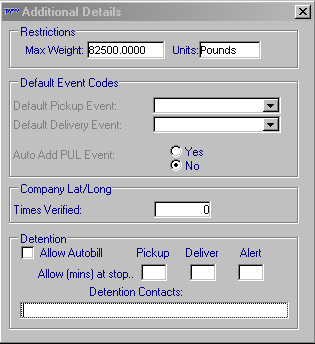
The Additional Details window is shown here. Each division of the window is explained in the following sections.
| The Company Firm Appointments field located in the lower portion of the Additional Details window is a custom field. |
Specifying which date type is used as the effective date for billing rates
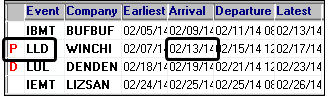
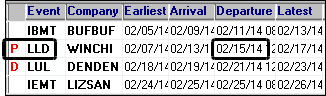
The dates recorded in the In Effect and To fields in the rate index specify the period during which the rate schedule is in effect.
When the system rates an order, it compares rate effective dates to the order to determine whether it falls within the effective date range. By default, the system compares rate effective dates to the Arrival date for the first pickup.
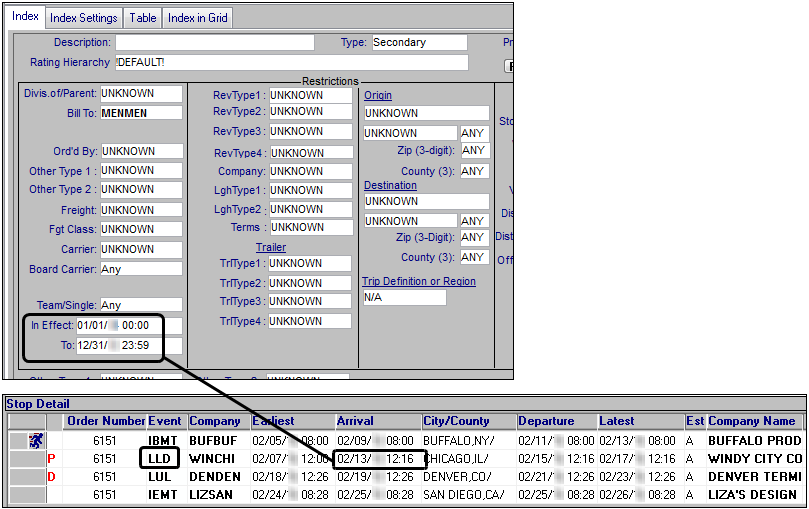
However, you can use the Billing Rating Eff Date field to specify which type of date the rating engine uses for a specific Bill To company.
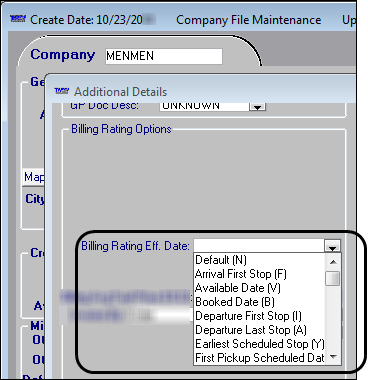
This table provides descriptions of the options in the Billing Rating Eff Date field.
| Option | Functionality | Date field’s location on the Trip Folder |
|---|---|---|
Default (N) |
Arrival date at the first pickup stop (stp_arrivaldate) |
|
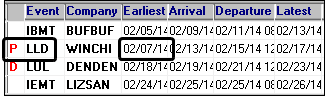
Arrival First Stop (F) |
Arrival date at the first pickup stop (stp_arrivaldate) |
|
Available Date (V) |
The date/time the order is available for dispatch, which is displayed in the Order Available field on the order header. ord_availabledate |
|
Booked Date |
Date the customer placed the order, which is displayed in the Booked field on the order header (ord_bookdate) |
|
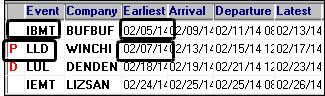
Departure First Stop (I) |
Departure date at the first pickup stop stp_departuredate |
|
Departure Last Stop (A) |
Departure date at the last drop stop stp_departuredate |
|
Earliest Scheduled Stop (Y) |
Scheduled earliest date of the first billable stop, e.g., first pickup or first billable empty stop (stp_schdtearliest. |
|
First Pickup Scheduled Date (P) |
The scheduled earliest date of the first pickup stop (stp_schdtearliest) |
|
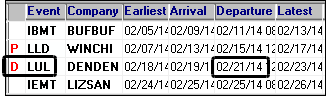
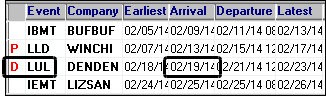
Last Delivery Arrival Date (D) |
The arrival date at the last drop stop (stp_arrivaldate) |
|
Null (blank) |
Functionality is controlled by the String1 field of the |
|
|
|
|
|
|


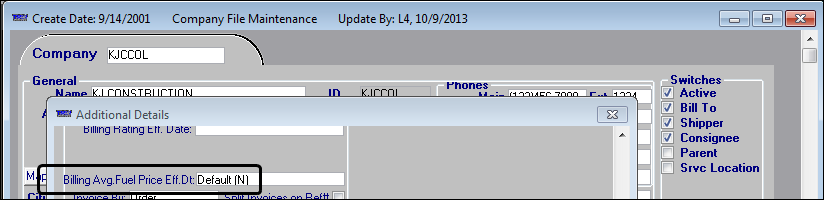
Specifying which date type is used as the effective date for average fuel prices
The Billing Avg. Fuel Price Eff. Dt field allows you to specify the type of date the system uses as the order’s start date to determine which average fuel price is in effect.
For details, see:
Guide: Average Fuel Price | Chapter: Setting up Average Fuel Price billing rates | Section: Specifying the date type used as the effective date for average fuel prices
Specifying the default event type(s) for a company
The options in the Default Event Codes section allow you to specify the default event type(s) for companies listed on an order as the initial pickup or last drop. When you create a new company, you can also use these fields to specify the company’s default pickup event and/or default drop event.
For details, see Setting a default pickup/delivery event.
Making entries in the Company Lat/Long section
The Times Verified field is used to indicate the accuracy of and to adjust a company’s latitude and longitude. For detailed information about using the Company Lat/Long section, see Assigning a confidence rating to a lat/long reading.
![]()
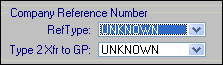
Setting up a company’s reference numbers
The options in the Company Reference Number section allow you to manage a company’s reference numbers.
-
The RefType field Identifies the type of reference number for which duplicates cannot be entered for a Bill To company. A reference number of the specified type cannot be duplicated for any order header, stop detail, or freight detail.
It is possible to specify one reference number type in the General Info Table RefUnique key, and a different reference number type in a Bill To’s profile. As long as the reference number types are different, reference number checking proceeds independently for each type. If the same reference number type is specified in both the General Info table and the company profile, both settings, the General Info Table takes precedence.
-
The options in this field are user-defined in the ReferenceNumber label, accessed in System Administration.
-
This field is not applicable for Fuel Dispatch.
-
-
The Type 2 Xfr to GP field identifies the reference number type from the order header that will be transferred to Microsoft Dynamics GP.
-
If a reference number of the type specified here exists in the order header, that number will be transferred.
-
If no reference number of the type specified in this field exists in the order header, the first reference number from the invoice header will be transferred. The reference number from the invoice header does not have to match the type specified here. If there is no reference number in the invoice header, no reference number is transferred.
-
Preventing duplicate reference numbers for a Bill To company
Entries in the RefType field are used to prevent duplicate reference numbers for a Bill To company. Reference numbers of the specified type cannot be duplicated for a Bill To whether they are recorded in the order header, for a stop, or for a commodity. In the Company Reference Number section, choose a reference number type from the RefType drop-down list.
Afterward, a specific reference number of the type you selected in the Ref Type field can be used only once for the company when the company is the Bill To on an order.
|
If you specify an existing combination of Bill To company, reference number type, and reference number in a new order, an error message similar to the following example appears when you attempt to save the order.
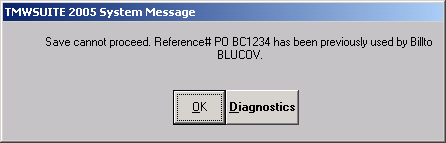
To complete the save with a given Bill To company, you must select a different reference number type or enter a unique reference number.
Identifying the reference number type to be transferred to Microsoft Dynamics GP
In the Company Reference Number section, the Type 2 Xfr to GP field is used to identify the reference number type that will be transferred to the Receivables module in Microsoft Dynamics GP on a company-by-company basis.
The Dynamics GP Integration module is a licensed add-on that must be purchased separately from the base TMWSuite system. For more information, contact TMW Sales.
Using the Detention Tracking feature
The fields in the Detention section are used by the Detention Tracking feature. That feature uses the information to determine when a detention charge is warranted and then to create an invoice detail for it.
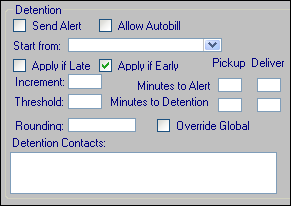
For detailed information about setting up and using the Detention Tracking feature, see the Detention Tracking Feature guide.
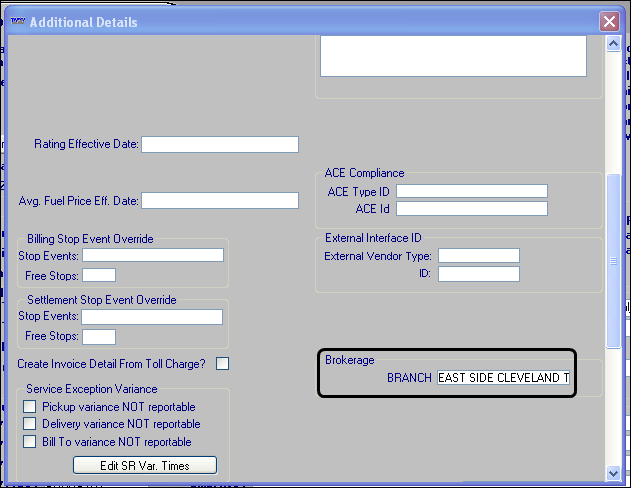
Associating a company with a cost center
When you are using branch configuration functionality to identify cost centers or booking terminal entities, you can link these entities with a company in its profile. You do this in the Brokerage section of the Additional Details window.
By default, the field you use to make the association is named Branch. Your company can rename the field.
|
Assigning a default consignee for a shipper
If a company has the Shipper switch selected in its profile, you can specify a default consignee to be used in Order Entry whenever the company is selected as a shipper. Use the Default Consignee field to enter the ID. The company you select must be marked as a consignee in its profile.
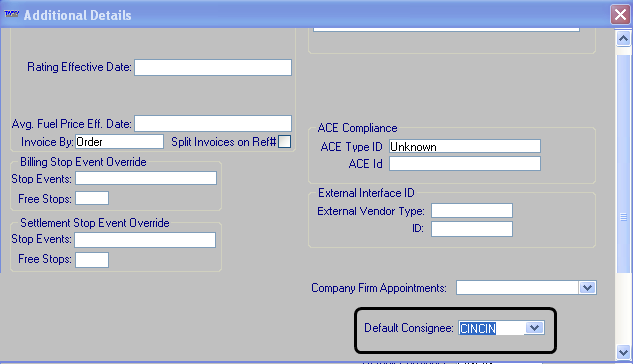
When you use Order Entry to record a shipper for an order, the system automatically copies the default consignee to the order. The default consignee can be manually changed at any time in the Order Entry and Dispatch applications.
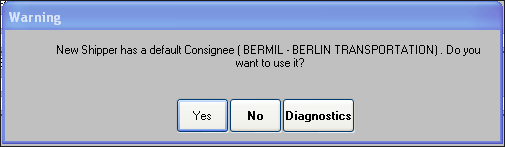
If you change the Shipper in Order Entry, and the new Shipper has a different default consignee, a Warning box will present the option to keep the current consignee or replace it with the new shipper’s default consignee.
| The default consignee will not be automatically copied to the Consignee field when you create an order in Dispatch. |
Adjusting pay quantities based on maximum legal weight
The Max Weight field and the Units field in the Restriction section are used by the settlement weight adjustment feature. That feature adjusts the weight used for calculating pay based on a maximum legal weight.
|
Using the settlement weight adjustment feature requires you to perform setup procedures in your TTS50 and in the Company File Maintenance and Rate Schedules applications. For detailed information about adjusting pay quantities based on maximum legal weight, see the Advanced Pay Rate documentation. |
Follow these steps to record a maximum legal weight for a company:
-
In the Max Weight field, enter the maximum weight that should be shipped to this company.
-
From the drop-down list in the Units field, select the weight unit.
The Max Weight and Units fields display for all companies. However, when you have [Settlements]AdjustPayQuantityForMaxLegalWeight=N in your TTS50, the fields are informational only.
It is recommended that all shippers and consignees be assigned to the same weight unit. If the shipper and the consignee on an order are assigned to two different weight units, the system may adjust the settlement weight incorrectly.
Viewing a history of stops made at a company
The Stop History window provides a list of stops made at a particular location.
-
Do one of the following to access this window:
-
Click
 History in the sheet toolbar.
 -
Select Edit > History.
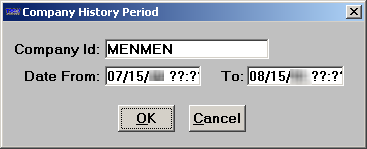
The Company History period dialog box displays.
-
-
In the Date From and To field, enter the desired beginning and ending dates for the look up.
-
Click OK.
The Stop History window is displayed.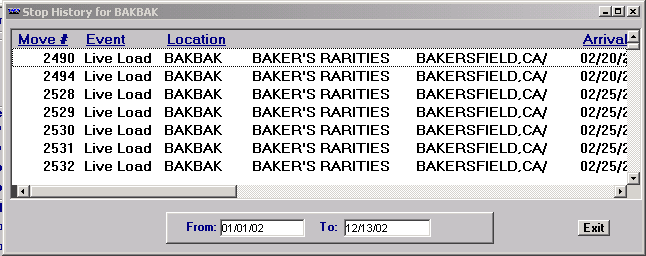
Information is provided in these columns:
Move #
ID of the movement
Event
Event type
Location
Company and city/state where the stop occurred
Arrival
Stop arrival date and time
Departure
Stop departure date and time
Schedule Early
Date and time of earliest scheduled arrival
Schedule Late
Date and time of latest scheduled arrival
Rsn Late
User-defined field for known reasons for delay
Trip Seg
ID of the trip segment
Order
ID of the order
Trailer
ID of the trailer assigned to the movement
Street Address
Street address of the stop
The scroll bar at the bottom of the window allows you to view all the columns of the window. When more than seven entries appear in the Stop History window, a scroll bar is displayed at the right of the window. Use this scroll bar to view additional stops.
To edit the date range of the records displayed in the Stop History window:
-
In the From field enter a beginning date.
-
Tab to the To field and enter the ending date.
-
Press TAB again to initiate the lookup.