Adding/maintaining miscellaneous company information
From the Company File Maintenance window, you can access a number of supporting windows used to record supplemental company information. These windows include:
| Window | Icon | Used to: | For more information |
|---|---|---|---|
View Attached Object |
|
View, add, or delete photos attached to a company profile. |
|
Expirations |
|
Record key events for a company. These records are informational only. They will not prevent a company from being used on a trip. |
|
Hours of Operation |
|
Record the hours that a company is open. |
|
Shipper List |
|
Access a list of shippers used by a particular Order By company. |
|
Consignee List |
|
Access a list of consignees used by a particular Order By company. |
|
Extra Info |
|
When the Extra Information feature is activated, this icon opens the Company Extra Information window, which is used to set up new fields where custom information can be recorded. |
Extra Information feature, System Administration Guide |
Directions |
|
Record directions to a company. When directions have been recorded, the icon displays red. |
|
Map |
|
View the company’s location on a map. |
|
Stop History |
|
View information regarding all stops made at a particular company, within a specific date range |
|
Credit Info |
|
Record and maintain accounts receivable aging periods. |
|
Load Requirements |
|
Associate load requirements with a shipper and/or consignee. |
|
Notes |
|
Record notes about the company. |
Viewing, adding, or deleting photos in a company profile
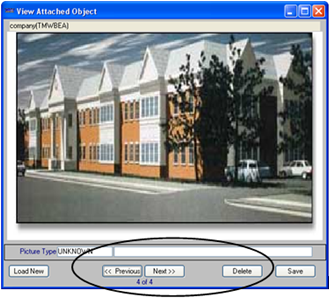
You can include multiple photos or other types of images in a company profile using the View Attached Object window. This window is also available in Driver, Trailer, and non-driver employee profiles.
If this is your first time attaching photos to a profile, see Setting up the File Maintenance photo feature to confirm your system is set up properly.
| Your TTS50 must be set up to enable accessing profile photos, and the computer must have Microsoft Office 2003 or later installed. |
-
Click
 Image in the sheet toolbar.
The View Attached Object window opens. Here, the window displays a previously saved image.
-
In the View Attached Object window:
-
To scroll through all photos attached to the profile, click the Previous or Next button.
-
To add a photo or edit fields, continue with Step 3.
-
If you are finished with the View Attached Object window, click
 to close it.
-
-
To add a photo, click Load New.
-
Browse to and select the photo you want to add.
-
In the Picture Type drop-down list, select a picture type.
Notes:
-
The options in this field are defined by your company, using the PictureType label.
-
If you want to add or modify this field for an existing photo attachment, select an option from the drop-down list and re-save the attachment.
-
This step is optional unless you have
[Misc]RequireTypeOnPicture=Yin your TTS50.
-
-
If you want, you can enter a comment in the field to the right of the Picture Type field.
Note: In you want to add or modify information for an existing photo attachment, edit the field and re-save the attachment.
-
Click Save to store the photo.
-
Click
in the upper right corner of the View Attached Object window to close it.
Deleting a photo from a company profile
To delete a photo from the View Attached Object window, follow these steps:
-
In the View Attached Object window, click Previous or Next to select the photo you want to delete.
-
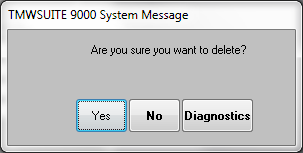
Click the Delete button. The system asks for confirmation.
-
Click Yes. The system deletes the photo.
-
Click Save.
-
Click
in the upper right corner of the View Attached Object window to close it.
Recording/viewing company expirations
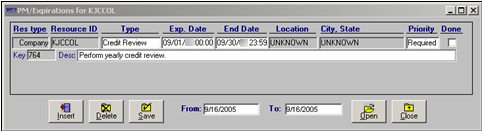
The company expirations feature allows you to record key events in a company’s profile. Unlike resource expirations, company expirations are informational only. They will not prevent a company from being used on a trip. Company expirations are recorded in the PM/Expirations window.
To record a key event (expiration) for a company:
-
With the company’s profile displayed, click the
 Expirations icon.
Note: In TMWSuite builds 2005.04_10.1012 and later, the Expirations icon displays only when you have
[FileMaint]EnableCompanyExpirations=Yin your TTS50. -
Click Insert to add a blank line.
-
Make entries in these fields.
Type
Select an option from the drop-down list.
Note: Options for this field are defined in the CmpExp label in the System Administration application.
Exp. Date
Enter a date for the key event.
End Date
If desired, enter an end date for the key event.
Desc.
Enter a description for the key event.
-
Click Save.
-
Click Close.
For complete details on company expirations, see the Company Expirations guide.
Recording/viewing hours of operation
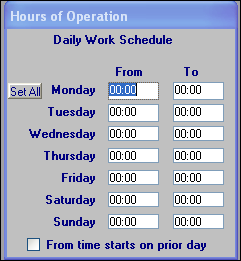
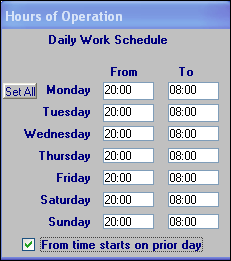
A company’s hours of operation can be recorded and accessed using the Hours of Operation window. Open or exit this window by selecting ![]() Hours in the sheet toolbar or Edit > Open Hours. Hours must be entered in military time.
Hours in the sheet toolbar or Edit > Open Hours. Hours must be entered in military time.
Hours can be set as follows:
-
When you enter the From and To times for Monday, the system automatically defaults those times into the From and To fields for Tuesday through Friday. If needed, adjust the times for days that do not have the same opening and closing times.
-
If the business hours are the same for all days of the week, including Saturday and Sunday, enter the opening and closing hours for Monday. Then click the Set All button. The system copies those hours to the From and To fields for the other days of the week, including Saturday and Sunday. If needed, adjust the times for days that do not have the same open and closing times.
-
By default, the opening and closing hours recorded for a day are assumed to occur on that day. However, if opening and closing spans two days, select the From time starts on prior day check box to indicate this. In this example, a work day runs from 10:00 PM on the prior day to 08:00 AM on the following day. The check mark in the From time starts on prior day explains why the opening and closing times are sequenced as they are.
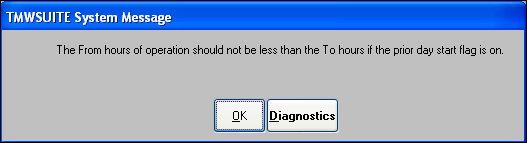
Note: If the From time starts on prior day check box is selected and you enter a start time that is less than the end time, or if you enter an end time is greater than the start time, you will see the warning shown here. You must change the times before you can exit the window.
Recording/viewing a shipper’s list
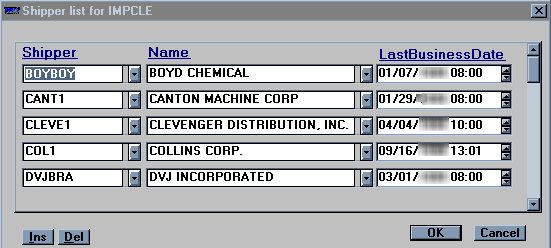
Click ![]() Shippers in the sheet toolbar, or select Edit > Shippers. For the company currently selected, you will see a list of shippers they do business with as a consignee. The system builds this list dynamically as orders are completed; however, you can also maintain the list manually. This list provides a memory cue for associated company IDs. In Order Entry, there is a corresponding Pickup Locations command in the Edit menu.
Shippers in the sheet toolbar, or select Edit > Shippers. For the company currently selected, you will see a list of shippers they do business with as a consignee. The system builds this list dynamically as orders are completed; however, you can also maintain the list manually. This list provides a memory cue for associated company IDs. In Order Entry, there is a corresponding Pickup Locations command in the Edit menu.
| You can click on a column heading to do a quick sort based on that column. |
Adding a shipper to a list
To add a shipper, click the Ins button in the lower left of the window and make entries in these fields:
Shipper |
The company’s ID |
Name |
The company’s name |
Last Business Date |
The last date and time that a pickup occurred This field is required. |
A scroll bar is displayed at the right of the Shippers List window when more than five shippers are entered. Click the scrollbar to access additional shippers in the list.
Recording/viewing a list of consignees
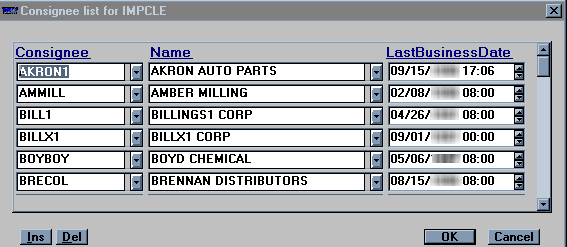
Click ![]() Consignee in the sheet toolbar, or select Edit > Consignees. For the company currently selected, you will see a list of consignees they do business with as a shipper. The system builds this list dynamically as orders are completed; however, you can also maintain the list manually. This list provides a memory cue for associated company IDs. In Order Entry, there is a corresponding Delivery Locations command in the Edit menu.
Consignee in the sheet toolbar, or select Edit > Consignees. For the company currently selected, you will see a list of consignees they do business with as a shipper. The system builds this list dynamically as orders are completed; however, you can also maintain the list manually. This list provides a memory cue for associated company IDs. In Order Entry, there is a corresponding Delivery Locations command in the Edit menu.
| You can click on a column heading to do a quick sort based on that column. |
Adding a consignee to a list
To add a consignee to a list, click the Ins button in the lower left of the window. Make entries in the following fields:
Consignee |
The company’s ID. |
Name |
The company’s name. |
Last Business Date |
The last date and time that a pickup occurred. This field is required. |
A scroll bar is displayed at the right of the Consignee List window when more than six consignees are entered. Click on the scroll bar to access additional consignees in the list.
Viewing a history of stops made at a company
The Stop History window provides a list of stops made at a particular location.
-
Do one of the following to access this window:
-
Click
 History in the sheet toolbar.
 -
Select Edit > History.
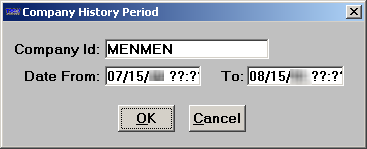
The Company History Period dialog box displays.
-
-
In the Date From and To field, enter the desired beginning and ending dates for the look up.
-
Click OK.
The Stop History window is displayed.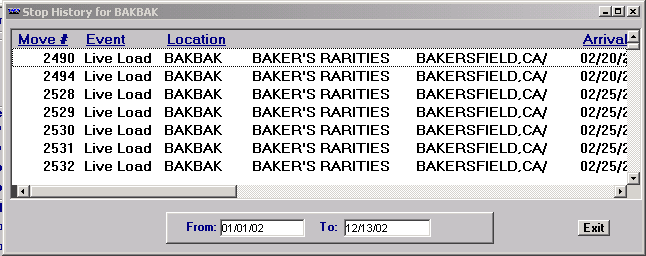
Information is provided in these columns:
Move #
ID of the movement
Event
Event type
Location
Company and city/state where the stop occurred
Arrival
Stop arrival date and time
Departure
Stop departure date and time
Schedule Early
Date and time of earliest scheduled arrival
Schedule Late
Date and time of latest scheduled arrival
Rsn Late
User-defined field for known reasons for delay
Trip Seg
ID of the trip segment
Order
ID of the order
Trailer
ID of the trailer assigned to the movement
Street Address
Street address of the stop
The scroll bar at the bottom of the window allows you to view all the columns of the window. When more than seven entries appear in the Stop History window, a scroll bar is displayed at the right of the window. Use this scroll bar to view additional stops.
To edit the date range of the records displayed in the Stop History window:
-
In the From field enter a beginning date.
-
Tab to the To field and enter the ending date.
-
Press TAB again to initiate the lookup.